









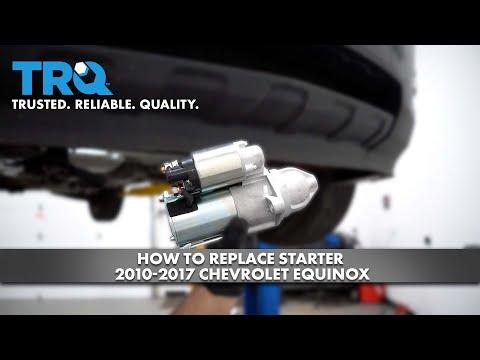





How to Replace the Starter Motor on a 2014 Chevrolet Equinox 2.4L
Step-by-step DIY starter replacement with tools, parts list, torque specs, safety tips, and cost savings
How to Replace the Starter Motor on a 2014 Chevrolet Equinox 2.4L
Step-by-step DIY starter replacement with tools, parts list, torque specs, safety tips, and cost savings


🔧 Equinox - Starter Motor Replacement
You’ll be removing the old starter from the front lower area of the engine on your Equinox and installing a new one. This will fix issues like clicking/no crank or very slow cranking, as long as the battery and cables are good.
Difficulty Level: Intermediate | Estimated Time: 2–3 hours
⚠️ Safety & Precautions
- ⚠️ Disconnect the negative battery cable before doing anything. This prevents accidental short circuits and sparks.
- ⚠️ Always support the Equinox with jack stands, never rely only on a floor jack.
- ⚠️ Let the engine and exhaust cool fully to avoid burns.
- ⚠️ Keep metal tools away from the battery positive terminal once the plastic cover is removed.
- ⚠️ Wear safety glasses when working under the vehicle; rust and dirt will fall down.
🔧 Required Tools
You'll need the following tools for this repair:
- 10mm socket
- 13mm socket
- 15mm socket
- 3/8" drive ratchet
- 3/8" drive torque wrench (10–100 Nm range)
- 3" socket extension
- 6" socket extension
- Flathead screwdriver (medium)
- Needle nose pliers
- Battery terminal wrench (10mm)
- Floor jack (rated 3-ton minimum)
- Jack stands (rated 3-ton minimum, Qty: 2)
- Wheel chocks
- Creeper or floor mat
- Work light or headlamp
- Mechanic’s gloves
- Safety glasses
- Fender cover
- Wire brush (battery terminal type)
- Dielectric grease packet
🔩 Required Parts
HowToo sells all the parts you need for this repair:
- Starter motor (2.4L Ecotec, new or remanufactured) - Qty: 1
- Starter mounting bolts - Qty: 2 (recommended but old ones can usually be reused)
- Battery terminal cleaning brush - Qty: 1
- Dielectric grease - Qty: 1 small tube
- Anti-seize compound - Qty: 1 small tube (optional)
- Replacement plastic push clips for splash shield - Qty: 4–6 (if any break)
📋 Before You Begin
- Park the Equinox on level ground, shift to Park, and set the parking brake.
- Place wheel chocks behind the rear wheels.
- Open the hood and install a fender cover to protect paint.
- Note radio presets and clock if you care; they may reset when the battery is disconnected.
- Disconnect the battery:
- Remove the battery cover if present.
- Use a 10mm socket to loosen the negative (-) terminal clamp and move the cable aside so it cannot spring back.
🔨 Step-by-Step Instructions
Follow these steps in order:
Step 1: Raise and support the front of the Equinox
- Use a floor jack (3-ton) at the front center jacking point or subframe to lift the front of the vehicle.
- Place jack stands under the left and right front pinch welds or frame points and slowly lower the vehicle onto the stands.
- Give the vehicle a firm shake to confirm it is stable.
- Never work under a car supported only by a jack.
Step 2: Remove the lower engine splash shield
- Position your work light under the front of the Equinox.
- Use a 10mm socket to remove any bolts holding the plastic splash shield under the engine.
- Use a flathead screwdriver or needle nose pliers to gently pry out any plastic push clips (these may break; that’s why replacements are listed).
- Lower the splash shield and set it aside.
Step 3: Locate the starter
- From underneath, look at the front lower part of the engine, close to where it meets the transmission.
- The starter is a small cylindrical motor with a smaller cylinder (solenoid) attached and two electrical connections on its rear side.
- Take a picture now to remember wire routing.
Step 4: Disconnect starter electrical connectors (from underneath)
- First, double-check the negative battery cable is still disconnected.
- On the starter solenoid, locate the small push-on connector (signal wire):
- Use your fingers or needle nose pliers to carefully unplug the small connector. Do not pull on the wire itself.
- Next, locate the larger cable on the stud (battery cable) covered by a rubber boot:
- Pull back the rubber boot by hand or with a flathead screwdriver.
- Use a 13mm socket with 3" extension and ratchet to remove the nut holding the large cable.
- Remove the cable from the stud and move it aside.
Step 5: Remove starter mounting bolts
- Support the body of the starter with one hand so it doesn’t drop suddenly.
- Locate the two starter mounting bolts that go into the engine block (usually at the top and bottom of the starter flange).
- Use a 15mm socket with a 6" extension and ratchet to loosen and remove the lower bolt first.
- Then remove the upper bolt with the same tools.
- Carefully lower the starter out of its position and remove it from under the vehicle.
- Wiggle and rotate starter if space is tight.
Step 6: Prepare for installation
- Compare the old and new starter side-by-side on a clean surface:
- Check mounting holes, electrical stud locations, and overall length are the same.
- Lightly clean the starter mounting surface on the engine with a rag so it’s free of dirt.
- If you have it, apply a tiny amount of anti-seize compound on the threads of the mounting bolts (do not get any on the starter gear or engine side).
Step 7: Install the new starter and hand-tighten bolts
- Position the new starter in place from underneath, aligning the gear end into the opening in the engine.
- Start the upper 15mm bolt by hand a few turns to hold the starter in place.
- Start the lower 15mm bolt by hand a few turns.
- Use a 15mm socket and ratchet to snug both bolts, but do not fully tighten yet.
Step 8: Torque the starter mounting bolts
- Set your torque wrench to 50 Nm (37 ft-lbs).
- Use the 15mm socket and 6" extension on the torque wrench.
- Tighten the upper starter bolt to 50 Nm (37 ft-lbs).
- Tighten the lower starter bolt to 50 Nm (37 ft-lbs).
Step 9: Reconnect the starter electrical connections
- Install the large battery cable on the main stud of the starter solenoid.
- Thread on the nut by hand first to avoid cross-threading.
- Use a 13mm socket and torque wrench to tighten the nut to 15 Nm (11 ft-lbs).
- Pull the rubber boot back over the nut to protect it.
- Reconnect the small signal wire connector by pushing it onto its terminal until it clicks or feels fully seated.
- Make sure wires are not touching exhaust parts.
Step 10: Reinstall the lower splash shield
- Lift the plastic splash shield back into place under the engine.
- Install any bolts using a 10mm socket and ratchet and snug them.
- Reinstall plastic push clips by pressing them in firmly. Replace any broken clips with new ones.
Step 11: Lower the Equinox
- Use the floor jack to lift the vehicle slightly off the jack stands.
- Remove the jack stands from both sides.
- Slowly lower the vehicle to the ground.
- Remove the wheel chocks.
Step 12: Reconnect the battery
- At the battery, inspect the negative (-) terminal and clamp.
- If there is corrosion, clean it with a battery terminal brush.
- Apply a very thin layer of dielectric grease to the terminal to help prevent future corrosion.
- Use a 10mm socket or battery terminal wrench to tighten the negative clamp. Make it snug but do not overtighten.
- Reinstall the battery cover if equipped.
✅ After Repair
- Turn the key to ON (or press Start without cranking) and wait a few seconds to let modules wake up.
- Start the engine. Listen for normal cranking speed and smooth engagement of the starter with no grinding noises.
- If the engine does not crank, turn it off and recheck the battery connections and both starter wires.
- Check under the vehicle for any loose wires or parts you may have missed.
- Reset radio presets and clock if needed.
- Over the next few days, pay attention to starting behavior. Any grinding or very slow crank should be investigated immediately.
💰 DIY vs Shop Cost
Shop Cost: $450–$750 (parts + labor)
DIY Cost: $150–$300 (parts only)
You Save: $300–$450 by doing it yourself!
Shop labor rates vary but typically run $100–$150/hour. This repair takes a shop approximately 1.5–2.0 hours.
🎯 Ready to get started?
HowToo makes it easy: same-day/2-day shipping on every part, plus all the tools and specialty tools you need! Check out the parts and tools sections above to add everything to your cart.
Guide for replace for these Chevrolet vehicles
| Year Make Model | Sub Model | Engine | Body Style |
|---|