









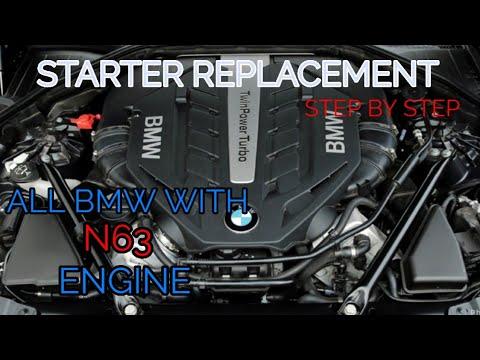






How to Replace the Starter Motor on a 2014-2016 BMW 550i (N63 V8) (Trim: Base | Engine: V8 4.4L)
Step-by-step intake manifold removal guide with tools, parts list, torque specs, and safety tips
How to Replace the Starter Motor on a 2014-2016 BMW 550i (N63 V8) (Trim: Base | Engine: V8 4.4L)
Step-by-step intake manifold removal guide with tools, parts list, torque specs, and safety tips for 2014, 2015, 2016


🔧 550i - Starter Motor Replacement
On your 550i, the starter motor sits in the “V” of the engine under the intake manifold, so replacing it requires removing the intake manifold to access the starter. This is a bigger job than most starters because there are many hoses and electrical connectors to move out of the way.
Difficulty Level: Advanced | Estimated Time: 5-8 hours
Assumption: N63 V8 starter is under the intake manifold.
⚠️ Safety & Precautions
- ⚠️ Disconnect the battery negative cable before touching the starter wiring.
- ⚠️ Let the engine cool fully; the turbo “hot-V” area stays hot a long time.
- ⚠️ Fuel lines may be opened; work in a ventilated area with no sparks/flames.
- ⚠️ Cover open intake ports immediately; dropped hardware can destroy the engine.
- ⚠️ Wear eye protection; dirt and clips fall from the cowl area.
🔧 Required Tools
You'll need the following tools for this repair:
- Safety glasses
- Nitrile gloves
- Fender cover
- Battery terminal wrench 10mm
- Socket set 8mm, 10mm, 11mm, 13mm, 16mm
- E-Torx socket set E10, E12, E14
- Torx bit set T20, T25, T30
- Ratchet 3/8" drive
- Ratchet 1/4" drive
- Long extensions 3/8" drive 6" and 12"
- Universal swivel adapter 3/8"
- Torque wrench 5-60 Nm
- Torque wrench 40-200 Nm
- Trim clip removal tool
- Pick tool set
- Hose clamp pliers
- Fuel line disconnect tool (specialty)
- Plastic scraper
- Shop vacuum
- Clean shop towels
- Painter’s tape and marker
- Magnetic parts tray
- OBD2 scan tool capable of BMW codes (specialty)
🔩 Required Parts
HowToo sells all the parts you need for this repair:
- Starter motor - Qty: 1
- Intake manifold gasket set - Qty: 1
- Throttle body gasket - Qty: 1
- Replacement one-time-use intake manifold bolts - Qty: 1 set
- Dielectric grease - Qty: 1
- Electrical contact cleaner - Qty: 1
📋 Before You Begin
- 🅿️ Park on level ground, set the parking brake, and open the hood fully.
- 🧠 Label connectors and hoses with painter’s tape as you unplug them.
- 🔋 Disconnect the battery negative cable in the trunk using a 10mm wrench.
- ⛽ Relieve fuel pressure: remove the fuel pump fuse (per fuse card) and crank the engine for 5 seconds, then reinstall the fuse.
🔨 Step-by-Step Instructions
Follow these steps in order:
Step 1: Remove the cowl covers and upper intake access panels
- Remove the plastic cowl/cover panels at the rear of the engine bay using a trim clip removal tool and Torx T20/T25 as needed.
- Set fasteners in a magnetic parts tray so nothing gets lost.
Step 2: Remove engine covers and intake ducting
- Pull off the decorative engine covers by hand (they pop up on rubber mounts).
- Loosen intake clamps using an 8mm socket or flat screwdriver (if equipped) and remove the intake tubes/air ducting.
- Disconnect any MAF/air temp connectors by pressing the lock tab; use a pick tool gently if stuck.
Step 3: Disconnect throttle body/charge pipe connections
- Unplug the throttle body electrical connector (press lock, then pull straight back).
- Remove charge pipes or couplers blocking the manifold area using an 8mm socket and hose clamp pliers.
- Tip: Twist hoses first, then pull.
Step 4: Disconnect vacuum/EVAP lines and harnesses on the intake manifold
- Carefully disconnect vacuum lines and EVAP lines; use a pick tool to lift locking tabs (don’t pry hard).
- Unclip the engine harness from the manifold using a trim clip removal tool.
- Take a quick photo before unplugging each group of connectors for reference.
Step 5: Disconnect fuel lines as required
- Place shop towels under the connection to catch fuel.
- Disconnect the fuel line(s) that prevent manifold removal using a fuel line disconnect tool (specialty).
- Cap/cover open fuel fittings with a clean towel to keep dirt out.
Step 6: Remove the intake manifold
- Remove intake manifold fasteners using E-Torx sockets (E10/E12) with a 3/8" ratchet, extensions, and a swivel adapter as needed.
- Lift the manifold straight up and out. If it sticks, gently wiggle—do not pry against plastic sealing surfaces.
- Immediately stuff each intake port with clean shop towels.
- Torque on install (common BMW spec): Torque to 15 Nm (11 ft-lbs)
Step 7: Access and remove the starter motor
- Locate the starter in the engine “V”.
- Remove the main power cable nut using a 13mm socket and remove the smaller signal wire connector by hand.
- Unbolt the starter mounting bolts using an E-Torx socket (typically E14) with a 3/8" ratchet and extensions.
- Lift the starter out carefully, watching for wiring snagging.
- Torque on install (common BMW spec): Torque to 55 Nm (41 ft-lbs)
Step 8: Install the new starter motor
- Compare the new starter to the old one (same mounting points and electrical terminals).
- Install the starter and hand-thread bolts first to avoid cross-threading.
- Tighten starter bolts with a torque wrench 40-200 Nm: Torque to 55 Nm (41 ft-lbs)
- Clean cable ends with electrical contact cleaner, then reconnect wiring.
- Snug the main power cable nut with a 13mm socket: Torque to 13 Nm (10 ft-lbs)
- Apply a tiny amount of dielectric grease to connector seals (not on the metal contact faces).
Step 9: Reinstall intake manifold with new gaskets
- Remove the towels from intake ports and use a shop vacuum to ensure nothing fell in.
- Replace the intake manifold gaskets and throttle body gasket.
- Set the manifold in place evenly, then start all fasteners by hand.
- Tighten with a torque wrench 5-60 Nm in an even pattern: Torque to 15 Nm (11 ft-lbs)
Step 10: Reconnect fuel lines, vacuum lines, and electrical connectors
- Reconnect fuel lines until you feel/hear a solid “click.”
- Reconnect vacuum/EVAP lines and all electrical connectors (match your labels/photos).
- Reinstall charge pipes/ducting and tighten clamps with an 8mm socket: Torque to 5 Nm (44 in-lbs)
Step 11: Reassemble cowl panels and reconnect battery
- Reinstall engine covers and cowl covers using Torx T20/T25 and the original clips.
- Reconnect the battery negative cable using a 10mm wrench.
✅ After Repair
- 🔍 Turn ignition on (engine off) for 30 seconds to let modules wake up, then start the engine.
- 🧯 Check carefully for fuel smell or wetness around any disconnected fuel line areas; shut off immediately if leaking.
- 🔎 Listen for vacuum leaks (hissing) around the intake manifold and charge pipe connections.
- 🧰 Scan for codes with an OBD2 scan tool capable of BMW codes (specialty) and clear any stored faults.
- 🛣️ Test drive gently, then recheck for leaks again after 10 minutes.
💰 DIY vs Shop Cost
Shop Cost: $1,200-$2,200 (parts + labor)
DIY Cost: $350-$900 (parts only)
You Save: $850-$1,300 by doing it yourself!
Shop labor rates vary but typically run $100-$150/hour. This repair takes a shop approximately 5-8 hours.
🎯 Ready to get started?
HowToo makes it easy: same-day/2-day shipping on every part, plus all the tools and specialty tools you need! Check out the parts and tools sections below to add everything to your cart.
Guide for Starter Motor replace for these BMW vehicles
| Year Make Model | Sub Model | Engine | Body Style |
|---|---|---|---|
| 2016 BMW 550i | Base | V8 4.4L | - |
| 2015 BMW 550i | Base | V8 4.4L | - |
| 2014 BMW 550i | Base | V8 4.4L | - |