









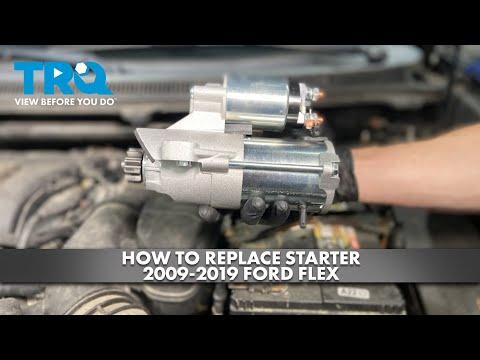







How to Replace the Starter Motor on a 2013-2019 Ford Flex (Step-by-Step Guide) (Engine: V6 3.5L)
Tools, parts, intake manifold removal tips, and key torque specs for a successful DIY install
How to Replace the Starter Motor on a 2013-2019 Ford Flex (Step-by-Step Guide) (Engine: V6 3.5L)
Tools, parts, intake manifold removal tips, and key torque specs for a successful DIY install for 2013, 2014, 2015, 2016, 2017, 2018, 2019


🔧 Flex - Starter Motor Replacement
On your Flex, the starter is bolted to the transmission bellhousing and is easiest to reach after removing the upper intake manifold (the large aluminum/plastic “plenum” on top of the engine). You’ll disconnect the battery, remove the intake parts for access, swap the starter, then reassemble with new intake gaskets to prevent vacuum leaks.
Difficulty Level: Intermediate | Estimated Time: 2.0-4.0 hours
⚠️ Safety & Precautions
- ⚠️ Disconnect the negative battery cable first to prevent a short (the starter power cable is always “live”).
- ⚠️ Let the engine cool before working near the intake and exhaust areas.
- ⚠️ Use jack stands if you raise the vehicle; never rely on a floor jack alone.
- ⚠️ Keep dirt out of the intake ports; cover openings with a clean shop towel.
- ⚠️ Battery disconnect is required for this repair.
🔧 Required Tools
You'll need the following tools for this repair:
- Safety glasses
- Nitrile gloves
- Floor jack (rated 3-ton minimum)
- Jack stands (rated 3-ton minimum)
- Wheel chocks
- 1/4" drive ratchet
- 3/8" drive ratchet
- 1/4" drive extension set (3" and 6")
- 3/8" drive extension set (6" and 12")
- 3/8" drive universal joint
- 8mm socket
- 10mm socket
- 13mm socket
- 8mm nut driver
- Flat-blade screwdriver
- Trim clip removal tool
- Torque wrench (3/8" drive, 10–100 Nm range)
- Shop light
- Magnetic pickup tool
- Masking tape and marker
🔩 Required Parts
HowToo sells all the parts you need for this repair:
- Starter motor - Qty: 1
- Upper intake manifold gasket set - Qty: 1
- Throttle body gasket - Qty: 1
- Dielectric grease - Qty: 1
📋 Before You Begin
- Park on level ground, set the parking brake, and install wheel chocks behind the rear wheels.
- Open the hood and remove any loose jewelry (rings/watches) to prevent accidental short circuits.
- Label hoses and connectors with masking tape as you unplug them. This avoids mix-ups during reassembly.
- Assumption: Torque specs can vary by production; verify with service data if available.
🔨 Step-by-Step Instructions
Follow these steps in order:
Step 1: Disconnect the battery
- Use a 10mm socket to loosen the negative battery terminal clamp.
- Remove the negative cable and tuck it aside so it can’t spring back to the battery post.
Step 2: Remove the engine cover and air intake tube
- Lift off the engine cover (it typically pulls up from rubber grommets).
- Use an 8mm nut driver to loosen the hose clamps on the air intake tube.
- Unplug any sensors on the tube, then remove the intake tube and set it aside.
Step 3: Create access to the upper intake manifold
- Unplug the throttle body electrical connector (press the tab, then pull straight off).
- Disconnect vacuum/PCV/EVAP hoses from the intake using a flat-blade screwdriver only if a clamp needs loosening.
- Use masking tape and marker to label each hose/connector as you remove it.
- Tip: Take a quick photo before unplugging.
Step 4: Remove the throttle body (if needed for clearance)
- Use a 8mm socket to remove the throttle body bolts.
- Remove the throttle body and the old gasket.
- Set the throttle body aside where it won’t get dirty.
- During reassembly, install a new gasket and Torque to 10 Nm (89 in-lbs).
- Throttle body: It controls airflow into the engine.
Step 5: Remove the upper intake manifold (plenum)
- Use a 10mm socket with a 1/4" drive extension to remove the upper intake manifold bolts.
- Lift the manifold straight up and out.
- Cover the exposed intake ports with clean shop towels immediately.
- Remove the old upper intake manifold gaskets.
- During reassembly, install new gaskets and Torque to 10 Nm (89 in-lbs).
- Plenum/manifold: Distributes air to each cylinder.
Step 6: Locate the starter and disconnect the wiring
- Use a shop light to locate the starter near the transmission bellhousing.
- Remove the starter electrical connector (solenoid signal wire) by pressing the tab and pulling off.
- Use a 13mm socket to remove the nut holding the main battery cable to the starter.
- Move the cable aside and keep the nut somewhere safe.
- Apply a small amount of dielectric grease to electrical connectors during reassembly.
Step 7: Remove the starter mounting bolts and remove the starter
- Use a 13mm socket with a 3/8" drive extension and 3/8" drive universal joint to remove the starter mounting bolts.
- Support the starter with one hand as the last bolt comes out.
- Remove the starter from the vehicle.
- Tip: Use a magnetic pickup for dropped bolts.
Step 8: Install the new starter
- Position the new starter into place by hand.
- Start all mounting bolts by hand (this prevents cross-threading).
- Use a 13mm socket to tighten the bolts evenly.
- Torque to 35–55 Nm (26–41 ft-lbs) (verify exact spec if you have service data).
Step 9: Reconnect starter wiring
- Install the main power cable onto the starter terminal and start the nut by hand.
- Use a 13mm socket to tighten the nut.
- Torque to 8–12 Nm (71–106 in-lbs) (do not over-tighten; the stud can break).
- Reconnect the solenoid signal connector until it clicks.
Step 10: Reinstall the upper intake manifold and throttle body
- Remove shop towels from the intake ports.
- Install new upper intake manifold gaskets, then set the manifold in place.
- Use a 10mm socket to snug bolts in a crisscross pattern.
- Torque to 10 Nm (89 in-lbs).
- Reinstall the throttle body with a new gasket using a 8mm socket.
- Torque to 10 Nm (89 in-lbs).
Step 11: Reinstall the air intake tube and engine cover
- Reinstall the intake tube and tighten clamps using an 8mm nut driver.
- Reconnect any sensors/connectors you unplugged.
- Reinstall the engine cover.
Step 12: Reconnect the battery
- Reconnect the negative battery terminal using a 10mm socket.
- Torque to 6–8 Nm (53–71 in-lbs).
✅ After Repair
- Start the engine and confirm the starter cranks strongly with no clicking/grinding.
- Let it idle for 2–3 minutes. Listen for hissing (a vacuum leak) around the intake manifold.
- Check that the throttle responds normally. If idle is rough, shut off and re-check every hose and connector you labeled.
- Verify no warning lights related to unplugged sensors (re-check connectors if a light appears).
💰 DIY vs Shop Cost
Shop Cost: $550-$950 (parts + labor)
DIY Cost: $180-$450 (parts only)
You Save: $370-$500 by doing it yourself!
Shop labor rates vary but typically run $100-$150/hour. This repair takes a shop approximately 2-4 hours.
🎯 Ready to get started?
HowToo makes it easy: same-day/2-day shipping on every part, plus all the tools and specialty tools you need! Check out the parts and tools sections below to add everything to your cart.
Guide for Starter Motor replace for these Ford vehicles
| Year Make Model | Sub Model | Engine | Body Style |
|---|---|---|---|
| 2019 Ford Flex | - | V6 3.5L | - |
| 2018 Ford Flex | - | V6 3.5L | - |
| 2017 Ford Flex | - | V6 3.5L | - |
| 2016 Ford Flex | - | V6 3.5L | - |
| 2015 Ford Flex | - | V6 3.5L | - |
| 2014 Ford Flex | - | V6 3.5L | - |
| 2013 Ford Flex | - | V6 3.5L | - |