









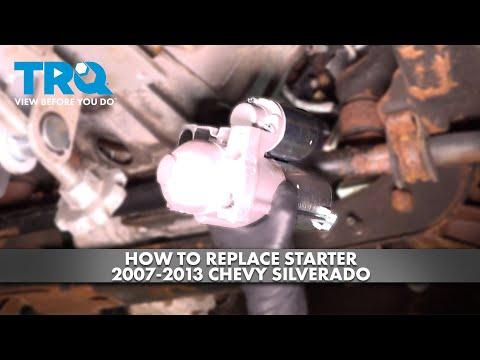







How to Replace the Starter Motor on a 2012 Chevy Silverado 1500 Hybrid
Step-by-step DIY starter removal and installation with tools, safety steps, hybrid system shutdown, and torque specs for 2009, 2010, 2011, 2012, 2013
How to Replace the Starter Motor on a 2012 Chevy Silverado 1500 Hybrid
Step-by-step DIY starter removal and installation with tools, safety steps, hybrid system shutdown, and torque specs for 2009, 2010, 2011, 2012, 2013


🔧 Silverado 1500 - Starter Motor Replacement
You’ll be removing the old starter motor from your Silverado and installing a new one. On your Hybrid, this also means safely disabling the high-voltage system before touching anything. This job is mainly underneath the truck and involves working around the transmission and battery cables.
Difficulty Level: Advanced | Estimated Time: 3-4 hours (first-timer)
⚠️ Safety & Precautions
- ⚠️ High-voltage hybrid system: Your Hybrid has an orange-cable high-voltage system that can be deadly if mishandled. Always disable the high-voltage battery using the service disconnect before working on the starter.
- ⚠️ Disconnect 12V battery: Always remove the negative (black) battery cable first to prevent short circuits and accidental cranking.
- ⚠️ Truck support: Use a proper floor jack and jack stands rated for a full-size pickup; never rely on the jack alone.
- ⚠️ Eye and hand protection: Wear safety glasses and gloves when working under the truck and around the battery.
- ⚠️ Exhaust and engine may be hot: Let the engine and exhaust cool completely before starting.
- ⚠️ Work on level ground: Avoid doing this on uneven or soft ground where jack stands could shift.
🔧 Required Tools
You'll need the following tools for this repair:
- 🛠️ Floor jack (rated 3-ton minimum)
- 🛠️ Jack stands (rated 3-ton minimum) - Qty: 2
- 🛠️ Wheel chocks
- 🛠️ Safety glasses
- 🛠️ Mechanic’s gloves
- 🛠️ 1/4" drive ratchet
- 🛠️ 3/8" drive ratchet
- 🛠️ 3/8" drive torque wrench (5-80 ft-lbs range)
- 🛠️ 6" extension (3/8" drive)
- 🛠️ 10mm socket
- 🛠️ 13mm socket
- 🛠️ 15mm socket
- 🛠️ 8mm combination wrench
- 🛠️ 13mm combination wrench
- 🛠️ Trim clip removal tool
- 🛠️ Flathead screwdriver (medium)
- 🛠️ Work light or LED trouble light
- 🛠️ Creeper or piece of cardboard
- 🛠️ Digital multimeter (specialty)
- 🛠️ OBD-II scan tool (basic) (specialty)
🔩 Required Parts
HowToo sells all the parts you need for this repair:
- 🔩 Starter motor (Hybrid-compatible 6.0L unit) - Qty: 1
- 🔩 Starter mounting bolts (if not reusing) - Qty: 2
- 🔩 Starter solenoid terminal nut (if not included) - Qty: 1
- 🔩 Dielectric grease - Qty: 1 small tube
- 🔩 Battery terminal cleaning brush - Qty: 1
- 🔩 Anti-seize compound - Qty: 1 small tube
- 🔩 Shop towels or rags - Qty: several
📋 Before You Begin
- Park the Silverado on level ground, shift to PARK, and set the parking brake fully.
- Place wheel chocks behind the rear wheels.
- Open the hood and make sure you have good light and space to work.
- Locate the 12V battery under the hood and the hybrid battery service disconnect (under the rear seat on the driver side for your truck).
- Have your radio and infotainment codes/settings handy if you care about them; disconnecting the battery may reset some settings.
🔨 Step-by-Step Instructions
Follow these steps in order:
Step 1: Disable the Hybrid High-Voltage System
- Fold up the rear seat bottom on the driver side to access the hybrid battery cover.
- Use the trim clip removal tool to carefully remove any plastic clips holding the small cover for the service disconnect.
- Lift the cover to reveal the orange service disconnect plug (this isolates the high-voltage battery).
- Pull the handle on the orange plug straight out; it may require a firm tug. Pull evenly, do not twist.
- Set the plug aside in a safe place and wait at least 10 minutes for capacitors in the system to discharge.
Step 2: Disconnect the 12V Battery
- Under the hood, use a 10mm socket and 3/8" drive ratchet to loosen the negative (black) battery terminal clamp bolt.
- Lift the negative cable off the post and tuck it aside so it cannot spring back and touch the terminal.
- Repeat with the positive (red) terminal only if you need more access, but negative alone is usually enough.
Step 3: Raise and Support the Truck
- Position the floor jack under the front crossmember and lift the front of the truck high enough to work under it.
- Place jack stands under the frame rails on both sides and slowly lower the truck onto the stands.
- Give the truck a firm shake to confirm it is solidly supported before going underneath.
Step 4: Locate the Starter
- Slide under the passenger side of the truck with your work light.
- The starter is mounted low on the passenger side of the engine, at the front of the transmission bellhousing, shaped like a small cylinder with a smaller cylinder on top (the solenoid).
Step 5: Remove Starter Electrical Connections
- Make sure the 12V battery is still disconnected.
- Locate the small push-on connector (S-terminal) on the solenoid. Use a flathead screwdriver gently if needed to release the clip, then pull it straight off.
- Locate the large battery cable on the solenoid stud.
- Use a 13mm socket and 3/8" drive ratchet to remove the nut holding the large cable.
- For reinstallation, this nut will be torqued to 15 Nm (11 ft-lbs).
- Pull the large cable off and gently move it aside.
Step 6: Remove Starter Mounting Bolts
- Support the body of the starter with one hand so it doesn’t drop when the bolts come out. Starters are heavier than they look.
- Use a 15mm socket, 6" extension, and 3/8" drive ratchet to remove the two starter mounting bolts going into the engine block.
- Break each bolt loose first, then remove them fully while holding the starter.
- Note the locations if one bolt is longer than the other.
- Factory spec for reinstallation: torque each starter bolt to 50 Nm (37 ft-lbs).
Step 7: Remove the Old Starter
- With bolts removed, wiggle the starter rearward and down to clear the bellhousing.
- You may need to rotate it slightly to clear wiring or the frame; move slowly and do not force it against wiring harnesses.
- Lower the starter out from under the truck.
Step 8: Compare Old and New Starters
- Place the old and new starters side by side on a bench.
- Check that the mounting holes, nose length, electrical terminals, and gear position match.
- If anything looks different, do not install; confirm you have the correct Hybrid-compatible 6.0L starter.
Step 9: Install the New Starter
- Apply a very thin film of anti-seize compound to the shanks of the mounting bolts only (not the threads if possible).
- Lift the new starter into position, aligning the nose into the opening in the bellhousing.
- Start both mounting bolts by hand a few turns to avoid cross-threading.
- Use the 15mm socket and 3/8" drive ratchet to snug the bolts.
- Then use the 3/8" drive torque wrench and 15mm socket to torque each bolt to 50 Nm (37 ft-lbs).
Step 10: Reconnect Starter Wiring
- Lightly coat the ring terminal of the large battery cable with dielectric grease to reduce corrosion.
- Place the large cable back on the starter solenoid stud.
- Install the nut with a 13mm socket and tighten using the 3/8" drive torque wrench to 15 Nm (11 ft-lbs).
- Push the small S-terminal connector back onto its spade until it clicks or feels firmly seated.
Step 11: Reconnect the 12V Battery
- Lower the truck by raising it slightly with the floor jack, removing the jack stands, then lowering it fully to the ground.
- Under the hood, use a battery terminal cleaning brush to clean both battery posts if they are corroded.
- Install the positive (red) terminal first if removed and tighten the clamp bolt with a 10mm socket.
- Install the negative (black) terminal and tighten its clamp bolt with the 10mm socket. Terminals should not twist by hand.
Step 12: Reinstall Hybrid Service Disconnect
- Inside the cab, at the rear seat, insert the orange service disconnect plug back into the hybrid battery slot.
- Push it straight in until it is fully seated and locked.
- Reinstall the cover panel and secure any clips using the trim clip removal tool to press them back in.
Step 13: Initial Check and Start-Up
- Turn the ignition key to ON (engine not started yet) and watch the dash for any warning lights that stay on unexpectedly.
- Use a basic OBD-II scan tool to check for any stored hybrid or engine codes; clear them if they are related to battery disconnect only.
- Now crank the engine and make sure it starts smoothly without grinding or unusual noises near the starter area.
✅ After Repair
- Listen for any abnormal sounds (grinding, whine, or repeated clicking) when starting; if present, shut off and recheck starter mounting and wiring.
- Check under the truck for any loose wires, tools, or drips before driving.
- Verify that no hybrid system warning lights remain on. If any hybrid or “Service Hybrid” message appears, re-check the orange service disconnect and use the scan tool to read codes.
- Re-enter radio presets and clock settings if they were reset by the battery disconnect.
💰 DIY vs Shop Cost
Shop Cost: $600-$900 (parts + labor)
DIY Cost: $200-$350 (parts only, depending on starter brand)
You Save: $400-$550 by doing it yourself!
Shop labor rates typically run $100-$150/hour. This repair takes a shop about 2-3 hours.
🎯 Ready to get started?
HowToo makes it easy: same-day/2-day shipping on every part, plus all the tools and specialty tools you need! Check out the parts and tools sections above to add everything to your cart.