









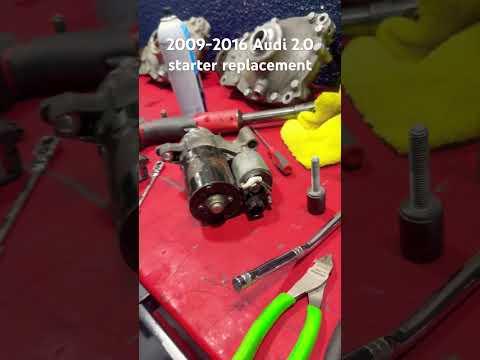







How to Replace the Starter Motor on a 2012-2018 Audi A6 (Step-by-Step DIY Guide) (Trim: Premium | Engine: Inline 4 2.0L | Body: Sedan)
Tools, parts list, safety tips, and torque specs for starter wiring and mounting bolts
How to Replace the Starter Motor on a 2012-2018 Audi A6 (Step-by-Step DIY Guide) (Trim: Premium | Engine: Inline 4 2.0L | Body: Sedan)
Tools, parts list, safety tips, and torque specs for starter wiring and mounting bolts for 2012, 2013, 2014, 2015, 2016, 2017, 2018


🔧 A6 - Starter Motor Replacement
Your A6’s starter motor spins the engine so it can start. If the starter is failing, you may hear a single click, slow cranking, or no crank at all. This job is mostly about access and careful wiring removal.
Assumption: 2.0T layout where the starter mounts to the transmission bellhousing and is accessed from underneath.
Difficulty Level: Intermediate | Estimated Time: 2-4 hours
⚠️ Safety & Precautions
- ⚠️ Disconnect the battery negative terminal before touching starter wiring (the main cable is always “hot”).
- ⚠️ Support the car on jack stands; never work under a car held only by a jack.
- ⚠️ Let the exhaust/turbo area cool fully; burns happen fast here.
- ⚠️ Keep the key far away from the car while working to prevent accidental wake-up of electronics.
🔧 Required Tools
You'll need the following tools for this repair:
- Floor jack (rated 3-ton minimum)
- Jack stands (rated 3-ton minimum)
- Wheel chocks
- Safety glasses
- Nitrile gloves
- 10mm socket
- 13mm socket
- 16mm socket
- Ratchet (3/8" drive)
- Extensions (3", 6", 12")
- Universal swivel adapter (3/8" drive)
- Torx T25 bit
- Torx T30 bit
- Triple-square XZN M12 bit
- Torque wrench (10–200 Nm range)
- Trim clip remover
- Small flathead screwdriver
- Flashlight
🔩 Required Parts
HowToo sells all the parts you need for this repair:
- Starter motor - Qty: 1
- Starter mounting bolts - Qty: 2 Replace, often torque-to-yield
- Belly pan/undertray fastener set - Qty: 1 Optional if clips/screws are damaged
📋 Before You Begin
- Park on level ground, turn the ignition off, and remove the key.
- Open the trunk and access the battery area (right-side trunk trim area is common on this chassis).
- Use a 10mm socket to disconnect the battery negative (-) terminal and isolate it so it can’t spring back.
- Chock the rear wheels with wheel chocks.
🔨 Step-by-Step Instructions
Follow these steps in order:
Step 1: Raise the front of the car safely
- Use a floor jack to lift the front at the proper front jacking point.
- Set the car down onto jack stands at the factory support points.
- Give the car a firm shake test before going underneath.
Step 2: Remove the lower engine cover (belly pan)
- Use a Torx T25 bit and Torx T30 bit to remove the undertray screws.
- Use a trim clip remover if any push-clips are present.
- Lower the cover and set it aside.
Step 3: Locate the starter motor
- From underneath, aim your flashlight at where the engine meets the transmission (the “bellhousing”).
- The starter is a cylinder-shaped motor with a smaller cylinder on it (the solenoid) and a thick power cable attached.
Step 4: Disconnect the starter electrical connections
- Remove the small trigger wire connector from the solenoid using a small flathead screwdriver to gently release the lock tab. Don’t pry hard—tabs snap easily
- Remove the main power cable nut using a 13mm socket, then lift the cable off the stud.
- Move the cable aside so it cannot touch metal.
- Torque spec (reinstall): Main terminal nut to 15 Nm (11 ft-lbs)
Step 5: Remove the starter mounting bolts
- Use a triple-square XZN M12 bit with a ratchet (3/8" drive), plus extensions and a universal swivel adapter as needed for access.
- Remove the upper and lower starter bolts while supporting the starter with your free hand.
- Tip: If it feels stuck, change extension length for a straighter angle.
Step 6: Remove the starter from the bellhousing
- Wiggle the starter straight out of its locating dowel/bore.
- If needed, use a small flathead screwdriver to gently nudge it free—do not gouge the mating surface.
- Lower the starter out of the car.
Step 7: Install the new starter
- Compare the old and new starter (mounting ears, electrical studs, connector style).
- Position the new starter into the bellhousing opening and seat it fully by hand.
- Start both mounting bolts by hand first to avoid cross-threading.
- Tighten the starter bolts using the triple-square XZN M12 bit and ratchet.
- Torque spec: Starter mounting bolts to 60 Nm (44 ft-lbs) + 90° Use new bolts if supplied
Step 8: Reconnect the starter wiring
- Install the main power cable onto the stud and tighten using a 13mm socket.
- Torque spec: Main terminal nut to 15 Nm (11 ft-lbs)
- Reconnect the small trigger wire until it clicks/locks in place.
- Double-check routing so wires won’t rub on the axle, exhaust, or heat shields.
Step 9: Reinstall the belly pan
- Lift the undertray into position.
- Install and snug the fasteners using a Torx T25 bit and Torx T30 bit.
Step 10: Reconnect the battery and lower the car
- Reconnect the battery negative terminal using a 10mm socket.
- Remove the jack stands and lower the car with the floor jack.
✅ After Repair
- Start the engine and confirm it cranks strongly with no clicking.
- Listen for abnormal grinding noises during cranking (can indicate misalignment).
- Check under the car for any loose wiring near moving/hot parts.
- If warning lights appear after battery disconnect, drive normally for a short trip; some systems re-learn automatically.
💰 DIY vs Shop Cost
Shop Cost: $650-$1,200 (parts + labor)
DIY Cost: $200-$550 (parts only)
You Save: $450-$650 by doing it yourself!
Shop labor rates vary but typically run $100-$150/hour. This repair takes a shop approximately 2-4 hours.
🎯 Ready to get started?
HowToo makes it easy: same-day/2-day shipping on every part, plus all the tools and specialty tools you need! Check out the parts and tools sections below to add everything to your cart.
Guide for Starter Motor replace for these Audi vehicles
| Year Make Model | Sub Model | Engine | Body Style |
|---|---|---|---|
| 2018 Audi A6 | Premium | Inline 4 2.0L | Sedan |
| 2018 Audi A6 | Premium Plus | Inline 4 2.0L | Sedan |
| 2018 Audi A6 | Sport | Inline 4 2.0L | Sedan |
| 2017 Audi A6 | Premium | Inline 4 2.0L | Sedan |
| 2017 Audi A6 | Premium Plus | Inline 4 2.0L | Sedan |
| 2016 Audi A6 | Premium | Inline 4 2.0L | Sedan |
| 2016 Audi A6 | Premium Plus | Inline 4 2.0L | Sedan |
| 2015 Audi A6 | Premium | Inline 4 2.0L | Sedan |
| 2015 Audi A6 | Premium Plus | Inline 4 2.0L | Sedan |
| 2014 Audi A6 | Premium | Inline 4 2.0L | Sedan |
| 2014 Audi A6 | Premium Plus | Inline 4 2.0L | Sedan |
| 2013 Audi A6 | Premium | Inline 4 2.0L | Sedan |
| 2013 Audi A6 | Premium Plus | Inline 4 2.0L | Sedan |
| 2012 Audi A6 | Premium | Inline 4 2.0L | Sedan |
| 2012 Audi A6 | Premium Plus | Inline 4 2.0L | Sedan |