









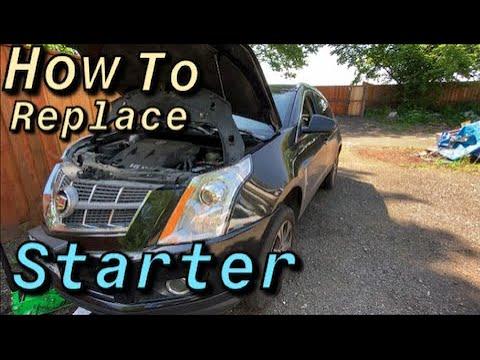







How to Replace the Starter Motor on a 2010-2016 Cadillac SRX 3.6L V6 (Engine: V6 3.6L)
Step-by-step DIY instructions with tools list, wiring tips, and torque specs for a safe install
How to Replace the Starter Motor on a 2010-2016 Cadillac SRX 3.6L V6 (Engine: V6 3.6L)
Step-by-step DIY instructions with tools list, wiring tips, and torque specs for a safe install for 2010, 2011


🔧 SRX - Starter Motor Replacement
The starter motor spins your engine to start it. On your SRX, it’s mounted to the transmission bellhousing and is usually accessed from underneath after removing the lower splash shield.
Difficulty Level: Intermediate | Estimated Time: 1.5-3 hours
Assumption: 3.6L V6 with factory underbody splash shield.
⚠️ Safety & Precautions
- ⚠️ Disconnect the battery before touching starter wiring (prevents sparks and cable melt).
- ⚠️ Support the SRX with jack stands; never rely on a floor jack alone.
- ⚠️ Let the exhaust cool fully; the starter sits near hot components.
- ⚠️ Keep the key fob away from the vehicle while working.
- ⚠️ Battery disconnect required: remove negative cable first, reinstall it last.
🔧 Required Tools
You'll need the following tools for this repair:
- Safety glasses
- Mechanic gloves
- Floor jack (rated 3-ton minimum)
- Jack stands (rated 3-ton minimum)
- Wheel chocks
- Trim clip removal tool
- Socket set (8mm, 10mm, 13mm, 15mm)
- Ratchet (3/8")
- Extension set (3/8", 3" and 6")
- Universal swivel joint (3/8")
- Wrench set (10mm, 13mm)
- Torque wrench (10-100 Nm range)
- Flathead screwdriver
- Small pick tool
- Battery terminal wrench (10mm)
- Flashlight
🔩 Required Parts
HowToo sells all the parts you need for this repair:
- Starter motor - Qty: 1
- Starter mounting bolts - Qty: 2 (recommended if provided)
- Battery terminal anti-corrosion spray - Qty: 1
- Dielectric grease - Qty: 1
📋 Before You Begin
- Park on level ground and set the parking brake.
- Chock the rear wheels using wheel chocks.
- Open the hood and plan to disconnect the battery negative first (10mm).
- Lay out tools and a small tray for bolts/clips so nothing gets lost.
🔨 Step-by-Step Instructions
Follow these steps in order:
Step 1: Disconnect the battery
- Use a 10mm battery terminal wrench to remove the negative (−) battery cable.
- Move the cable aside so it can’t spring back and touch the terminal.
- Negative off first, on last.
Step 2: Raise and support the SRX
- Use a floor jack (rated 3-ton minimum) to lift the front of the SRX at the proper front jacking point.
- Set it down securely on jack stands (rated 3-ton minimum).
- Give the vehicle a gentle shake to confirm it’s stable before going underneath.
Step 3: Remove the lower splash shield
- Use a trim clip removal tool and flathead screwdriver to remove any plastic push-clips.
- Use an 8mm socket with a 3/8" ratchet to remove the shield bolts/screws.
- Set the shield and hardware aside in order.
Step 4: Locate the starter
- Use a flashlight to find the starter where it meets the transmission bellhousing.
- You’ll see a larger battery cable on a stud and a smaller signal wire connector on the starter solenoid.
- Take a quick photo for reassembly.
Step 5: Disconnect the starter electrical connections
- Remove the small signal wire connector:
- If it’s a plug connector, release the lock using a small pick tool, then pull it off by hand.
- If it’s a ring terminal, remove the nut using a 10mm socket.
- Remove the main battery cable nut from the starter stud using a 13mm socket and 3/8" ratchet.
- Carefully pull the cable(s) off and position them so they can’t touch metal.
- When reinstalling later: Torque the main battery cable nut to 15 Nm (11 ft-lbs).
- When reinstalling later (if ring terminal signal wire): Torque the signal wire nut to 4 Nm (35 in-lbs).
Step 6: Remove the starter mounting bolts
- Support the starter with one hand.
- Use a 15mm socket with a 3/8" ratchet, plus a 3/8" extension set and universal swivel joint if needed, to remove the two starter mounting bolts.
- Lower the starter out carefully, keeping it clear of wiring and hoses.
Step 7: Install the new starter
- Compare the old and new starter (mounting ears, electrical studs, connector style) before installing.
- Lift the new starter into place and hand-start both mounting bolts to avoid cross-threading.
- Tighten with a 15mm socket and 3/8" ratchet.
- Torque the starter mounting bolts to 50 Nm (37 ft-lbs) using a torque wrench (10-100 Nm range).
- Hand-start bolts—cross-threads ruin housings.
Step 8: Reconnect the starter wiring
- Apply a thin film of dielectric grease to the connector seal (not the metal stud threads).
- Reconnect the main battery cable to the stud and install the nut using a 13mm socket.
- Torque the main battery cable nut to 15 Nm (11 ft-lbs) using a torque wrench.
- Reconnect the signal wire connector (click in) or ring terminal (nut) using a 10mm socket.
- Torque the signal wire nut to 4 Nm (35 in-lbs) if equipped.
- Make sure the cable routing matches your photo and won’t rub on anything.
Step 9: Reinstall the lower splash shield
- Position the shield back in place.
- Reinstall bolts/screws using an 8mm socket.
- Reinstall push-clips using a trim clip removal tool and hand pressure.
Step 10: Lower the SRX and reconnect the battery
- Use the floor jack to lift slightly, remove the jack stands, and lower the SRX to the ground.
- Reconnect the negative (−) battery cable using the 10mm battery terminal wrench.
- Spray the terminal with battery terminal anti-corrosion spray.
✅ After Repair
- Start the engine and listen: it should crank strongly with no clicking/grinding.
- Check for warning lights and confirm all accessories work.
- With the engine off, recheck the starter wiring area for any loose cables.
- If it grinds, stop—starter may be mis-seated.
💰 DIY vs Shop Cost
Shop Cost: $450-$900 (parts + labor)
DIY Cost: $150-$350 (parts only)
You Save: $300-$550 by doing it yourself!
Shop labor rates vary but typically run $100-$150/hour. This repair takes a shop approximately 1.5-3 hours.
🎯 Ready to get started?
HowToo makes it easy: same-day/2-day shipping on every part, plus all the tools and specialty tools you need! Check out the parts and tools sections below to add everything to your cart.
Guide for Starter Motor replace for these Cadillac vehicles
| Year Make Model | Sub Model | Engine | Body Style |
|---|---|---|---|
| 2016 Cadillac SRX | - | V6 3.6L | - |
| 2015 Cadillac SRX | - | V6 3.6L | - |
| 2014 Cadillac SRX | - | V6 3.6L | - |
| 2013 Cadillac SRX | - | V6 3.6L | - |
| 2012 Cadillac SRX | - | V6 3.6L | - |
| 2011 Cadillac SRX | - | V6 3.0L | - |
| 2010 Cadillac SRX | - | V6 3.0L | - |