









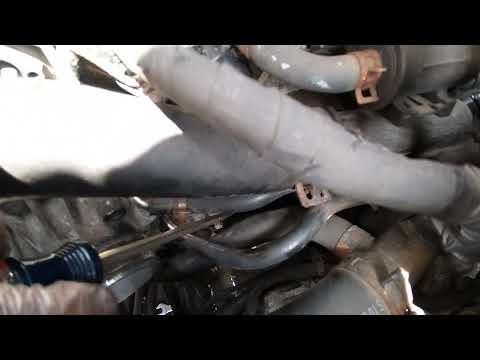





How to Replace the Starter Motor on a 2010-2015 Hyundai Tucson (Engine: Inline 4 2.0L)
Step-by-step DIY guide with required tools, parts, torque specs, and safety tips
How to Replace the Starter Motor on a 2010-2015 Hyundai Tucson (Engine: Inline 4 2.0L)
Step-by-step DIY guide with required tools, parts, torque specs, and safety tips for 2010, 2011, 2012, 2013, 2014, 2015


🔧 Tucson - Starter Motor Replacement
Replacing the starter motor on your Tucson involves disconnecting the battery, accessing the starter at the engine/transaxle area, removing the electrical connections, and swapping the starter assembly. The starter is the electric motor that cranks the engine when you turn the key.
Difficulty Level: Intermediate | Estimated Time: 1.5-2.5 hours
⚠️ Safety & Precautions
- ⚠️ Disconnect the negative battery cable before touching the starter wiring. The starter cable is high-current and can spark badly if shorted.
- ⚠️ Let the engine cool before working. The starter sits near hot engine and exhaust-area components.
- ⚠️ Support your Tucson securely with jack stands if raising the front. Never rely on a jack alone.
- ⚠️ Keep the ignition key out of the vehicle while working.
- ⚠️ Manual transmission safety: make sure the shifter is in neutral and the parking brake is fully set before testing.
🔧 Required Tools
You'll need the following tools for this repair:
- 10mm socket
- 12mm socket
- 14mm socket
- 3/8-inch drive ratchet
- 3/8-inch drive 6-inch extension
- 3/8-inch drive universal joint
- 10mm wrench
- 12mm wrench
- 14mm wrench
- Flat-blade screwdriver
- Trim clip removal tool
- Torque wrench rated 10-80 Nm
- Floor jack rated 2-ton minimum
- Jack stands rated 2-ton minimum
- Wheel chocks
- Mechanic gloves
- Safety glasses
- Shop light
🔩 Required Parts
HowToo sells all the parts you need for this repair:
- Starter motor assembly - Qty: 1
- Starter terminal nut - Qty: 1
- Dielectric grease - Qty: 1 small tube
📋 Before You Begin
- Park your Tucson on level ground.
- Set the parking brake firmly and place the manual transmission in neutral.
- Place wheel chocks behind the rear wheels.
- If you raise the vehicle, lift the front with a floor jack and support it with jack stands at the proper front support points.
- Open the hood and let the engine cool fully.
- A universal joint is a small swivel adapter that helps your socket reach bolts at an angle.
- Dielectric grease is a non-conductive protective grease used lightly on electrical connector seals to help keep moisture out.
🔨 Step-by-Step Instructions
Follow these steps in order:
Step 1: Disconnect the Battery
- Use a 10mm wrench to loosen the negative battery terminal clamp.
- Remove the negative cable from the battery and move it aside so it cannot spring back onto the terminal.
- Use a 10mm wrench to loosen and remove the positive battery terminal only if you need extra room near the battery area.
- Negative cable comes off first.
Step 2: Raise and Secure the Front
- Place wheel chocks behind both rear wheels.
- Use the floor jack rated 2-ton minimum to raise the front of your Tucson if underbody access is needed.
- Place jack stands rated 2-ton minimum under the proper front support points.
- Gently lower the vehicle onto the jack stands and shake the vehicle lightly to confirm it is stable.
Step 3: Remove Lower Access Shield if Equipped
- Use a 10mm socket and 3/8-inch drive ratchet to remove the lower splash shield bolts if fitted.
- Use a trim clip removal tool or flat-blade screwdriver to release any plastic clips.
- Set the shield and hardware aside in order.
- Keep bolts grouped by location.
Step 4: Locate the Starter Motor
- Use a shop light to look at the front side of the transaxle where the engine and transmission meet.
- The starter is a small cylindrical motor with a thick battery cable attached to it.
- Trace the thick positive battery cable if you need help identifying it.
Step 5: Disconnect the Starter Electrical Connectors
- Use a 12mm socket or 12mm wrench to remove the nut holding the large battery cable to the starter B-terminal.
- Pull the large cable straight off the stud and move it aside.
- Use your fingers or a flat-blade screwdriver to release the small starter solenoid connector tab, then unplug it.
- The solenoid is the small electrical switch mounted on the starter that engages the starter gear.
- Inspect the cable ends for corrosion, looseness, or burned spots.
Step 6: Remove the Starter Mounting Bolts
- Support the starter with one hand so it does not drop when the bolts come out.
- Use a 14mm socket, 3/8-inch drive ratchet, and 3/8-inch drive 6-inch extension to loosen the starter mounting bolts.
- Use the 3/8-inch drive universal joint if the upper bolt is angled or hard to reach.
- Remove both starter mounting bolts completely.
- Pull the starter straight away from the transaxle and lower it out carefully.
- It is heavier than it looks.
Step 7: Compare the Old and New Starter
- Place both starters side by side on a clean surface.
- Confirm the mounting ears, gear nose, electrical terminals, and connector shape match.
- Use a shop light to inspect the mounting surface on the transaxle for dirt or corrosion.
- Clean the mounting surface with a clean rag if needed.
Step 8: Install the New Starter
- Lift the new starter into position by hand.
- Start both mounting bolts by hand first to avoid cross-threading.
- Use a 14mm socket, 3/8-inch drive extension, and 3/8-inch drive ratchet to snug the bolts evenly.
- Use a torque wrench rated 10-80 Nm with the 14mm socket to tighten the starter mounting bolts to Torque to 39-54 Nm (29-40 ft-lbs).
Step 9: Reconnect the Starter Wiring
- Push the small solenoid connector onto the starter until it clicks.
- Place the large battery cable onto the starter B-terminal stud.
- Install the terminal nut by hand first.
- Use a 12mm socket and torque wrench rated 10-80 Nm to tighten the starter terminal nut to Torque to 9-12 Nm (80-106 in-lbs).
- Apply a very small amount of dielectric grease around the connector seal if the area is exposed to moisture.
- Do not pack grease between the metal terminal and the stud.
Step 10: Reinstall the Lower Shield
- Raise the lower splash shield into place by hand if it was removed.
- Install all clips by hand first.
- Use a 10mm socket and 3/8-inch drive ratchet to reinstall the shield bolts snugly.
- Do not overtighten plastic shield fasteners.
Step 11: Lower the Vehicle
- Use the floor jack rated 2-ton minimum to raise the front slightly off the jack stands.
- Remove the jack stands rated 2-ton minimum.
- Lower your Tucson slowly to the ground.
- Remove the wheel chocks only after the vehicle is fully lowered.
Step 12: Reconnect the Battery
- Reconnect the positive battery cable first if it was removed.
- Use a 10mm wrench to tighten the positive terminal clamp snugly.
- Reconnect the negative battery cable last.
- Use a 10mm wrench to tighten the negative terminal clamp snugly.
- Positive on first, negative on last.
✅ After Repair
- Turn the key to START and confirm the engine cranks strongly.
- Listen for grinding, clicking, or delayed engagement. Stop immediately if you hear harsh grinding.
- Start the engine 2-3 times to confirm consistent operation.
- Check that the battery terminals and starter cable are tight.
- If the starter still only clicks, test battery voltage and battery cable condition before condemning the new starter.
- Reset the clock and radio presets if they were lost after battery disconnection.
💰 DIY vs Shop Cost
Shop Cost: $350-$650 (parts + labor)
DIY Cost: $130-$280 (parts only)
You Save: $220-$370 by doing it yourself!
Shop labor rates vary but typically run $100-$150/hour. This repair takes a shop approximately 1.0-1.5 hours.
🎯 Ready to get started?
HowToo makes it easy: same-day/2-day shipping on every part, plus all the tools and specialty tools you need! Check out the parts and tools sections below to add everything to your cart.
Guide for Starter Motor replace for these Hyundai vehicles
| Year Make Model | Sub Model | Engine | Body Style |
|---|---|---|---|
| 2015 Hyundai Tucson | - | Inline 4 2.4L | - |
| 2014 Hyundai Tucson | - | Inline 4 2.4L | - |
| 2013 Hyundai Tucson | - | Inline 4 2.4L | - |
| 2013 Hyundai Tucson | - | Inline 4 2.0L | - |
| 2012 Hyundai Tucson | - | Inline 4 2.4L | - |
| 2012 Hyundai Tucson | - | Inline 4 2.0L | - |
| 2011 Hyundai Tucson | - | Inline 4 2.4L | - |
| 2011 Hyundai Tucson | - | Inline 4 2.0L | - |
| 2010 Hyundai Tucson | - | Inline 4 2.4L | - |