


How to Replace the Starter Motor on a 2006-2007 Honda Accord (Step-by-Step Guide) (Engine: Inline 4 2.4L)
Tools, parts list, safety tips, wiring steps, and torque specs for a reliable no-crank fix
How to Replace the Starter Motor on a 2006-2007 Honda Accord (Step-by-Step Guide) (Engine: Inline 4 2.4L)
Tools, parts list, safety tips, wiring steps, and torque specs for a reliable no-crank fix for 2006, 2007
🔧 Accord - Starter Motor Replacement
Your Accord’s starter motor is the electric motor that spins the engine so it can start. When it’s worn out, you’ll usually get a single click, slow cranking, or intermittent no-crank even with a good battery.
Difficulty Level: Intermediate | Estimated Time: 1.5-3.0 hours
⚠️ Safety & Precautions
- ⚠️ Disconnect the battery negative cable first to prevent an electrical short.
- ⚠️ Let the engine cool; the starter sits near hot engine parts.
- ⚠️ If you work from underneath, support the car on jack stands—never rely on a floor jack.
- ⚠️ Keep tools away from the starter’s main power stud; it’s direct battery power.
🔧 Required Tools
You'll need the following tools for this repair:
- Safety glasses
- Mechanic gloves
- Floor jack (rated 2-ton minimum)
- Jack stands (rated 2-ton minimum)
- Wheel chocks
- 10mm socket
- 12mm socket
- 14mm socket
- 8mm deep socket
- 3/8" drive ratchet
- 3/8" drive extension set (3", 6", 12")
- 3/8" drive wobble extension
- Torque wrench (10-100 ft-lbs range)
- Flathead screwdriver
- Needle-nose pliers
- Trim clip tool
- Flashlight
- Small wire brush
🔩 Required Parts
HowToo sells all the parts you need for this repair:
- Starter motor assembly - Qty: 1
- Starter solenoid terminal nut kit (if included/needed) - Qty: 1
- Dielectric grease - Qty: 1
📋 Before You Begin
- Park on level ground, shift to 1st gear, and set the parking brake.
- Chock the rear wheels using wheel chocks.
- Disconnect the battery using a 10mm socket: remove the negative (–) cable first, then move it aside so it can’t spring back.
- Take a photo of wiring before removal.
🔨 Step-by-Step Instructions
Follow these steps in order:
Step 1: Remove the air intake duct/air box for access (top access)
- Open the hood and locate the air intake tube and air box on the driver side.
- Use a flathead screwdriver to loosen the hose clamps on the intake tube.
- Unplug the intake air temperature sensor connector (if equipped) by pressing the tab and pulling it off.
- Remove any clips with a trim clip tool, then lift out the intake tube/air box as needed for working room.
Step 2: (Optional) Raise the front for bottom access
- If you prefer more room, lift the front with a floor jack (rated 2-ton minimum) at the front center jacking point.
- Set the car down on jack stands (rated 2-ton minimum) at the front pinch welds.
- Confirm stability with a gentle shake before going underneath.
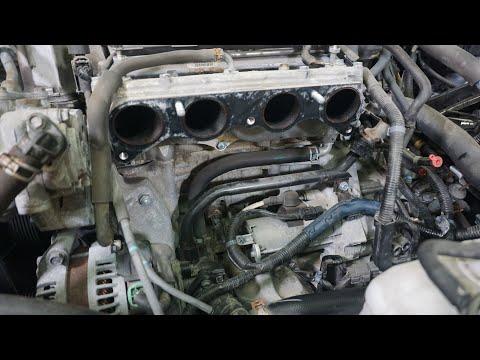
Step 3: Locate the starter
- Use a flashlight to find the starter where the engine meets the transmission (bellhousing area), below the intake manifold.
- You’ll see a cylindrical motor with a smaller solenoid on top and a thick battery cable attached.
Step 4: Disconnect the starter electrical connections
- Remove the rubber boot covering the large power terminal using needle-nose pliers (gently pull it back).
- Use a 12mm socket to remove the nut on the large battery cable (B+), then lift the cable off and position it away from metal.
- Disconnect the small solenoid trigger wire:
- If it’s a nut-style terminal, use an 8mm deep socket to remove the nut and pull the ring terminal off.
- If it’s a clip-style connector, press the tab and pull it off by hand.
- Don’t pull on the wire—pull the connector.
Step 5: Remove the starter mounting bolts
- Support the starter with one hand.
- Use a 14mm socket with a 3/8" drive ratchet and a 6" or 12" extension (and a wobble extension if needed) to remove the two starter mounting bolts.
- Once both bolts are out, pull the starter straight out from the transmission housing.
Step 6: Transfer parts (only if needed)
- Compare the old and new starter (nose length, mounting ears, electrical studs).
- If your replacement starter did not include heat shielding or brackets, move them over using the same sockets you removed them with.
Step 7: Install the new starter
- Place the starter into position and start both mounting bolts by hand to avoid cross-threading.
- Tighten using a 14mm socket, then finish with a torque wrench: Torque to 44 N·m (32 ft-lbs).
Step 8: Reconnect the starter wiring
- Clean the cable ends lightly with a small wire brush if they’re oxidized.
- Install the small solenoid wire:
- Nut-style: install and tighten with an 8mm deep socket to Torque to 3.4 N·m (30 in-lbs), then add a light smear of dielectric grease to the outside of the connection.
- Install the large battery cable (B+) and tighten with a 12mm socket to Torque to 9.8 N·m (7 ft-lbs).
- Reinstall the rubber boot over the B+ terminal.
Step 9: Reinstall the intake parts
- Reinstall the intake tube/air box and any clips you removed.
- Tighten hose clamps using a flathead screwdriver.
- Reconnect any unplugged sensor connectors until they click.
Step 10: Reconnect the battery
- Reconnect the positive cable first (if removed), then reconnect the negative cable using a 10mm socket.
✅ After Repair
- Start your Accord and confirm it cranks strongly and starts normally.
- Listen for abnormal grinding or whining—if heard, shut it off and re-check starter seating and bolts.
- Verify the intake tube is fully seated (no hissing/whistling air leak).
- If you raised the car, remove jack stands and lower it safely using the floor jack.
💰 DIY vs Shop Cost
Shop Cost: $450-$850 (parts + labor)
DIY Cost: $120-$350 (parts only)
You Save: $300-$500 by doing it yourself!
Shop labor rates vary but typically run $100-$150/hour. This repair takes a shop approximately 1.5-2.5 hours.
🎯 Ready to get started?
HowToo makes it easy: same-day/2-day shipping on every part, plus all the tools and specialty tools you need! Check out the parts and tools sections below to add everything to your cart.
Guide for Starter Motor replace for these Honda vehicles
| Year Make Model | Sub Model | Engine | Body Style |
|---|---|---|---|
| 2007 Honda Accord | - | Inline 4 2.4L | - |
| 2006 Honda Accord | - | Inline 4 2.4L | - |
