









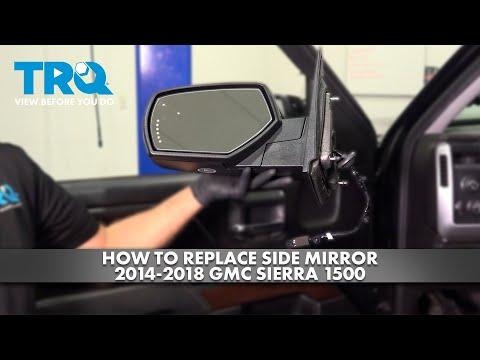






How to Replace the Side View Mirror on a 2015-2019 GMC Sierra 1500
Step-by-step instructions with tools, parts, torque specs, and safety tips
How to Replace the Side View Mirror on a 2015-2019 GMC Sierra 1500
Step-by-step instructions with tools, parts, torque specs, and safety tips for 2015, 2016, 2017, 2018, 2019


🔧 Side View Mirror - Replacement
This job replaces the exterior door mirror assembly on your Sierra. The mirror usually comes off from inside the door panel, then the electrical connector is unplugged before installing the new unit.
Difficulty Level: Intermediate | Estimated Time: 1-2 hours per mirror
⚠️ Safety & Precautions
- Disconnect the negative battery cable before unplugging mirror connectors.
- Use care around the door trim clips so you do not crack the panel.
- If your mirror has power, heat, blind-spot, or turn signal features, make sure the connector is fully seated at installation.
- Work with the door glass fully raised.
🔧 Required Tools
You'll need the following tools for this repair:
- 7mm socket
- 10mm socket
- Ratchet
- Short extension
- Trim panel removal tool
- Flat trim stick
- Phillips screwdriver
- Torx T15 screwdriver
- Torque wrench
- Safety glasses
- Mechanic gloves
🔩 Required Parts
HowToo sells all the parts you need for this repair:
- Side view mirror assembly - Driver or passenger side - Qty: 1
- Door panel clip set - Qty: 1
- Mirror mounting nuts - Qty: 3
- Door vapor barrier adhesive - Qty: 1
📋 Before You Begin
- Park on level ground and set the parking brake.
- Lower the window fully only if needed for access, then raise it before starting removal.
- Disconnect the negative battery cable before unplugging the mirror harness.
- Keep the door open but secured.
🔨 Step-by-Step Instructions
Follow these steps in order:
Step 1: Remove the door trim panel
- Use a 7mm socket to remove the screws at the door pull handle and lower trim area.
- Use a trim panel removal tool to pop the door panel clips loose around the perimeter.
- Lift the panel upward to release it from the window ledge.
- Disconnect any electrical connectors from the door panel and set the panel aside.
Step 2: Peel back the vapor barrier
- Use a flat trim stick to carefully lift the edge of the vapor barrier.
- Peel it back just enough to access the mirror mounting area.
- Do not tear the barrier.
Step 3: Disconnect the mirror wiring
- Locate the mirror connector and unplug it by hand.
- If the connector is tight, use a flat trim stick to gently release the lock tab.
- Make sure the harness is free before removing the mirror.
Step 4: Remove the mirror mounting nuts
- Use a 10mm socket and ratchet with a short extension to remove the 3 mirror nuts.
- Hold the mirror with one hand while removing the last nut so it does not fall.
- Remove the mirror from the outside of the door.
- Torque on installation: 9 Nm (80 in-lbs)
Step 5: Install the new mirror
- Position the new mirror on the door studs from the outside.
- Reconnect the mirror wiring connector until it clicks.
- Start all 3 nuts by hand first.
- Use a 10mm socket and torque wrench to tighten the nuts evenly to 9 Nm (80 in-lbs).
- Snug them evenly to avoid cracking the housing.
Step 6: Reassemble the door
- Press the vapor barrier back into place.
- Reinstall the door panel by hooking the top edge over the window ledge first.
- Use a trim panel removal tool to press each clip back into place.
- Reinstall the screws with a 7mm socket.
✅ After Repair
- Reconnect the battery negative cable.
- Turn the ignition on and test mirror adjustment, heat, folding, turn signal, and blind-spot functions if equipped.
- Check that the door panel is fully seated and there are no rattles.
- Verify the mirror glass moves smoothly through its full range.
💰 DIY vs Shop Cost
Shop Cost: $250-$650 per mirror (parts + labor)
DIY Cost: $120-$350 per mirror (parts only)
You Save: $130-$300 by doing it yourself!
Shop labor rates vary but typically run $100-$150/hour. This repair takes a shop approximately 1-2 hours.
🎯 Ready to get started?
HowToo makes it easy: same-day/2-day shipping on every part, plus all the tools and specialty tools you need! Check out the parts and tools sections below to add everything to your cart.
Guide for Door Mirror replace for these GMC vehicles
| Year Make Model | Sub Model | Engine | Body Style |
|---|---|---|---|
| 2019 GMC Sierra 1500 | - | - | - |
| 2018 GMC Sierra 1500 | - | - | - |
| 2017 GMC Sierra 1500 | - | - | - |
| 2016 GMC Sierra 1500 | - | - | - |
| 2015 GMC Sierra 1500 | - | - | - |