


How to Replace the Serpentine Belt on a 2022 Ford Explorer 3.3L
Step-by-step 2022 Explorer 3.3L serpentine belt replacement with tools, parts list, torque specs, and safety tips
How to Replace the Serpentine Belt on a 2022 Ford Explorer 3.3L
Step-by-step 2022 Explorer 3.3L serpentine belt replacement with tools, parts list, torque specs, and safety tips


🔧 Explorer - Serpentine Belt Replacement
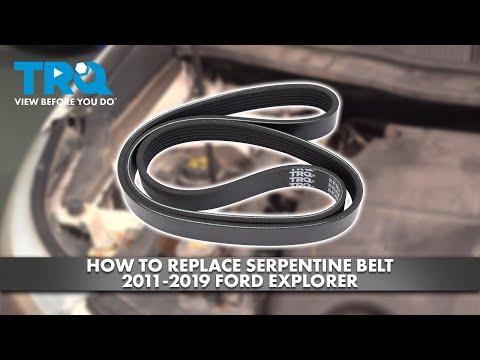
You’ll be removing the old serpentine belt (the long belt that drives the alternator, A/C compressor, and other accessories) and installing a new one on your Explorer. This job is mostly about safely relieving the belt tensioner and carefully routing the new belt.
Difficulty Level: Intermediate | Estimated Time: 1-2 hours
⚠️ Safety & Precautions
- 🔹Always work with the engine off, key removed, and let the engine cool fully before starting.
- 🔹Disconnect the negative battery cable to avoid accidental cranking while your hands are near pulleys.
- 🔹Keep fingers, clothing, and tools away from all belt pulleys and fan blades at all times.
- 🔹Do not start the engine until you’ve double-checked belt routing on every pulley.
- 🔹If you need to raise the vehicle, always support it with jack stands, never just a jack.
🔧 Required Tools
You'll need the following tools for this repair:
- 🔹3/8" drive ratchet
- 🔹3/8" drive breaker bar (18"+ length)
- 🔹Serpentine belt tool set (low-profile, 3/8" drive) (specialty)
- 🔹8mm socket
- 🔹10mm socket
- 🔹1/4" drive ratchet
- 🔹Torque wrench (inch-lb, 40–200 in-lbs range)
- 🔹Torque wrench (ft-lb, 10–75 ft-lbs range)
- 🔹Flat-blade trim tool or plastic panel tool
- 🔹Work light or LED inspection light
- 🔹Mechanic’s gloves
- 🔹Safety glasses
- 🔹Fender cover or clean blanket
🔩 Required Parts
HowToo sells all the parts you need for this repair:
- 🔹Serpentine drive belt (main accessory belt, 3.3L) - Qty: 1
- 🔹Belt tensioner assembly (optional but recommended if original) - Qty: 1
- 🔹Idler pulley (optional, replace if noisy or worn) - Qty: 1–2
- 🔹Dielectric grease (small tube, optional for battery terminals) - Qty: 1
- 🔹Shop towels or rags - Qty: 1 pack
📋 Before You Begin
- 🔹Park your Explorer on level ground, shift to Park, and set the parking brake.
- 🔹Open the hood and install the hood prop securely.
- 🔹Locate the belt routing diagram sticker (usually on the radiator support or underside of the hood). If none is present, plan to take a clear photo of the current belt routing before removal.
- 🔹Disconnect the negative battery terminal using a 10mm socket and 1/4" ratchet. Torque on reassembly: 7–9 Nm (62–80 in-lbs).
🔨 Step-by-Step Instructions
Follow these steps in order:
Step 1: Remove the engine cover
- 🔹Gently pull up on the plastic engine cover; it is held by rubber grommets, no bolts.
- 🔹If it feels stuck, lift one corner at a time while supporting the center.
- 🔹Set it aside in a safe place.
- 🔹No torque specs for this step; the cover simply presses back on.
Step 2: Remove the upper air intake tube (for better access)
- 🔹Locate the intake tube between the air filter box and the throttle body.
- 🔹Use an 8mm socket and 1/4" ratchet to loosen the hose clamp at the airbox.
- 🔹Use the same 8mm socket to loosen the hose clamp at the throttle body.
- 🔹If there are small clips or a sensor wire attached, use a flat-blade trim tool to gently pry the clips out. Do not pull on wires.
- 🔹Lift the tube off and set it aside.
- 🔹When reinstalling later, snug the clamps with the 8mm socket to about 3–4 Nm (27–35 in-lbs)—firm but not overtightened.
Step 3: Study and document belt routing
- 🔹Use your work light to clearly see all pulleys: crankshaft, alternator, A/C compressor, idlers, power steering (if equipped), and tensioner.
- 🔹Take one or two clear photos of the existing belt path from above and from the right side. Photos save a lot of frustration.
- 🔹Compare your photos to the factory routing diagram if available.
- 🔹No torque specs for this step; this is a visual check.
Step 4: Locate the belt tensioner
- 🔹On the 3.3L V6, the automatic belt tensioner is mounted on the front of the engine toward the passenger side, with a smooth pulley and a molded arm.
- 🔹The tensioner has a square hole sized for a 3/8" drive ratchet or a specific hex fitting for a serpentine belt tool (a thin, long bar designed for tight spaces).
- 🔹Position your serpentine belt tool (or 3/8" breaker bar) in the square hole so you can rotate the tensioner safely.
- 🔹No torque yet; you are only finding the correct leverage point.
Step 5: Relieve tension and remove the old belt
- 🔹Put on your mechanic’s gloves and safety glasses.
- 🔹Using the serpentine belt tool or 3/8" breaker bar, rotate the tensioner in the direction that loosens the belt (usually clockwise when viewed from the front on this engine).
- 🔹While holding the tensioner fully released, use your free hand to slip the belt off one of the easiest-to-reach smooth pulleys, usually an idler.
- 🔹Slowly let the tensioner return to its rest position—do not let it snap back.
- 🔹Remove the belt from the remaining pulleys and pull it out from the engine bay.
- 🔹No torque spec here because no bolts are removed—just controlled movement.
Step 6: Inspect pulleys and tensioner
- 🔹Spin each accessible pulley by hand.
- 🔹They should spin smoothly and quietly, with no grinding or wobble.
- 🔹Gently push on the tensioner pulley to check for side-to-side play; it should feel solid.
- 🔹If a pulley feels rough or loose, plan to replace that pulley or the tensioner now while access is easy.
- 🔹If you replace the tensioner or an idler, follow the torque specs below:
- 🔹Tensioner mounting bolts: use a 10mm socket with 3/8" ratchet and torque to 48 Nm (35 ft-lbs).
- 🔹Idler pulley center bolt: use a 10mm socket or correct size (often 13mm; confirm visually) with 3/8" ratchet and torque to 40 Nm (30 ft-lbs).
Step 7: Route the new belt (except one pulley)
- 🔹Lay the new belt next to the old one on the ground and confirm length and rib count match.
- 🔹Starting at the crankshaft pulley (lowest, biggest pulley), route the new belt following your photo and the diagram: around grooved pulleys with the ribbed side, and around smooth pulleys with the flat back.
- 🔹Leave the easiest upper smooth pulley (usually an idler) for last; do not place the belt over it yet.
- 🔹Make sure every groove in the belt sits in the grooves of each pulley—no ribs hanging off the edge.
- 🔹No torque yet; you are only positioning the belt.
Step 8: Apply tension and seat the belt
- 🔹Reinstall the serpentine belt tool or 3/8" breaker bar into the tensioner.
- 🔹Rotate the tensioner again to create slack.
- 🔹With your free hand, slip the belt over the final smooth pulley you left for last.
- 🔹Carefully release the tensioner so it applies tension to the new belt.
- 🔹Visually inspect each pulley again to confirm the belt is centered and fully seated in every groove.
- 🔹No torque spec here—again, only controlled movement.
Step 9: Reinstall the intake tube and engine cover
- 🔹Reposition the intake tube between the airbox and throttle body.
- 🔹Make sure it is fully seated on both ends.
- 🔹Use the 8mm socket and 1/4" ratchet to tighten both hose clamps evenly to about 3–4 Nm (27–35 in-lbs)—snug, not crushed.
- 🔹Reattach any wiring clips using gentle pressure or the flat-blade trim tool if needed.
- 🔹Press the engine cover back down firmly over its mounting pegs until it clicks into the rubber grommets. No torque spec for the cover; it just snaps on.
Step 10: Reconnect the battery and perform final checks
- 🔹Reconnect the negative battery cable to the terminal.
- 🔹Use a 10mm socket and 1/4" ratchet to tighten the clamp.
- 🔹Torque the clamp to 7–9 Nm (62–80 in-lbs)—snug but not crushing the post.
- 🔹Remove all tools and rags from the engine bay.
- 🔹Double-check belt routing one more time with your work light.
✅ After Repair
- 🔹Start the engine and stand to the side, looking down at the belt—do not lean over rotating parts.
- 🔹Watch the belt for 30–60 seconds; it should run smoothly with no wobble, squeal, or walking off a pulley.
- 🔹Turn the A/C on and off and briefly raise engine RPM to around 2000; listen for any chirping or squealing.
- 🔹Shut the engine off and recheck belt seating on all pulleys.
- 🔹If you disconnected the battery for a while, your radio presets or clock may need to be reset via the infotainment screen.
💰 DIY vs Shop Cost
Shop Cost: $250–$400 (parts + labor)
DIY Cost: $40–$90 (belt only), $90–$170 (belt + new tensioner/idler)
You Save: $160–$260 by doing it yourself!
Shop labor rates typically run $100–$150/hour. This repair takes a shop approximately 1.0–1.5 hours.
🎯 Ready to get started?
HowToo makes it easy: same-day/2-day shipping on every part, plus all the tools and specialty tools you need! Check out the parts and tools sections above to add everything to your cart.
