









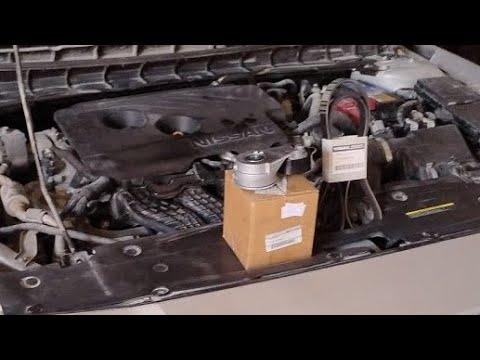





How to Replace the Serpentine Belt on a 2020 Nissan Altima 2.5L
Step-by-step DIY serpentine belt replacement with tools, parts list, safety tips, and torque specs for 2019, 2020, 2021, 2022
How to Replace the Serpentine Belt on a 2020 Nissan Altima 2.5L
Step-by-step DIY serpentine belt replacement with tools, parts list, safety tips, and torque specs for 2019, 2020, 2021, 2022


🔧 Altima - Serpentine Belt Replacement
The serpentine belt (also called the drive belt) runs the alternator, A/C compressor, and other accessories on your Altima. You’ll remove the old belt, release the spring-loaded tensioner, then route and install a new belt following the factory diagram.
Difficulty Level: Intermediate | Estimated Time: 1-1.5 hours
⚠️ Safety & Precautions
- ⚠️ Always work with the engine off and completely cool to avoid burns.
- ⚠️ Disconnect the negative battery terminal before putting your hands near the belt area.
- ⚠️ Secure the vehicle on level ground with the parking brake firmly applied.
- ⚠️ You will be working in tight spaces around the engine; remove rings, watches, and loose clothing.
- ⚠️ Use jack stands whenever the vehicle is raised; never rely only on a floor jack.
🔧 Required Tools
You'll need the following tools for this repair:
- 🛠️ 3/8" drive ratchet
- 🛠️ 3/8" drive torque wrench (5-80 ft-lbs range)
- 🛠️ 10mm socket
- 🛠️ 12mm socket
- 🛠️ 14mm socket
- 🛠️ Serpentine belt tool with 14mm and 3/8" drive adapter (specialty)
- 🛠️ Short extension 3/8" drive (2-3")
- 🛠️ Flathead screwdriver (medium)
- 🛠️ Trim clip remover tool (specialty)
- 🛠️ Floor jack (rated 3-ton minimum)
- 🛠️ Jack stands (rated 3-ton minimum)
- 🛠️ Wheel chocks
- 🛠️ Work light or flashlight
- 🛠️ Mechanic gloves
- 🛠️ Safety glasses
- 🛠️ Fender cover or clean towel
- 🛠️ Paint marker or white chalk
🔩 Required Parts
HowToo sells all the parts you need for this repair:
- 🔩 Serpentine belt (accessory drive belt, 2.5L) - Qty: 1
- 🔩 Belt tensioner assembly - Qty: 1 (optional but recommended if noisy or original)
- 🔩 Idler pulley - Qty: 1 (optional, inspect and replace if rough)
- 🔩 Plastic push clips for right front splash shield - Qty: 4-6
- 🔩 Dielectric grease (small tube) - Qty: 1
- 🔩 Battery terminal cleaning brush - Qty: 1 (optional)
📋 Before You Begin
- Park your Altima on level ground, shift to PARK, and set the parking brake.
- Chock the rear wheels with wheel chocks so the car cannot roll.
- Open the hood and support it fully.
- Use a 10mm socket and ratchet to disconnect the negative battery cable. Move the cable aside so it cannot spring back.
- Lay a fender cover or towel over the front fender to protect paint while you lean in.
- Have your new belt nearby and keep the belt routing diagram ready. If there is no factory sticker, you will draw your own in Step 1.
🔨 Step-by-Step Instructions
Follow these steps in order:
Step 1: Access the Belt Area and Record Routing
- Use the floor jack to lift the front-right (passenger side) of your Altima at the front pinch weld or front crossmember, then place a jack stand under the pinch weld. Lower the car gently onto the stand.
- Use the flathead screwdriver or trim clip remover tool to pop out the plastic clips holding the right front lower splash shield (behind the front bumper, passenger side).
- Remove any 10mm bolts on the shield with a 10mm socket and ratchet, then pull the shield down to access the lower front of the engine.
- From the top and bottom, look at how the belt snakes around the crank pulley, alternator, A/C compressor, and any idler pulleys.
- Use the paint marker or chalk to draw the belt path on a piece of paper or on the top radiator support. Draw clearly; it saves headaches later.
Step 2: Locate the Belt Tensioner
- The belt tensioner is the spring-loaded arm with a pulley that presses on the belt. On the 2.5L in your Altima, it’s on the front of the engine, slightly below and toward the passenger side of the alternator.
- Use your work light to see the tensioner clearly from the wheel well or from above.
- Identify the tensioner’s square drive or bolt head used to rotate it. For this engine, you will typically use a 14mm socket or the serpentine belt tool on the tensioner bolt.
Step 3: Release Tension and Remove the Old Belt
- Install the 14mm socket on the end of your serpentine belt tool (or a long 3/8" ratchet with extension if you have room).
- Place the socket on the tensioner pulley bolt. Note which way the belt is being pushed; you will rotate the tensioner in the opposite direction to remove tension. Usually this is clockwise viewed from the front on this engine.
- Slowly pull on the tool to rotate the tensioner and relieve tension. It will be stiff but smooth. Move steadily, never jerk the tool.
- While holding the tensioner in the released position with one hand, use your other hand to slide the belt off the easiest-to-reach smooth pulley (often the idler or alternator) using gloves.
- Slowly let the tensioner return to its resting position with the tool, keeping a firm grip.
- Remove the belt completely from all pulleys and pull it out through the top or bottom of the engine bay.
Step 4: Inspect Pulleys and Tensioner
- Spin each accessible pulley (idler, tensioner, alternator, A/C) by hand with gloves on.
- If any pulley feels rough, gritty, wobbly, or makes scraping sounds, plan to replace that pulley or the tensioner now.
- Check the tensioner arm movement using the serpentine belt tool again: rotate it slightly and let it return. It should move smoothly and spring back firmly. Weak or jerky movement means the tensioner should be replaced.
- Clean any heavy dirt from the pulley grooves with a rag. Do not use grease or oil on the belt or pulleys.
Step 5: Compare Old Belt to New Belt
- Lay the old belt and new belt side by side on a clean surface.
- They should be the same length and have the same number of ribs.
- If the new belt is noticeably shorter or longer, or has different ribs, do not install it; double-check the part.
Step 6: Pre-Route the New Belt
- Use your routing diagram from Step 1 as a guide.
- Starting from the crankshaft pulley (largest pulley at the bottom), route the belt around the pulleys that are hardest to reach later (usually crank, A/C compressor, and lower idlers) leaving the belt off one upper smooth pulley (often the alternator or idler) so you can slip it on at the end.
- Make sure the ribbed side of the belt sits in the ribbed pulleys and the smooth back side contacts smooth pulleys.
- Use your work light and visually confirm the belt is seated correctly in every groove you can see.
Step 7: Apply Tension and Seat the Belt
- Place the 14mm socket and serpentine belt tool back on the tensioner bolt.
- Rotate the tensioner again to relieve tension, same direction as in Step 3.
- While holding the tensioner, slide the belt over the last remaining upper pulley (the one you left off on purpose).
- Make sure the belt is still sitting fully in the grooves on all other pulleys using your other hand to feel along the lower pulleys if possible.
- Slowly release the tensioner back against the belt. The belt should now be tight with no slack.
- Remove the tool from the tensioner.
Step 8: Double-Check Belt Routing and Seating
- From the top and bottom, visually follow the belt around every pulley, comparing to your routing diagram.
- Confirm there is no twist in the belt anywhere.
- Run a gloved finger along the side of the belt at each pulley to confirm it is centered and fully in the grooves.
- If anything looks off, repeat Steps 6 and 7 until routing is perfect. Incorrect routing can quickly damage the belt.
Step 9: Reinstall Splash Shield and Lower Vehicle
- Reposition the right front splash shield back into place.
- Install any bolts you removed with a 10mm socket and ratchet. Tighten snugly by hand; these are small fasteners (about 5-7 Nm / 44-62 in-lbs).
- Reinstall the plastic push clips by inserting the clip body, then pressing the center pin in with your thumb or the flathead screwdriver.
- Use the floor jack to raise the car slightly off the jack stand, remove the stand, then lower the vehicle fully to the ground.
Step 10: Reconnect Battery and Initial Check
- Clean the negative battery terminal if needed using the battery terminal brush.
- Reconnect the negative cable and tighten the nut with a 10mm socket and ratchet to about 5-7 Nm (44-62 in-lbs). Do not overtighten.
- Apply a tiny amount of dielectric grease around, not inside, the battery terminal if you have it.
✅ After Repair
- Start the engine and let it idle while you watch the belt from above. Keep hands and tools clear of moving parts.
- Verify the belt runs smoothly with no wobble or wandering off any pulley.
- Listen for squealing, chirping, or grinding noises from the belt area. If you hear any, shut the engine off and recheck routing and pulleys.
- Turn on the A/C and headlights to add load. Watch the belt again to ensure it stays stable.
- After a short test drive (5-10 minutes), recheck belt tension and routing visually once more with the engine off.
💰 DIY vs Shop Cost
Shop Cost: $220-$380 (parts + labor)
DIY Cost: $35-$90 (parts only, depending on belt brand and if you add a new tensioner)
You Save: $130-$300 by doing it yourself!
Shop labor rates vary but typically run $100-$150/hour. This repair takes a shop approximately 0.8-1.0 hours.
🎯 Ready to get started?
HowToo makes it easy: same-day/2-day shipping on every part, plus all the tools and specialty tools you need! Check out the parts and tools sections above to add everything to your cart.