

















How to Replace the Serpentine Belt on a 2019-2023 Cadillac XT4 (Step-by-Step Guide)
Tools, parts list, belt routing tips, wheel-well access steps, and safety checks to prevent squeal
How to Replace the Serpentine Belt on a 2019-2023 Cadillac XT4 (Step-by-Step Guide)
Tools, parts list, belt routing tips, wheel-well access steps, and safety checks to prevent squeal for 2019, 2020, 2021, 2022, 2023


🔧 XT4 - Serpentine Belt Replacement
The serpentine belt drives key accessories like the alternator and A/C compressor. If it’s cracked, noisy, or slipping, replacing it prevents a no-start, overheating, or loss of charging while driving.
Difficulty Level: Intermediate | Estimated Time: 1.0-2.0 hours
⚠️ Safety & Precautions
- ⚠️ Work on a cool engine; keep hands away from fans and pulleys.
- ⚠️ Support your XT4 with jack stands; never rely on a floor jack alone.
- ⚠️ Keep fingers clear of the belt tensioner while releasing tension (it’s spring-loaded).
- ⚠️ Battery disconnect is not required for this job, but keep the key away from the vehicle so no one can start it.
🔧 Required Tools
You'll need the following tools for this repair:
- Safety glasses
- Mechanic gloves
- Wheel chocks
- Floor jack (rated 3-ton minimum)
- Jack stands (rated 3-ton minimum)
- Breaker bar 1/2"
- Torque wrench 1/2"
- Socket set: 7mm, 8mm, 10mm, 15mm, 19mm
- Ratchet 3/8"
- Serpentine belt tool (specialty)
- Flathead screwdriver
- Trim clip removal tool
- Work light
🔩 Required Parts
HowToo sells all the parts you need for this repair:
- Serpentine belt - Qty: 1
- Fender liner / splash shield push clips - Qty: 1 set
📋 Before You Begin
- Park on level ground, shift to Park, and set the parking brake.
- Open the hood and take a photo of the belt routing diagram (often on a sticker under the hood) or sketch the routing before removing the belt.
- If you can’t find a routing sticker, take clear photos of how the belt wraps around each pulley from above and through the wheel well.
🔨 Step-by-Step Instructions
Follow these steps in order:
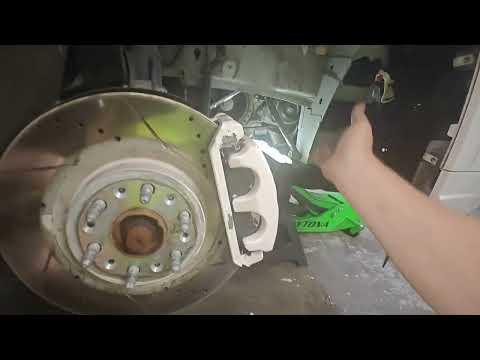
Step 1: Remove the right front wheel
- Place wheel chocks behind the rear wheels.
- Use a 19mm socket and breaker bar 1/2" to slightly loosen the right front lug nuts (about 1/2 turn) while the tire is still on the ground.
- Lift the right front using a floor jack (rated 3-ton minimum) and support it with jack stands (rated 3-ton minimum).
- Remove the lug nuts with a 19mm socket and take the wheel off.
- During reassembly, install and tighten lug nuts with a torque wrench 1/2": Torque to 190 Nm (140 ft-lbs).
Step 2: Open access to the belt area (wheel well splash shield)
- Use a trim clip removal tool to pop out plastic push-clips.
- Use a 7mm socket and ratchet 3/8" to remove any small screws holding the front/side splash shield section.
- Use a flathead screwdriver if needed to gently pry the shield edge free.
- Fold the splash shield back enough to clearly see the belt and the belt tensioner.
Step 3: (If needed) Remove the intake duct for more room
- Use an 8mm socket and ratchet 3/8" to loosen the hose clamps on the intake duct.
- Use a flathead screwdriver to release any retaining clips.
- Lift the duct out and set it aside so you can reach the tensioner more easily.
- Tip: Take a photo before pulling hoses.
Step 4: Release belt tension
- Find the belt tensioner (a spring-loaded arm with a pulley). A “tensioner” keeps the belt tight automatically.
- Install a 15mm socket on the tensioner’s hex/bolt head and attach a breaker bar 1/2" or use a serpentine belt tool (specialty) (this is a long, thin handle made to reach tight tensioners).
- Rotate the tensioner in the direction that moves the pulley away from the belt to relieve tension.
- While holding the tensioner rotated, slip the belt off one smooth pulley (usually the easiest upper smooth pulley) using your free hand.
- Slowly let the tensioner return to its resting position. Do not let it snap back.
Step 5: Remove the old belt
- Pull the belt out through the wheel well opening and/or from the top of the engine bay.
- Use a work light to inspect each pulley face for wobble, cracks, or shredded rubber buildup.
- If any pulley feels rough when spun by hand, stop and tell me which pulley it is (idler, tensioner pulley, alternator, A/C).
Step 6: Route the new belt
- Compare the new belt to the old one (same length and rib count) before installing.
- Route the belt following the under-hood diagram/photo you took. Make sure the ribbed side sits fully in the ribbed pulleys.
- Use a work light and visually confirm every rib is seated (no “one-rib off” misalignment).
- Tip: Leave the easiest pulley for last.
Step 7: Apply tension and seat the belt
- Use a 15mm socket with a breaker bar 1/2" (or serpentine belt tool (specialty)) to rotate the tensioner again.
- Slip the belt onto the final pulley.
- Slowly release the tensioner so it tightens the belt.
- Re-check belt alignment on every pulley using a work light.
Step 8: Reinstall splash shield and wheel
- Reposition the splash shield and reinstall screws using a 7mm socket and ratchet 3/8".
- Reinstall push-clips using a trim clip removal tool (use it to press them in straight).
- Reinstall the wheel and hand-thread lug nuts.
- Lower the vehicle, then use a torque wrench 1/2" to tighten lug nuts in a star pattern: Torque to 190 Nm (140 ft-lbs).
✅ After Repair
- Start the engine and let it idle for 30–60 seconds while watching the belt track on the pulleys.
- Listen for squeal, chirping, or slapping noises. If you hear any, shut the engine off and re-check pulley alignment.
- Take a short test drive, then do one more quick visual belt check.
💰 DIY vs Shop Cost
Shop Cost: $180-$350 (parts + labor)
DIY Cost: $35-$90 (parts only)
You Save: $145-$260 by doing it yourself!
Shop labor rates vary but typically run $100-$150/hour. This repair takes a shop approximately 1.0-1.5 hours.
🎯 Ready to get started?
HowToo makes it easy: same-day/2-day shipping on every part, plus all the tools and specialty tools you need! Check out the parts and tools sections below to add everything to your cart.
Guide for Serpentine Belt replace for these Cadillac vehicles
| Year Make Model | Sub Model | Engine | Body Style |
|---|---|---|---|
| 2023 Cadillac XT4 | - | - | - |
| 2022 Cadillac XT4 | - | - | - |
| 2021 Cadillac XT4 | - | - | - |
| 2020 Cadillac XT4 | - | - | - |
| 2019 Cadillac XT4 | - | - | - |
