


How to Replace the Serpentine Belt on a 2018 Chevy Colorado 2.5L
Step-by-step DIY serpentine belt replacement with tools, safety tips, routing, inspection, and torque specs for your 2.5L Colorado
How to Replace the Serpentine Belt on a 2018 Chevy Colorado 2.5L
Step-by-step DIY serpentine belt replacement with tools, safety tips, routing, inspection, and torque specs for your 2.5L Colorado
Colorado - Serpentine Belt Replacement 🔧
Got it—you want to replace the serpentine belt on your 2018 Colorado 2.5L. I’ll walk you through it step by step.
Quick check first: Are you working with basic hand tools only (ratchets, sockets, wrenches), and do you plan to do this on the ground (no lift)?
If yes, follow this guide exactly and you’ll be fine.
Parts & Specs 📦
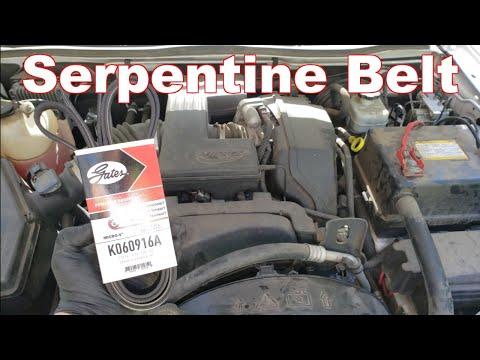
- 🧩 Serpentine belt (main drive belt)
- Engine: 2.5L L4 (LCV)
- Configuration: Single belt driving alternator, A/C, power steering, and water pump
- Use a quality belt (ACDelco or equivalent) matched to your engine and with A/C.
- 🧩 Optional new parts (recommended if worn)
- Belt tensioner assembly (spring-loaded pulley that keeps belt tight)
- Idler pulley (smooth pulley that guides the belt)
Tools You’ll Need 🛠️
- 🔧 3/8" or 1/2" drive ratchet – basic handle for sockets.
- 🔧 Socket set (metric, 10–15 mm range) – for covers or tensioner bolts if needed.
- 🔧 Serpentine belt tool or long-handled ratchet/breaker bar – a long bar gives leverage to move the tensioner.
- 🔧 Flat-blade screwdriver or trim tool – to pop off any plastic covers or clips.
- 🧤 Mechanic gloves – protect your hands from sharp edges.
- 🔦 Work light – helps you see the belt routing clearly.
Safety First ⚠️
- ⚠️ Engine OFF and COOL – never work on the belt with the engine running or hot.
- ⚠️ Battery negative cable disconnected (10 mm) – optional but safer, prevents accidental cranking.
- ⚠️ Keep fingers clear of pulleys when moving the tensioner; it’s spring-loaded.
Colorado - Belt Routing 🧩
Your Colorado has a belt routing diagram from the factory:
- 📌 Look for a belt routing sticker:
- Usually on the upper radiator support or underside of the hood.
If there’s no sticker, take a clear photo of the belt before removal from above and from the side.
Step-by-Step: Remove the Old Belt 🪤
- 🧰 1. Park and prepare
- Park on level ground, set the parking brake, and put the transmission in gear.
- Open the hood and secure it.
- Disconnect the negative battery terminal (10 mm) if you want maximum safety.
- 🧰 2. Access the belt
- On the 2.5L, the belt is on the front/right side of the engine bay (passenger side in your LHD truck).
- If there’s a plastic engine cover, pull it up gently (it’s usually held by rubber grommets).
- Check if there’s a lower splash shield blocking access from below; if so, remove the plastic clips/bolts (usually 10 mm).
- 🧰 3. Locate the belt tensioner
- The tensioner is a spring-loaded arm with a pulley on it.
- On the 2.5L, it’s typically near the center-lower area of the belt path.
- Look for a square hole for a ratchet or a bolt head on the pulley (often 15 mm) where you apply force.
- 🧰 4. Relieve tension
- Place your ratchet or belt tool on the tensioner bolt or in the square drive.
- Rotate the tensioner in the direction that loosens the belt (usually clockwise on this engine, but confirm by watching the belt slacken).
- Use two hands and move slowly; the spring is strong.
- 🧰 5. Slip the belt off one pulley
- While holding the tensioner in the released position, slide the belt off the smooth, easiest-to-reach pulley (often the idler or alternator).
- Slowly release the tensioner back to its rest position.
- Now remove the belt completely from all pulleys, noting the path as you go.
Inspect Pulleys & Tensioner 🔍
- 🧪 Check each pulley
- Spin each pulley by hand:
- Should spin smoothly, no grinding or roughness.
- No wobble or side-to-side play.
- If any pulley feels rough or loose, plan to replace that idler or tensioner.
- Spin each pulley by hand:
- 🧪 Check the old belt
- Look for cracks, missing ribs, glazing (shiny surface), or chunks missing.
- This confirms you’re changing it at the right time.
Install the New Belt 🆕
- 🧰 6. Compare belts
- Lay the old belt and new belt side by side.
- They should be the same length and rib count (number of grooves).
- 🧰 7. Route the belt (without tensioner last)
- Using the routing diagram or your photo:
- Wrap the belt around the crankshaft pulley first (largest pulley at the bottom).
- Then route around the accessory pulleys (alternator, A/C, power steering, water pump) as shown in the diagram.
- Leave the belt off one easy-access pulley (often the idler or alternator) for last.
- Make sure the belt ribs sit fully in the grooves on every ribbed pulley.
- Using the routing diagram or your photo:
- 🧰 8. Apply tension and slip belt on
- Again, put your ratchet/belt tool on the tensioner.
- Rotate the tensioner to create slack in the belt.
- With your other hand, slide the belt onto the last pulley.
- Slowly release the tensioner so it tightens the belt.
- 🧰 9. Final visual check
- Look at every pulley from top and bottom:
- Belt ribs fully seated in grooves.
- No ribs hanging off the edge of any pulley.
- Take your time here—misrouting can damage the belt or accessories.
- Look at every pulley from top and bottom:
Start-Up & Verification 🚗
- 🧪 10. Reconnect and start
- Reconnect the negative battery cable if you removed it (snug the 10 mm nut; about 44 in-lb is typical, but “firm, not gorilla tight” is fine).
- Start the engine and let it idle.
- Watch the belt for:
- Smooth running, no wobble.
- No squealing or chirping noises.
- 🧪 11. Reinstall covers
- Shut the engine off.
- Reinstall any engine covers or splash shields you removed.
Torque Notes (If You Replace Tensioner/Idler) 🔩
- 📏 Typical GM 2.5L values (check your exact part instructions if possible):
- Tensioner mounting bolts: ~37–43 ft-lb.
- Idler pulley bolt: ~37–43 ft-lb.
- Use a torque wrench if you have one; overtightening can strip aluminum threads.
Tips & Tricks 💡
- 💡 Take multiple photos of the belt routing before removal; it’s the #1 beginner mistake.
- 💡 A long-handled ratchet or breaker bar makes the tensioner much easier to move.
- 💡 If you hear a squeal after replacement, recheck belt routing and pulley alignment first.
If you’d like, tell me whether you have access from the top only or can also get under the truck, and I can tailor the steps to the exact access path that will be easiest for you.
HowToo makes it easy: below this answer you’ll see recommended belts, tensioners, idler pulleys, and any specialty tools you might need. You can add them to your cart right from the parts section for fast shipping.
Guide for replace for these Chevrolet vehicles
| Year Make Model | Sub Model | Engine | Body Style |
|---|
