


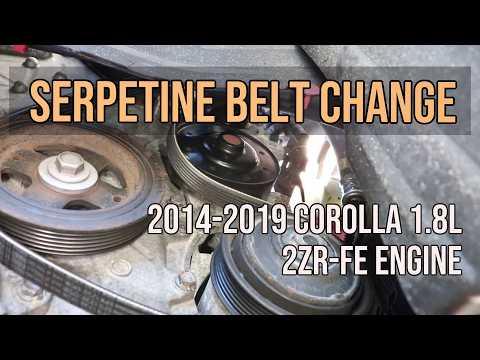


How to Replace the Serpentine Belt on a 2017 Toyota Corolla
Step-by-step DIY serpentine belt replacement with tools, parts list, safety tips, and post-repair checks
How to Replace the Serpentine Belt on a 2017 Toyota Corolla
Step-by-step DIY serpentine belt replacement with tools, parts list, safety tips, and post-repair checks
🔧 Corolla - Serpentine Belt Replacement
You’ll be replacing the serpentine belt that drives the alternator and other accessories on your Corolla. This belt can crack, squeal, or fail with age, so changing it prevents breakdowns and charging issues.
Difficulty Level: Beginner-Intermediate | Estimated Time: 1–2 hours
⚠️ Safety & Precautions
- 🛑 Always support the car with jack stands, never trust only a floor jack.
- 🛑 Work on a cool engine; hot pulleys and exhaust parts can burn you.
- 🛑 Keep fingers and clothing away from pulleys when you test-run the engine.
- 🛑 Turn ignition OFF and remove the key while working near the belt.
- 🛑 Set the parking brake and chock the rear wheels so the car cannot roll.
- 🛑 Battery disconnect is not required, but you can remove the negative cable with a 10mm wrench for extra safety.
🔧 Required Tools
You'll need the following tools for this repair:
- 🧰 Floor jack (rated 2-ton or higher)
- 🧰 Jack stands (rated 2-ton or higher)
- 🧰 Wheel chocks
- 🧰 21mm socket
- 🧰 3/8" drive ratchet
- 🧰 3/8" drive extension (6")
- 🧰 10mm socket
- 🧰 12mm socket
- 🧰 14mm socket
- 🧰 14mm box-end wrench (long handle)
- 🧰 Serpentine belt tool (14mm head) (specialty)
- 🧰 Trim clip remover tool (specialty)
- 🧰 Flat blade screwdriver (medium)
- 🧰 Work light or flashlight
- 🧰 Mechanic’s gloves
- 🧰 Safety glasses
- 🧰 White paint marker or chalk
🔩 Required Parts
HowToo sells all the parts you need for this repair:
- 🧱 Serpentine drive belt (accessory belt) - Qty: 1
- 🧱 Belt tensioner assembly - Qty: 1 (optional but recommended if noisy or weak)
- 🧱 Idler pulley - Qty: 1 (optional, inspect and replace if rough or noisy)
📋 Before You Begin
- 📌 Park the Corolla on level ground, set the parking brake, and put the transmission in PARK.
- 📌 Place wheel chocks behind both rear wheels.
- 📌 Loosen (do not remove) the right-front wheel lug nuts with a 21mm socket before lifting the car.
- 📌 Jack up the right-front corner with the floor jack under the front pinch weld or front subframe, then support the car securely with jack stands.
- 📌 Remove the right-front wheel completely using the 21mm socket once the car is supported.
- 📌 Put on safety glasses and mechanic’s gloves before working under the fender area.
🔨 Step-by-Step Instructions
Follow these steps in order:
Step 1: Remove the right-front wheel and splash shield
- Use the 21mm socket and 3/8" ratchet to remove the right-front wheel lug nuts and take off the wheel.
- Turn the steering wheel fully to the left to open up space in the right wheel well.
- Use the 10mm socket and trim clip remover tool (a small fork-shaped tool for plastic clips) to remove the screws and plastic clips holding the right-front inner fender / splash shield.
- Gently pry the splash shield back with the flat blade screwdriver to expose the belt and pulleys on the side of the engine.
- Do not break plastic clips; pry slowly.
Step 2: Note the belt routing
- Look for a belt routing diagram sticker under the hood. If present, study it carefully.
- If there is no sticker, use your phone to take a clear picture of the full belt routing from several angles.
- Use the white paint marker or chalk to sketch a simple diagram on cardboard or paper showing how the belt wraps around each pulley (crankshaft, alternator, water pump, A/C, idler, tensioner).
- Good routing diagram saves big headaches.
Step 3: Locate the belt tensioner
- Shine the work light into the wheel well opening.
- Find the smooth pulley mounted on a spring-loaded arm; this is the belt tensioner.
- On this engine, the tensioner has a 14mm bolt head in the center of its pulley for releasing tension.
Step 4: Relieve tension on the belt
- Place the 14mm box-end wrench or serpentine belt tool (14mm head) on the center bolt of the tensioner pulley.
- Rotate the tensioner in the direction that loosens the belt (usually clockwise when viewed from the wheel well on this engine). Move it smoothly; you will feel spring resistance.
- While holding the tensioner in the released position, use your free hand to slip the belt off one easy-to-reach pulley (often the alternator or idler) using your fingers only.
- Slowly let the tensioner return to its resting position with the 14mm wrench still on it. Do not let it snap back hard.
- Keep your fingers clear of moving pulleys.
Step 5: Remove the old belt
- With tension removed from one pulley, slide the belt off the remaining pulleys by hand, working it out of the engine bay from the wheel well.
- Pay attention to where the ribbed side of the belt contacts ribbed pulleys and the smooth side contacts smooth pulleys.
- Remove the belt completely from the engine compartment.
Step 6: Inspect pulleys and tensioner
- Spin each accessible pulley (idler, tensioner, alternator, A/C) by hand.
- If a pulley feels rough, wobbly, or makes grinding noise, plan to replace that pulley or the whole tensioner assembly.
- Check the tensioner arm movement by gently moving it with the 14mm box-end wrench; it should move smoothly and spring back firmly.
- Replace weak or noisy tensioners now, not later.
Step 7: Compare old and new belts
- Lay the old and new belts side by side on a clean surface.
- Make sure the new belt is the same length and width, and has the same number of ribs.
- If the new belt is significantly different in size or rib count, do not install it; confirm the correct part first.
Step 8: Route the new belt (first pass, loose)
- Using your diagram or photo, start routing the new belt from the lower crankshaft pulley, working upward.
- Fit the ribbed side of the belt into the grooves of each ribbed pulley (crankshaft, alternator, A/C, etc.).
- Place the smooth side of the belt against any smooth pulleys (idler or tensioner) where it contacts them.
- Leave one easy-to-reach upper pulley (often the alternator or idler) for last so the belt is slightly loose there.
- Make sure every groove is seated correctly.
Step 9: Apply tension and seat the belt fully
- Double-check that the belt is correctly routed around all pulleys except the last one, and that the ribs are sitting straight in each groove.
- Place the 14mm box-end wrench or serpentine belt tool on the tensioner bolt again.
- Rotate the tensioner in the same direction as before to relieve tension.
- With your other hand, slide the belt over the last pulley.
- Release the tensioner slowly so it tightens the belt.
- Inspect each pulley from different angles with the work light to confirm the belt is centered and fully seated in every groove.
Step 10: Reinstall the splash shield and wheel
- Reposition the inner fender / splash shield back into place.
- Use the 10mm socket and trim clip remover tool to reinstall all screws and plastic clips you removed. Snug the screws by hand; do not overtighten them.
- Reinstall the right-front wheel and thread the lug nuts on by hand.
- Use the 21mm socket and 3/8" ratchet to snug the lug nuts in a star pattern while the car is still on the jack stands.
- Raise the car slightly with the floor jack, remove the jack stands, then slowly lower the car to the ground.
- With the car on the ground, tighten the lug nuts fully with the 21mm socket in a star pattern to 103 Nm (76 ft-lbs).
Step 11: Final checks
- Look down from the top of the engine bay and through the wheel well to confirm the belt is tracking straight on all pulleys.
- Remove all tools from the engine bay and wheel well area.
✅ After Repair
- 🔍 Start the engine and let it idle while you watch the belt from a safe distance; it should run smoothly with no wobble or wandering.
- 🔍 Listen for squealing, chirping, or grinding noises. If you hear any, shut the engine off and recheck belt routing and pulley condition.
- 🔍 After a short test drive (5–10 minutes), recheck the belt visually for proper position and tension.
- 🔍 If you disconnected the battery, reset your clock and radio presets.
💰 DIY vs Shop Cost
Shop Cost: $180–$320 (parts + labor)
DIY Cost: $25–$60 (belt only) or $80–$160 (belt + tensioner/idler)
You Save: $100–$240 by doing it yourself!
Shop labor rates typically run $100–$150/hour. This repair takes a shop approximately 0.8–1.2 hours.
🎯 Ready to get started?
HowToo makes it easy: same-day/2-day shipping on every part, plus all the tools and specialty tools you need! Check out the parts and tools sections above to add everything to your cart.
