









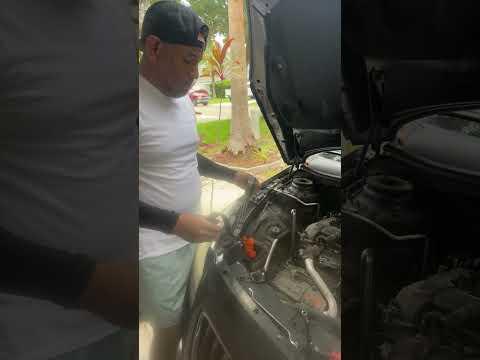







How to Replace the Serpentine Belt on a 2016 Buick Regal (Step-by-Step Guide)
Tools, parts list, belt routing tips, wheel-well access steps, and safety checks to prevent squeal for 2014, 2015, 2016, 2017
How to Replace the Serpentine Belt on a 2016 Buick Regal (Step-by-Step Guide)
Tools, parts list, belt routing tips, wheel-well access steps, and safety checks to prevent squeal for 2014, 2015, 2016, 2017


🔧 Regal - Serpentine Belt Replacement
The serpentine belt runs your alternator and other accessories. If it’s cracked, noisy, or slipping, replacing it prevents charging problems and breakdowns.
Difficulty Level: Intermediate | Estimated Time: 1.0-2.0 hours
⚠️ Safety & Precautions
- ⚠️ Let the engine cool fully before working near the belt drive.
- ⚠️ Keep fingers/clothing clear of pulleys at all times.
- ⚠️ Support the car with jack stands; never rely on a floor jack alone.
- ⚠️ Do not start the engine until all tools are out of the bay.
- ⚠️ Battery disconnect is not required, but keep the key/fob away to prevent accidental start.
🔧 Required Tools
You'll need the following tools for this repair:
- Floor jack (rated 3-ton minimum)
- Jack stands (rated 3-ton minimum)
- Wheel chocks
- 19mm socket
- 1/2" drive breaker bar
- 3/8" drive ratchet
- 3/8" breaker bar
- 7mm socket
- 10mm socket
- Torx T15 driver
- Trim clip removal tool
- Serpentine belt tool set (specialty)
- Torque wrench (20-200 Nm range)
- Work light
- Mechanic gloves
- Safety glasses
🔩 Required Parts
HowToo sells all the parts you need for this repair:
- Serpentine belt - Qty: 1
📋 Before You Begin
- 🧰 Park on level ground, set the parking brake, and chock the rear wheels.
- 🧰 Open the hood and locate the belt routing diagram (usually on the radiator support/underhood label). If it’s missing, take a clear photo of the current routing before removal.
- 🧰 Plan access: on your Regal, belt service is typically easiest through the right-front wheel well.
🔨 Step-by-Step Instructions
Follow these steps in order:
Step 1: Remove the right-front wheel
- Use wheel chocks behind the rear wheels.
- Break loose the lug nuts slightly with a 19mm socket and 1/2" drive breaker bar.
- Lift the right-front corner using a floor jack (rated 3-ton minimum) and support it with jack stands (rated 3-ton minimum).
- Remove the lug nuts with a 19mm socket.
- Reinstall torque later: Torque to 140 Nm (103 ft-lbs).
Step 2: Remove the right-front inner fender/splash shield (for belt access)
- Use a work light to see the plastic fasteners clearly.
- Remove small screws/bolts using a 7mm socket and 10mm socket (varies by fastener location).
- Remove any Torx screws using a Torx T15 driver.
- Pry plastic push-clips out using a trim clip removal tool. Work gently to avoid breaking clips.
- Fold the shield back or remove it to expose the belt, tensioner, and pulleys.
Step 3: Confirm belt routing
- Use your phone to take a photo of the belt routing from the wheel well view.
- Look for the smooth pulleys (idler/tensioner) vs grooved pulleys (crank/alternator). The ribbed side of the belt runs on grooved pulleys.
Step 4: Relieve belt tension
- Locate the automatic belt tensioner (spring-loaded arm with a pulley).
- Use a serpentine belt tool set (specialty) (a long, thin handle designed to reach the tensioner in tight spaces) or a 3/8" breaker bar in the tensioner’s square drive.
- Rotate the tensioner to unload the belt:
- If the tensioner moves smoothly one way and resists the other, use the smooth direction.
- Common movement is either clockwise or counterclockwise depending on bracket design—do not force it.
- Hold the tensioner in the released position and slide the belt off the easiest top pulley (often the alternator) by hand with mechanic gloves.
Step 5: Remove the old belt
- Slowly release the tensioner back to rest using the serpentine belt tool set (specialty) or 3/8" breaker bar. Never let it snap back.
- Remove the belt completely and compare length/width to the new belt.
Step 6: Inspect pulleys and tensioner
- Spin each pulley by hand (engine OFF). They should spin smoothly and quietly.
- Check the tensioner pulley for wobble and roughness. If it feels gritty or loose, the tensioner/idler likely needs replacement (separate repair).
Step 7: Install the new belt
- Route the new belt following the underhood routing diagram (or your photo).
- Leave the easiest pulley for last (usually a smooth idler or the alternator).
- Use the serpentine belt tool set (specialty) or 3/8" breaker bar to rotate the tensioner and slip the belt onto the final pulley.
- Double-check that every rib is seated in every grooved pulley (no ribs hanging off). Use a work light to confirm alignment.
Step 8: Reinstall splash shield and wheel
- Reinstall the splash shield fasteners using a 7mm socket, 10mm socket, Torx T15 driver, and trim clip removal tool as needed.
- Install the wheel and hand-start lug nuts.
- Lower the car and tighten lug nuts with a torque wrench (20-200 Nm range): Torque to 140 Nm (103 ft-lbs).
✅ After Repair
- 🧪 Start the engine and watch the belt for 20–30 seconds. It should run centered with no hopping.
- 🧪 Listen for squeal/chirp. If you hear noise, shut off and re-check belt seating on every grooved pulley.
- 🧪 Take a short test drive, then do one more quick visual check through the wheel well.
💰 DIY vs Shop Cost
Shop Cost: $180-$350 (parts + labor)
DIY Cost: $35-$85 (parts only)
You Save: $145-$265 by doing it yourself!
Shop labor rates vary but typically run $100-$150/hour. This repair takes a shop approximately 1.0-1.5 hours.
🎯 Ready to get started?
HowToo makes it easy: same-day/2-day shipping on every part, plus all the tools and specialty tools you need! Check out the parts and tools sections below to add everything to your cart.