









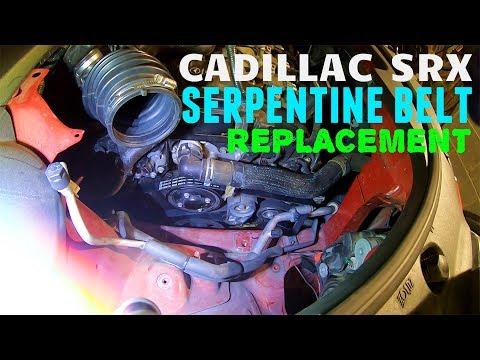







How to Replace the Serpentine Belt on a 2011-2016 Cadillac SRX (Step-by-Step Guide) (Engine: V6 3.6L)
Tools, belt routing tips, tensioner release steps, and torque specs for a smooth DIY install
How to Replace the Serpentine Belt on a 2011-2016 Cadillac SRX (Step-by-Step Guide) (Engine: V6 3.6L)
Tools, belt routing tips, tensioner release steps, and torque specs for a smooth DIY install for 2011


🔧 SRX - Serpentine Belt Replacement
The serpentine belt drives key accessories like the alternator and A/C. Replacing it fixes belt squeal, cracking, or slipping and helps prevent a sudden breakdown if the belt snaps.
Difficulty Level: Intermediate | Estimated Time: 0.5-1.5 hours
⚠️ Safety & Precautions
- ⚠️ Work on a cool engine; hot parts can burn you.
- ⚠️ Keep fingers and clothing away from pulleys at all times.
- ⚠️ If you raise the SRX, support it with jack stands before going under it.
- ⚠️ Do not start the engine with hands near the belt path.
- ⚠️ Battery disconnect is not required for this job, but remove the key and keep it away from the vehicle.
🔧 Required Tools
You'll need the following tools for this repair:
- Safety glasses
- Mechanic gloves
- Floor jack (rated 3-ton minimum)
- Jack stands (rated 3-ton minimum)
- Wheel chocks
- Breaker bar 1/2"
- 15mm socket (1/2" drive)
- 15mm box wrench
- Ratchet 3/8"
- Socket set (8mm-13mm)
- Torx bit set
- Trim clip removal tool
- Flashlight
- Paint marker
🔩 Required Parts
HowToo sells all the parts you need for this repair:
- Serpentine belt - Qty: 1
📋 Before You Begin
- 🧰 Park on level ground and set the parking brake.
- 🧰 Open the hood and let the engine cool fully.
- 🧰 Find the belt routing diagram (usually on the radiator support/underhood area). If it’s missing, take a clear photo of the current routing before removal.
- 🧰 Plan your access: on the SRX 3.6L the belt can often be slipped off from the top, but easiest access is commonly through the right-front wheel well (inner splash shield).
🔨 Step-by-Step Instructions
Follow these steps in order:
Step 1: Record the belt routing
- Use a flashlight to locate the belt routing diagram under the hood.
- If the diagram is missing, use a phone camera to take a picture of the belt around every pulley.
- Use a paint marker to mark the “smooth” (back) side vs “ribbed” (grooved) side direction if helpful.
Step 2: Create access to the belt (top access first)
- Remove any plastic engine appearance cover by pulling upward firmly by hand; set it aside.
- If the intake duct blocks your reach, loosen clamps with a socket set (8mm-13mm) and move the duct enough to get your arm in.
- More room = less frustration.
Step 3: If needed, open the right-front wheel well access
- Place wheel chocks behind the rear wheels.
- Raise the right-front corner using a floor jack (rated 3-ton minimum) and support it with jack stands (rated 3-ton minimum).
- Remove the right-front wheel using a breaker bar 1/2" and appropriate socket from your socket set (8mm-13mm), then reinstall later with Torque to 190 Nm (140 ft-lbs).
- Remove the inner splash shield (plastic liner) fasteners using a trim clip removal tool and Torx bit set, and fold it back for access.
- “Splash shield” is the plastic inner liner.
Step 4: Release belt tension
- Locate the belt tensioner (spring-loaded arm with a pulley). The “tensioner” is the part that keeps the belt tight automatically.
- Install a 15mm socket (1/2" drive) on the tensioner’s hex and attach a breaker bar 1/2".
- Rotate the tensioner to relieve tension (you’ll feel the spring load). If your access is tight, use a 15mm box wrench instead.
- While holding tension off, slide the belt off the easiest-to-reach smooth pulley (often an idler pulley).
Step 5: Remove the old belt
- Slowly let the tensioner return to its resting position (do not let it snap back).
- Pull the belt out from around all pulleys by hand.
- Use a flashlight to inspect each pulley for wobble or roughness by spinning them by hand.
Step 6: Install the new belt
- Route the new belt following the underhood diagram (or your photo). Make sure the ribs sit fully in the grooves on ribbed pulleys.
- Leave the easiest pulley for last (usually a smooth idler) so you have slack to slip it on.
- Rotate the tensioner again using the 15mm socket (1/2" drive) and breaker bar 1/2", then slip the belt onto the last pulley.
- Release the tensioner slowly and verify the belt is centered on every pulley.
- If one rib is off, fix it now.
Step 7: Reassemble removed items
- Reinstall the splash shield using the trim clip removal tool and Torx bit set.
- Reinstall the wheel and tighten lug nuts in a star pattern; Torque to 190 Nm (140 ft-lbs).
- Lower the SRX using the floor jack (rated 3-ton minimum) and remove the jack stands (rated 3-ton minimum).
- Reinstall the intake duct using the socket set (8mm-13mm) and reinstall the engine cover by pressing it down into place.
✅ After Repair
- 🧪 Before starting, re-check belt alignment on every pulley with a flashlight.
- 🧪 Start the engine and watch the belt for 15-30 seconds (keep hands clear). It should run smooth with no jumping.
- 🧪 Listen for chirping/squealing. If you hear it, shut off and re-check belt routing and pulley alignment.
- 🧪 Take a short test drive, then do a final quick visual check.
💰 DIY vs Shop Cost
Shop Cost: $150-$300 (parts + labor)
DIY Cost: $25-$60 (parts only)
You Save: $125-$240 by doing it yourself!
Shop labor rates vary but typically run $100-$150/hour. This repair takes a shop approximately 0.5-1.0 hours.
🎯 Ready to get started?
HowToo makes it easy: same-day/2-day shipping on every part, plus all the tools and specialty tools you need! Check out the parts and tools sections below to add everything to your cart.
Guide for Serpentine Belt replace for these Cadillac vehicles
| Year Make Model | Sub Model | Engine | Body Style |
|---|---|---|---|
| 2016 Cadillac SRX | - | V6 3.6L | - |
| 2015 Cadillac SRX | - | V6 3.6L | - |
| 2014 Cadillac SRX | - | V6 3.6L | - |
| 2013 Cadillac SRX | - | V6 3.6L | - |
| 2012 Cadillac SRX | - | V6 3.6L | - |
| 2011 Cadillac SRX | - | V6 3.0L | - |
| 2011 Cadillac SRX | - | V6 2.8L | - |