


How to Replace the Rear Door Lock Actuator on a 2016 Acura ILX
Step-by-step rear door panel removal, latch/actuator swap, tools, parts, and torque specs
How to Replace the Rear Door Lock Actuator on a 2016 Acura ILX
Step-by-step rear door panel removal, latch/actuator swap, tools, parts, and torque specs


🔧 ILX - Rear Door Lock Actuator Replacement
The rear door lock actuator is the small electric motor/gear unit that locks and unlocks the door when you press the key fob or switch. When it fails, the rear door may not lock/unlock consistently, may make a weak clicking sound, or may only work manually.
Difficulty Level: Intermediate | Estimated Time: 1.5-3.0 hours
Assumption: standard U.S.-spec rear door latch/actuator (common ILX setup).
⚠️ Safety & Precautions
- ⚠️ Disconnect the 12V battery negative cable before working in the door to reduce the risk of short circuits and accidental airbag/SRS faults.
- ⚠️ Don’t turn the ignition ON while door electrical connectors are unplugged.
- ⚠️ Support the door panel as you remove it so it doesn’t hang by the wiring.
- ⚠️ Be careful with the moisture barrier (plastic sheet). Tearing it can cause water leaks and window fogging.
- ⚠️ Use plastic trim tools to avoid cracking clips and scratching trim.
🔧 Required Tools
You'll need the following tools for this repair:
- Safety glasses
- Nitrile gloves
- Plastic trim removal tool set
- Phillips #2 screwdriver
- Flat trim pick
- Ratchet
- 8mm socket
- 10mm socket
- 6-inch socket extension
- Torque wrench (5–25 Nm range)
- Needle-nose pliers
- Magnetic pickup tool
- Painters tape
- Butyl rope adhesive
- Flashlight
🔩 Required Parts
HowToo sells all the parts you need for this repair:
- Rear door lock actuator - Qty: 1
- Rear door latch/lock assembly - Qty: 1 (only if actuator is not serviced separately)
- Door panel trim clips - Qty: 6-10 (handy to have spares)
- Moisture barrier butyl seal strip - Qty: 1
📋 Before You Begin
- Park on level ground and remove the key from the vehicle.
- Lower the rear window about halfway. This gives you a better handhold and reduces the chance of scratching glass.
- Use a 10mm socket to disconnect the battery negative cable, then wait 3 minutes.
- Put painters tape along the painted door edge near the latch area to prevent accidental scratches.
🔨 Step-by-Step Instructions
Follow these steps in order:
Step 1: Remove the rear door switch/trim pieces
- Use a plastic trim removal tool set to gently pry up the window switch panel.
- Unplug the switch connector by pressing the tab and pulling straight out.
- Use a flat trim pick to pop out any small screw covers in the armrest/handle area.
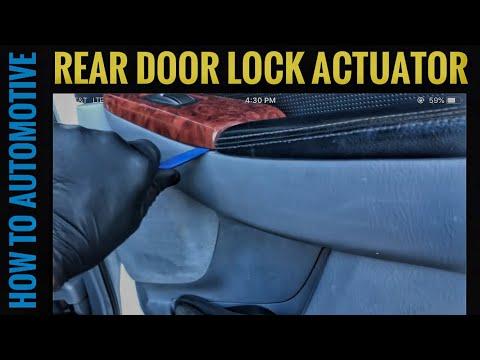
Step 2: Remove the rear door panel
- Remove the door panel screws using a Phillips #2 screwdriver (common locations: inside the pull handle and behind a small trim cap).
- Starting at the bottom edge, use a plastic trim removal tool set to pop the panel clips free, one at a time.
- Lift the door panel straight up to unhook it from the window channel.
- Support the panel and unplug any remaining connectors.
- If equipped with a cable-style inside handle, unhook it using needle-nose pliers. A door-handle cable is a steel cable with a plastic end that snaps into the handle.
Step 3: Peel back the moisture barrier
- Use a plastic trim removal tool set to carefully peel the plastic moisture barrier away from the butyl adhesive.
- Only peel it back as much as needed to reach the latch/actuator area at the rear of the door.
- Go slow so the plastic doesn’t tear.
Step 4: Disconnect the actuator/latch electrical connector
- At the rear of the door near the latch, locate the latch/actuator connector.
- Press the lock tab and unplug it by hand; use a flat trim pick only if the tab is stubborn.
Step 5: Remove the rear door latch/actuator from the door
- At the door edge (rear side), remove the latch mounting bolts using an 8mm socket, ratchet, and 6-inch socket extension.
- Remove the latch/actuator assembly from inside the door by guiding it out through the access opening.
- If a bolt drops inside the door, use a magnetic pickup tool and flashlight.
- Torque to 9 Nm (80 in-lbs) when reinstalling latch mounting bolts.
Step 6: Detach the lock and handle linkages
- Identify the metal linkage rods connected to the latch (they look like thin metal rods).
- Open the colored plastic retainer clip, then lift the rod out. Use needle-nose pliers gently if needed.
- Take a quick photo before removal.
Step 7: Replace the actuator (two common setups)
- Setup A (actuator is separate from latch):
- Remove the actuator fasteners using an 8mm socket or Phillips #2 screwdriver (varies by part style).
- Transfer any brackets/seals to the new actuator, then install it onto the latch.
- Torque to 4–6 Nm (35–53 in-lbs) for small actuator screws/bolts.
- Setup B (actuator is integrated into latch):
- Replace the entire latch/actuator assembly as one unit.
Step 8: Reinstall the latch/actuator and reconnect everything
- Guide the latch back into position and start the bolts by hand to avoid cross-threading.
- Tighten latch bolts using an 8mm socket, then torque wrench: Torque to 9 Nm (80 in-lbs).
- Reconnect linkage rods and close the plastic retainer clips fully.
- Plug in the electrical connector until it clicks.
Step 9: Re-seal the moisture barrier
- Press the moisture barrier back into the original butyl adhesive.
- If the adhesive is dirty or doesn’t stick, apply butyl rope adhesive and press firmly all the way around.
Step 10: Reinstall the door panel
- Reconnect all door panel connectors and any handle cable.
- Hang the top of the panel onto the window channel, then press the panel in to engage the clips.
- Reinstall screws using a Phillips #2 screwdriver.
- Reinstall the switch panel: plug in connector, then press into place.
Step 11: Reconnect the battery
- Reconnect the battery negative cable using a 10mm socket.
- Snug the terminal securely: Torque to 5 Nm (44 in-lbs).
✅ After Repair
- Test the rear door lock using the key fob, the driver’s lock switch, and the inside lock knob (if equipped).
- Open/close the rear door from inside and outside to confirm the handle linkages are correct.
- Confirm the window switch works and no connectors were left unplugged.
- If the battery was disconnected, reset auto window function (if needed): hold the window switch down to fully open, then hold up to fully close, holding 2 seconds at each end.
💰 DIY vs Shop Cost
Shop Cost: $300-$650 (parts + labor)
DIY Cost: $80-$250 (parts only)
You Save: $220-$400 by doing it yourself!
Shop labor rates vary but typically run $100-$150/hour. This repair takes a shop approximately 1.5-2.5 hours.
🎯 Ready to get started?
HowToo makes it easy: same-day/2-day shipping on every part, plus all the tools and specialty tools you need! Check out the parts and tools sections below to add everything to your cart.
