









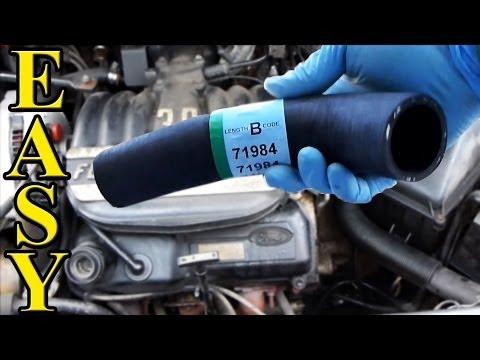






How to Replace the Radiator Hoses on a 2012 Chevy Silverado 1500
Step-by-step DIY radiator hose removal, installation, tools, coolant refill, and safety tips for your Silverado 1500 for 2005, 2006, 2007, 2009, 2010, 2013
How to Replace the Radiator Hoses on a 2012 Chevy Silverado 1500
Step-by-step DIY radiator hose removal, installation, tools, coolant refill, and safety tips for your Silverado 1500 for 2005, 2006, 2007, 2009, 2010, 2013


🔧 Silverado 1500 - Radiator Hose Replacement
You’ll be removing the old radiator hose, draining some coolant, then installing a new hose and refilling the cooling system. This protects your engine from overheating and coolant leaks.
Difficulty Level: Beginner | Estimated Time: 1–2 hours
⚠️ Safety & Precautions
- 🔥 Only work on the cooling system with the engine completely cold. Hot coolant can cause severe burns.
- ⚡ This is a hybrid, but this job is on the standard engine cooling system. Avoid orange high-voltage cables and components.
- 🧯 Keep coolant off belts and pulleys; it makes them slip.
- 🐶 Keep coolant away from children and pets. It is toxic and sweet-tasting.
- 🔌 Battery disconnect is not required, but you can remove the negative battery cable with a 10mm wrench if you want extra safety.
🔧 Required Tools
You'll need the following tools for this repair:
- 🧰 Floor jack (rated 3-ton minimum)
- 🧰 Jack stands (rated 3-ton minimum)
- 🧰 Wheel chocks
- 🧰 10mm socket
- 🧰 13mm socket
- 🧰 1/4" drive ratchet
- 🧰 3/8" drive ratchet
- 🧰 3/8" drive torque wrench (5–80 ft-lbs range)
- 🧰 Hose clamp pliers (specialty)
- 🧰 Regular slip-joint pliers
- 🧰 Flathead screwdriver (6mm blade)
- 🧰 Utility knife
- 🧰 Coolant drain pan (at least 10-liter capacity)
- 🧰 Small funnel
- 🧰 Shop rags
- 🧰 Safety glasses
- 🧰 Nitrile or mechanic gloves
- 🧰 Plastic trim tool
🔩 Required Parts
HowToo sells all the parts you need for this repair:
- 🔩 Upper radiator hose (6.0L Hybrid) - Qty: 1
- 🔩 Lower radiator hose (6.0L Hybrid) - Qty: 1
- 🔩 Radiator hose clamps (correct diameter) - Qty: 2–4
- 🔩 DEX-COOL compatible engine coolant (50/50 premix) - Qty: 2–3 gallons
- 🔩 Cooling system flush chemical (optional) - Qty: 1
- 🔩 Radiator cap (if original is old) - Qty: 1
- 🔩 Distilled water - Qty: 1–2 gallons (if mixing concentrate)
📋 Before You Begin
- Park your Silverado on level ground, set the parking brake, and put the transmission in P.
- Let the engine cool for at least 1–2 hours until the upper hose feels cold to the touch.
- Place wheel chocks behind the rear wheels.
- Open the hood and locate the radiator, upper hose (top of radiator to engine), and lower hose (bottom of radiator to engine).
- If you want extra safety, disconnect the negative battery cable with a 10mm socket.
🔨 Step-by-Step Instructions
Follow these steps in order:
Step 1: Lift and Support the Front (if needed)
- Use the floor jack to lift the front of your Silverado by the front crossmember.
- Place jack stands under the frame rails and gently lower the truck onto them.
- Never work under a vehicle supported only by a jack.
Step 2: Relieve Pressure and Remove Radiator Cap
- Put on safety glasses and gloves.
- Slowly turn the radiator cap counterclockwise by hand until it reaches the first stop to release any leftover pressure.
- After any hiss stops, press down and turn further to remove the cap.
Step 3: Position Drain Pan and Drain Coolant
- Slide the coolant drain pan under the radiator drain (bottom of the radiator, usually passenger side).
- Use slip-joint pliers or your fingers to open the drain petcock if equipped, or loosen the lower hose clamp at the radiator with hose clamp pliers or a flathead screwdriver.
- Let enough coolant drain so the level is below the hose you’re changing (usually 4–6 liters).
- Drain slowly to avoid splashing.
Step 4: Remove Any Covers or Shields
- If there is a lower splash shield, remove its bolts with a 10mm socket and 1/4" ratchet.
- Set bolts and shield aside where you won’t lose them.
Step 5: Remove the Upper Radiator Hose
- Locate the upper hose from the top of the radiator to the engine.
- Use hose clamp pliers or slip-joint pliers to compress the spring clamp at the radiator end, then slide the clamp back along the hose.
- Twist the hose gently by hand to break it loose; if stuck, carefully slide a flathead screwdriver under the hose edge to free it. Do not gouge the plastic fitting.
- Pull the hose off the radiator neck and aim it into the drain pan for any remaining coolant.
- Repeat the clamp and removal process at the engine end of the hose.
- If the hose is very stuck, carefully slice lengthwise with a utility knife and peel it off.
Step 6: Remove the Lower Radiator Hose
- Locate the lower hose from the bottom of the radiator to the engine (usually near the water pump inlet).
- Use hose clamp pliers or slip-joint pliers to compress the lower hose clamp at the radiator end and slide it back.
- Twist and pull the hose off the radiator. Aim into the drain pan.
- Move to the engine end, compress the clamp, slide it back, then twist and remove the hose from the engine fitting.
Step 7: Inspect Fittings and Clean Surfaces
- Check the radiator necks and engine hose nipples for cracks or heavy corrosion.
- Use a shop rag to wipe off any old rubber, rust, or debris.
- Clean surfaces seal better and prevent leaks.
Step 8: Install the New Upper Radiator Hose
- Compare the new upper hose with the old one to match shape and length.
- Slide new hose clamps onto the hose before installing it.
- Push one end of the hose fully onto the radiator neck by hand until it seats fully.
- Position the clamp over the raised bead on the neck and release with hose clamp pliers.
- Repeat for the engine side: push hose fully onto the engine fitting and position the clamp correctly.
- Make sure the hose is not twisted and has clearance from belts or pulleys.
Step 9: Install the New Lower Radiator Hose
- Compare the new lower hose with the old one to ensure correct shape.
- Slide new hose clamps onto the hose.
- Install the hose onto the engine fitting first, seat it fully, then position the clamp with hose clamp pliers.
- Install the radiator-side end of the hose onto the lower radiator neck and position the clamp.
- Confirm the hose is not rubbing against frame, fan, or moving parts.
Step 10: Close Drain and Reinstall Shields
- If you opened the radiator drain petcock, close it by turning it clockwise by hand. Do not overtighten.
- Reinstall any lower splash shield using the 10mm socket and tighten bolts to 10 Nm (89 in-lbs) with the torque wrench.
Step 11: Refill the Cooling System
- Place a funnel in the radiator filler neck.
- Pour in DEX-COOL 50/50 premix slowly until the radiator is full.
- Fill the coolant reservoir (expansion tank) to the COLD mark.
- Pour slowly to reduce trapped air.
Step 12: Bleed Air from the System
- Leave the radiator cap off for now.
- Start the engine and let it idle. Turn the heater to HOT and fan to low.
- Watch the coolant level in the radiator. As the engine warms, air bubbles may come out and the level may drop.
- Add more coolant as needed to keep it near the top.
- When the upper radiator hose feels hot and firm and the heater blows hot, most air is out.
- Shut off the engine and top off the radiator if needed.
Step 13: Install Radiator Cap and Final Checks
- Install the radiator cap by pressing down and turning clockwise until fully seated.
- Check around both hoses and clamps for any signs of leaks.
- Wipe any spilled coolant with shop rags.
Step 14: Lower the Vehicle
- Use the floor jack to lift the front slightly, remove the jack stands, and lower the truck to the ground.
- Remove wheel chocks.
✅ After Repair
- Start the engine and let it reach normal operating temperature while parked.
- Check for leaks around the new hoses and clamps.
- After the engine cools completely (later the same day or next morning), recheck coolant level in the reservoir and top off to the COLD mark if needed.
- Over the next few drives, keep an eye on the temperature gauge and the ground under the truck for any drips.
💰 DIY vs Shop Cost
Shop Cost: $250–$450 (parts + labor for both hoses)
DIY Cost: $70–$150 (hoses, clamps, coolant)
You Save: $180–$300 by doing it yourself!
Shop labor rates usually run $100–$150/hour. This repair takes a shop about 1.0–1.5 hours.
🎯 Ready to get started?
HowToo makes it easy: same-day/2-day shipping on every part, plus all the tools and specialty tools you need! Check out the parts and tools sections above to add everything to your cart.