









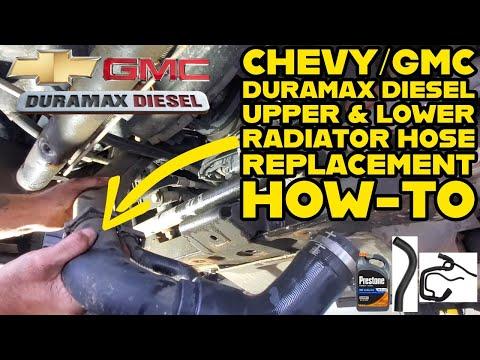







How to Replace the Radiator Hose on a 2018 GMC Sierra 1500 (Upper or Lower)
Step-by-step coolant drain/refill and air purge guide with required tools, parts, and safety tips
How to Replace the Radiator Hose on a 2018 GMC Sierra 1500 (Upper or Lower)
Step-by-step coolant drain/refill and air purge guide with required tools, parts, and safety tips


🔧 Sierra 1500 - Radiator Hose Replacement
On your Sierra 1500, replacing a radiator hose means safely draining some coolant, swapping the hose, then refilling and purging air so it won’t overheat. The exact steps and access change depending on whether it’s the upper hose (radiator to engine) or lower hose (radiator to water pump).
Difficulty Level: Intermediate | Estimated Time: 1-2 hours
⚠️ Safety & Precautions
- ⚠️ Never open the coolant cap hot; let the engine cool completely.
- ⚠️ Coolant is toxic—keep away from kids/pets and clean spills immediately.
- ⚠️ Support the truck on jack stands if you go underneath; never rely on a jack.
- ⚠️ Avoid the cooling fan area; it can start unexpectedly on some conditions.
🔧 Required Tools
You'll need the following tools for this repair:
- Safety glasses
- Nitrile gloves
- Drain pan (at least 3-gallon)
- Floor jack (rated 3-ton minimum)
- Jack stands (rated 3-ton minimum)
- Wheel chocks
- Slip-joint pliers
- Hose clamp pliers (specialty)
- Flathead screwdriver
- 1/4" drive ratchet
- 8mm socket
- 10mm socket
- Pick tool (small hook) (specialty)
- Funnel
🔩 Required Parts
HowToo sells all the parts you need for this repair:
- Radiator hose (upper or lower) - Qty: 1
- Hose clamps - Qty: 2
- DEX-COOL coolant 50/50 premix - Qty: As needed
- Distilled water - Qty: As needed
📋 Before You Begin
- Park on level ground, set the parking brake, and chock the rear wheels.
- Let the engine cool fully (upper radiator hose should feel cool).
- Place a drain pan under the radiator area before loosening any hoses.
- Take a photo of hose routing first.
🔨 Step-by-Step Instructions
Follow these steps in order:
Step 1: Confirm which hose you’re replacing
- Is it the upper hose (top of radiator to engine) or lower hose (bottom of radiator to water pump)?
- Also, do you have spring clamps (pinch type) or screw clamps (worm-gear with a screw)?
Step 2: Relieve pressure safely
- With the engine cool, slowly loosen the coolant reservoir cap by hand to release any leftover pressure.
- Leave the cap resting loose for now.
Step 3: Drain coolant to below hose level
- Position the drain pan under the radiator.
- If you can access the drain, open it using slip-joint pliers or by hand (varies by radiator), and drain enough coolant so the level is below the hose you’re removing.
- If you can’t access a drain, you can carefully loosen the hose at the radiator end and let coolant drain into the pan.
Step 4: Remove components blocking access (if needed)
- If the air intake duct blocks access, loosen the clamps using a flathead screwdriver or 8mm socket, then move the duct aside.
- Remove any small brackets in the way using a 10mm socket and 1/4" drive ratchet.
- Set bolts in a cup so none disappear.
Step 5: Release the hose clamps
- For spring clamps: squeeze the clamp tabs using hose clamp pliers (specialty) and slide the clamp back on the hose.
- For screw clamps: loosen using a flathead screwdriver (or 8mm socket if the clamp uses a hex head) and slide the clamp back.
- Spring-clamp pliers lock; they make it easier.
Step 6: Break the hose free and remove it
- Twist the hose by hand to break it loose from the fitting.
- If it’s stuck, carefully work the edge with a pick tool (small hook) (specialty) to let air in, then twist again.
- Pull the hose off and aim it into the drain pan as coolant will spill.
- Do not pry hard on the radiator neck; it can crack.
Step 7: Prep the fittings and install the new hose
- Wipe the radiator/engine fittings clean using a shop towel (use your gloves).
- Push the new hose on fully until it bottoms out.
- Position clamps behind the hose’s raised bead, then tighten/secure them.
- For screw clamps: tighten using a flathead screwdriver or 8mm socket until snug—do not crush the hose.
Step 8: Reinstall any removed intake/brackets
- Reinstall brackets using a 10mm socket and 1/4" drive ratchet.
- Reinstall the air intake duct and tighten clamps using a flathead screwdriver or 8mm socket.
Step 9: Refill coolant
- Close the radiator drain (if opened).
- Refill at the coolant reservoir using a funnel with DEX-COOL 50/50 premix to the “COLD” line.
- If you drained a lot and used concentrate, top off with distilled water as needed to maintain a proper mix.
Step 10: Purge air and verify circulation
- Start the engine and set HVAC to heat, fan on low.
- Let it idle and watch the coolant level; add coolant as the level drops using a funnel.
- Once the engine reaches operating temp, the upper hose should get hot (thermostat opens) and you should feel steady heat from the vents.
- Install the reservoir cap hand-tight once the level stabilizes.
✅ After Repair
- Test drive 10-15 minutes while monitoring the temperature gauge.
- Park, let it cool completely, then recheck the reservoir level and top off to the “COLD” line.
- Inspect for leaks at both ends of the hose with the engine running.
- If you see drips, slightly reposition/tighten the clamps and recheck.
💰 DIY vs Shop Cost
Shop Cost: $250-$550 (parts + labor)
DIY Cost: $40-$150 (parts only)
You Save: $210-$400 by doing it yourself!
Shop labor rates vary but typically run $100-$150/hour. This repair takes a shop approximately 1-2 hours.
🎯 Ready to get started?
HowToo makes it easy: same-day/2-day shipping on every part, plus all the tools and specialty tools you need! Check out the parts and tools sections below to add everything to your cart.
Guide for replace for these GMC vehicles
| Year Make Model | Sub Model | Engine | Body Style |
|---|