









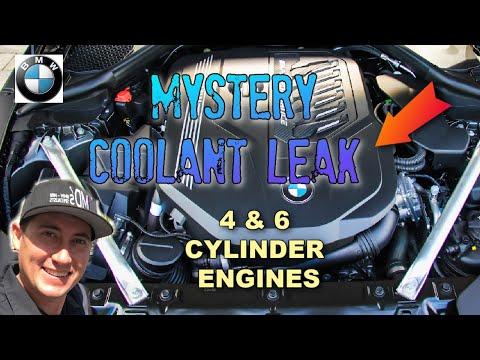







How to Replace the Radiator Hose on a 2016-2019 BMW X1 (Quick-Connect Fittings) (Engine: Inline 4 2.0L)
Step-by-step DIY guide with required tools/parts, coolant refill, electric pump bleeding procedure, and leak checks
How to Replace the Radiator Hose on a 2016-2019 BMW X1 (Quick-Connect Fittings) (Engine: Inline 4 2.0L)
Step-by-step DIY guide with required tools/parts, coolant refill, electric pump bleeding procedure, and leak checks for 2016, 2017, 2018, 2019


🔧 X1 - Radiator Hose Replacement
Replacing a radiator hose stops coolant leaks and prevents overheating. On your X1, the hoses typically use quick-connect fittings with locking clips, so the job is more about careful release and proper bleeding than heavy wrenching.
Difficulty Level: Intermediate | Estimated Time: 1.5-3 hours
Assumption: you’re replacing a main radiator hose (upper or lower) with quick-connect ends.
⚠️ Safety & Precautions
- ⚠️ Never open the coolant cap hot; wait until fully cool.
- ⚠️ Coolant is toxic; keep away from kids/pets and clean spills.
- ⚠️ Use jack stands; never work under a vehicle supported only by a jack.
- ⚠️ Wear gloves and safety glasses; coolant can irritate skin/eyes.
- ⚠️ Battery disconnect is not required, but keep hands clear of the electric cooling fan (it can run unexpectedly).
🔧 Required Tools
You'll need the following tools for this repair:
- Nitrile gloves
- Safety glasses
- Floor jack (rated 3-ton minimum)
- Jack stands (rated 3-ton minimum)
- Wheel chocks
- Trim clip removal tool
- Torx T25 bit
- Torx T30 bit
- 1/4" ratchet
- 3/8" ratchet
- 8mm socket
- 10mm socket
- Flat-blade screwdriver (small)
- Hose clamp pliers
- Pick tool (small hook) (specialty)
- Drain pan (at least 10-quart)
- Funnel
- Shop towels
- Flashlight
🔩 Required Parts
HowToo sells all the parts you need for this repair:
- Radiator hose (upper or lower, as applicable) - Qty: 1
- Hose locking clip(s) / retaining clip(s) - Qty: 1-2
- O-ring seal(s) for hose quick-connect(s) - Qty: 1-2
- BMW-compatible coolant concentrate (HT-12 equivalent) - Qty: 1-2 gallons
- Distilled water - Qty: 1-2 gallons
📋 Before You Begin
- Park on level ground, set the parking brake, and let the engine cool completely.
- Chock the rear wheels with wheel chocks.
- Plan for bleeding: your X1 uses an electric coolant pump bleeding routine after opening the cooling system.
- Place a drain pan under the front of the engine/radiator area before disconnecting any hose.
🔨 Step-by-Step Instructions
Follow these steps in order:
Step 1: Remove the lower splash shield (undertray)
- Raise the front with a floor jack (rated 3-ton minimum) and support with jack stands (rated 3-ton minimum).
- Use a Torx T25 bit, Torx T30 bit, and 8mm socket with a 1/4" ratchet to remove the undertray screws/bolts.
- Use a trim clip removal tool to pop any plastic push-clips.
Step 2: Relieve coolant system pressure (only when cool)
- Open the hood and slowly loosen the coolant expansion tank cap by hand.
- If you hear pressure release, stop and wait a few more minutes, then continue.
Step 3: Drain enough coolant to get below the hose level
- Position the drain pan (at least 10-quart) under the radiator/lower hose area.
- If your hose is the lower radiator hose, expect a larger drain when disconnected.
- Use hose clamp pliers to slide any traditional clamp back (some connections may be quick-connect instead).
Step 4: Disconnect the quick-connect fitting(s)
- At the hose end, locate the locking clip on the connector.
- Use a pick tool (small hook) (specialty) or flat-blade screwdriver (small) to lift/pull the clip to the “unlocked” position.
- Wiggle and pull the hose straight off the neck while holding the connector square.
- Tip: twist gently first, then pull.
- Use shop towels to catch coolant that will spill.
Step 5: Remove the hose routing clips and take the hose out
- Use a trim clip removal tool to release any hose retainers from the fan shroud or brackets.
- Use a flashlight to confirm the hose is free all along its path.
- Remove the hose from the engine bay.
Step 6: Prep the new hose (seals and clips)
- Compare the old and new hose shape and connector angles.
- Install new O-ring seal(s) onto the hose connector(s) if they are separate pieces.
- Lightly wet the O-ring with clean coolant using a funnel or a dab from the bottle (no grease).
- Install/position the new locking clip(s) so they can snap into place.
Step 7: Install the new hose
- Push the hose connector straight onto the radiator/engine neck until it bottoms out.
- Snap the locking clip into the locked position by hand (you should feel it click).
- Gently tug the hose to confirm it’s locked and won’t slide off.
- Reinstall any routing clips using the trim clip removal tool (reverse of removal).
Step 8: Reinstall the undertray
- Reposition the undertray and start all fasteners by hand.
- Use the Torx T25 bit, Torx T30 bit, and 8mm socket with a 1/4" ratchet to tighten snugly.
Step 9: Refill coolant
- Mix BMW-compatible coolant concentrate (HT-12 equivalent) with distilled water to a 50/50 mix unless your coolant is pre-mixed.
- Use a funnel to fill the expansion tank to the MAX line.
- Install the expansion tank cap finger-tight for now.
Step 10: Run the electric coolant pump bleeding procedure
- Turn ignition ON (engine OFF). Do not start the engine.
- Set climate temperature to maximum heat and set the fan to the lowest speed.
- Press and hold the accelerator pedal to the floor for about 10 seconds.
- Listen for the electric pump cycling; it may run for several minutes.
- When it finishes, wait 2–3 minutes, then slowly open the coolant cap and top off as needed using the funnel.
- Tip: expect the level to drop after bleeding.
Step 11: Check for leaks
- Start the engine and let it idle while watching the hose connections with a flashlight.
- Look for seepage at the quick-connect joints and any clamps.
- Shut off the engine and re-check coolant level after it cools, topping off if needed.
✅ After Repair
- Drive for 10–15 minutes, then park and visually re-check for leaks.
- After the engine fully cools, re-check the expansion tank level and adjust to the MAX line.
- If you get a coolant warning, do not ignore it; stop and re-check connections and level.
- Properly dispose of old coolant at a recycling center or parts store that accepts fluids.
💰 DIY vs Shop Cost
Shop Cost: $350-$750 (parts + labor)
DIY Cost: $60-$220 (parts only)
You Save: $290-$530 by doing it yourself!
Shop labor rates vary but typically run $100-$150/hour. This repair takes a shop approximately 1.5-3 hours.
🎯 Ready to get started?
HowToo makes it easy: same-day/2-day shipping on every part, plus all the tools and specialty tools you need! Check out the parts and tools sections below to add everything to your cart.
Guide for Radiator Coolant Hose replace for these BMW vehicles
| Year Make Model | Sub Model | Engine | Body Style |
|---|---|---|---|
| 2019 BMW X1 | - | Inline 4 2.0L | - |
| 2018 BMW X1 | - | Inline 4 2.0L | - |
| 2017 BMW X1 | - | Inline 4 2.0L | - |
| 2016 BMW X1 | - | Inline 4 2.0L | - |