













How to Replace the Radiator Hose on a 2002-2019 Ford Explorer (Engine: V6 3.5L)
Step-by-step instructions with tools, parts, coolant refill tips, and leak checks
How to Replace the Radiator Hose on a 2002-2019 Ford Explorer (Engine: V6 3.5L)
Step-by-step instructions with tools, parts, coolant refill tips, and leak checks for 2002, 2003, 2004, 2005


🔧 Radiator Hose - Replacement
Assumption: This guide covers the engine coolant hose at the radiator connection. If you mean the upper hose, lower hose, or a heater hose, the removal points are different but the replacement process is similar.
The radiator hose carries hot coolant between the engine and radiator, so a leak or soft, swollen hose should be replaced right away. On your Explorer, this job is straightforward if you can safely drain some coolant and access the hose clamps without damaging the fittings.
Difficulty Level: Beginner | Estimated Time: 1-2 hours
⚠️ Safety & Precautions
- Never open the cooling system when the engine is hot; pressurized coolant can spray out and cause burns.
- Use gloves and safety glasses. Coolant is toxic and slippery.
- Support the vehicle only if you need underbody access, and use jack stands on solid ground.
- Keep coolant away from pets and children; clean spills immediately.
- If your hose uses a spring clamp near a fan or tight space, keep fingers clear while releasing it.
- Battery disconnect is not required for this repair unless you must work near the electric fan wiring.
🔧 Required Tools
You'll need the following tools for this repair:
- Drain pan
- Flat-blade screwdriver
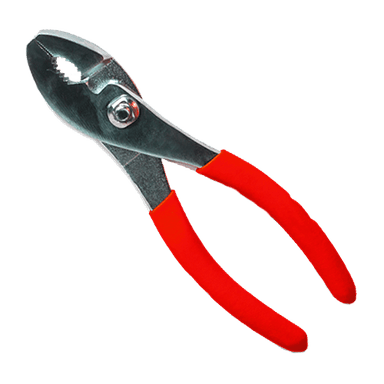
- Pliers
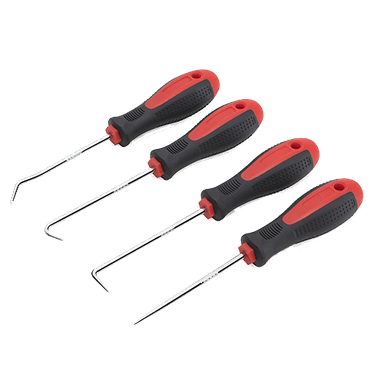
- Pick tool (specialty)
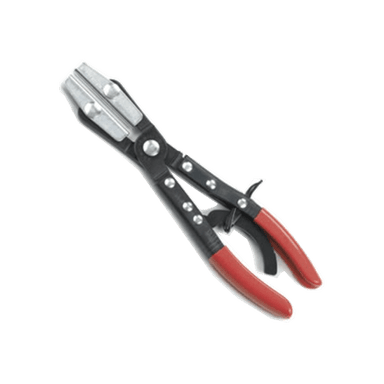
- Hose clamp pliers
- 10mm socket
- Ratchet
- Extension bar
- Funnel
- Floor jack (rated 3-ton minimum)
- Jack stands
- Gloves
- Safety glasses
- Shop towels
🔩 Required Parts
HowToo sells all the parts you need for this repair:
- Radiator hose - Qty: 1
- Radiator hose clamps - Qty: 2
- Motorcraft orange coolant - Qty: 1-2 gallons
- Coolant degas bottle cap - Qty: 1
📋 Before You Begin
- Park on level ground and set the parking brake.
- Let the engine cool completely before opening the cooling system.
- Open the hood and locate the hose routing before removing anything.
- Place a drain pan under the radiator drain area.
- If the hose has quick-connect ends, release the lock tabs gently before pulling.
🔨 Step-by-Step Instructions
Follow these steps in order:
Step 1: Relieve coolant pressure
- With the engine fully cool, slowly loosen the degas bottle cap to release any remaining pressure.
- Remove the cap and set it aside in a clean spot.
Step 2: Drain coolant to a safe level
- Place the drain pan under the radiator drain area.
- Open the radiator drain or lower hose connection just enough to lower the coolant level below the hose you are replacing.
- Use pliers or a flat-blade screwdriver depending on the clamp style.
Step 3: Remove the old hose
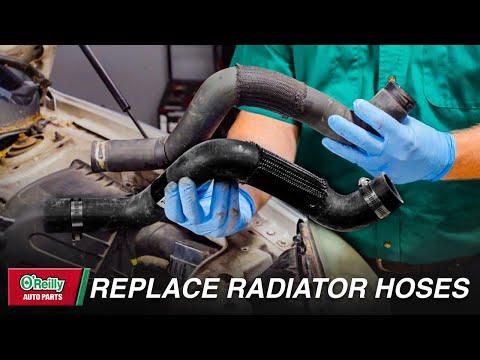
- Use hose clamp pliers to move the spring clamps back on both ends.
- Twist the hose gently by hand to break it loose.
- If the hose is stuck, use a pick tool (specialty) carefully at the end of the hose seal.
- Pull the hose off the radiator neck and engine fitting.
- Do not pry hard on plastic fittings.
Step 4: Inspect the fittings
- Check both hose necks for cracks, rust, or coolant residue.
- Wipe the sealing surfaces clean with shop towels.
- If the hose neck is damaged, replace that part before continuing.
Step 5: Install the new hose
- Match the new hose to the old one for length and bend shape.
- Slide the clamps onto the new hose first.
- Push the hose fully onto the radiator neck and engine fitting until it seats past the lip.
- Position the clamps in the same clamp marks as the original hose.
- Use hose clamp pliers to secure both clamps.
Step 6: Refill the cooling system
- Use a funnel to refill with the correct coolant.
- Add coolant slowly until the degas bottle reaches the proper mark.
- Install the cap securely.
Step 7: Bleed air from the system
- Start the engine and let it idle.
- Set the cabin heat to full hot and the fan on low.
- Watch the coolant level and top off as air bubbles purge.
- Use a 10mm socket and ratchet only if you need to remove any splash shield or cover for access.
Step 8: Check for leaks
- Inspect both hose ends while the engine warms up.
- Look for drips, seepage, or a loose clamp.
- Shut the engine off and recheck the level after it cools.
✅ After Repair
- Drive the Explorer a short distance and recheck coolant level after it cools fully.
- Inspect the hose again the next day for any wetness or coolant odor.
- If the temperature gauge rises above normal, stop driving and inspect for air in the system or a leak.
- Dispose of old coolant properly.
💰 DIY vs Shop Cost
Shop Cost: $180-$420 (parts + labor)
DIY Cost: $35-$120 (parts only)
You Save: $145-$300 by doing it yourself!
Shop labor rates vary but typically run $100-$150/hour. This repair takes a shop approximately 1-2 hours.
🎯 Ready to get started?
HowToo makes it easy: same-day/2-day shipping on every part, plus all the tools and specialty tools you need! Check out the parts and tools sections below to add everything to your cart.
Guide for Radiator Coolant Hose replace for these Ford vehicles
| Year Make Model | Sub Model | Engine | Body Style |
|---|---|---|---|
| 2019 Ford Explorer | - | V6 3.5L | - |
| 2019 Ford Explorer | - | Inline 4 2.3L | - |
| 2018 Ford Explorer | - | V6 3.5L | - |
| 2018 Ford Explorer | - | Inline 4 2.3L | - |
| 2017 Ford Explorer | - | V6 3.5L | - |
| 2017 Ford Explorer | - | Inline 4 2.3L | - |
| 2016 Ford Explorer | - | V6 3.5L | - |
| 2016 Ford Explorer | - | Inline 4 2.3L | - |
| 2015 Ford Explorer | - | V6 3.5L | - |
| 2015 Ford Explorer | - | Inline 4 2.0L | - |
| 2014 Ford Explorer | - | V6 3.5L | - |
| 2014 Ford Explorer | - | Inline 4 2.0L | - |
| 2013 Ford Explorer | - | V6 3.5L | - |
| 2013 Ford Explorer | - | Inline 4 2.0L | - |
| 2012 Ford Explorer | - | V6 3.5L | - |
| 2012 Ford Explorer | - | Inline 4 2.0L | - |
| 2011 Ford Explorer | - | V6 3.5L | - |
| 2005 Ford Explorer | - | V6 4.0L | - |
| 2005 Ford Explorer | - | V8 4.6L | - |
| 2004 Ford Explorer | - | V6 4.0L | - |
| 2004 Ford Explorer | - | V8 4.6L | - |
| 2003 Ford Explorer | - | V6 4.0L | - |
| 2003 Ford Explorer | - | V8 4.6L | - |
| 2002 Ford Explorer | - | V6 4.0L | - |
| 2002 Ford Explorer | - | V8 4.6L | - |