


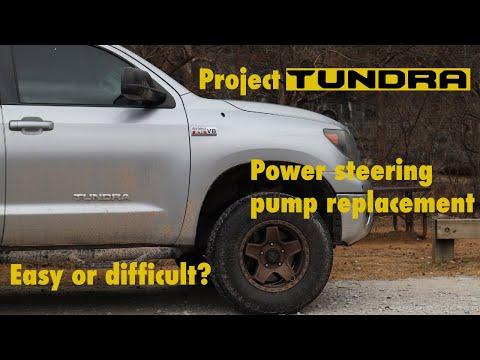


How to Replace the Power Steering Pump on a 2016 Toyota Tundra
Step-by-step instructions with tools, parts, torque specs, safety tips, and bleeding steps for 2007, 2008, 2009, 2010, 2011, 2012, 2013, 2014
How to Replace the Power Steering Pump on a 2016 Toyota Tundra
Step-by-step instructions with tools, parts, torque specs, safety tips, and bleeding steps for 2007, 2008, 2009, 2010, 2011, 2012, 2013, 2014
🔧 Power Steering Pump - Replacement
The power steering pump on your Tundra drives hydraulic steering assist. Replacing it means removing the belt, hoses, and pump, then installing the new unit and bleeding air out of the system.
Difficulty Level: Intermediate | Estimated Time: 2-4 hours
⚠️ Safety & Precautions
- Work with the engine off and cool before touching the belt or pump.
- Keep hands clear of the fan and pulleys.
- Use a drain pan because power steering fluid will spill when hoses are removed.
- Do not start the engine with the reservoir empty.
- No battery disconnect is required for this repair.
🔧 Required Tools
You'll need the following tools for this repair:
- Ratchet
- 3/8-inch drive socket set
- 10mm socket
- 12mm socket
- 14mm socket
- Extensions
- Serpentine belt tool or long-handled breaker bar
- Line wrench set
- Drain pan
- Shop towels
- Funnel
- Jack and jack stands
- Safety glasses
- Mechanic gloves
🔩 Required Parts
HowToo sells all the parts you need for this repair:
- Power steering pump - Qty: 1
- Power steering fluid - Qty: 2 quarts
- O-ring seals for power steering lines - Qty: 1 set
📋 Before You Begin
- Park on level ground and set the parking brake.
- Let the engine cool fully.
- Raise the front of the truck if needed for easier access, then support it securely on jack stands.
- Have rags ready before disconnecting any hose.
🔨 Step-by-Step Instructions
Follow these steps in order:
Step 1: Remove the engine cover and gain access
- Remove the engine cover by hand if equipped.
- Use a 10mm socket to remove any intake ducting or brackets blocking access to the pump.
Step 2: Remove the serpentine belt
- Use a serpentine belt tool or long-handled breaker bar to rotate the belt tensioner.
- Slip the belt off the power steering pump pulley.
- Note the belt routing before removal. Take a quick photo first.
Step 3: Drain the power steering fluid
- Place a drain pan under the pump and hoses.
- Remove the reservoir cap.
- Use a line wrench if needed, then disconnect the return hose first and let the fluid drain.
Step 4: Disconnect the hoses
- Use a line wrench set to remove the high-pressure line fitting from the pump.
- Remove the return hose clamp and hose.
- Cap or cover open lines to keep dirt out.
Step 5: Remove the pump
- Use a 14mm socket and 12mm socket to remove the pump mounting bolts.
- Lift the pump out of the bracket carefully.
- If a bracket is attached, remove it only if needed for access.
Step 6: Transfer any brackets or pulley if needed
- If your replacement pump does not come with the pulley, transfer the pulley using the correct pulley installer/remover (specialty).
- Transfer any mounting brackets from the old pump to the new one.
- Do not hammer on the pulley.
Step 7: Install the new pump
- Set the new pump in place and start all bolts by hand.
- Use a 12mm socket and 14mm socket to tighten the mounting bolts.
- Torque to 39 Nm (29 ft-lbs) unless your replacement pump instructions specify otherwise.
Step 8: Reconnect the hoses
- Install new O-ring seals on the pressure line fitting if supplied.
- Use a line wrench set to reinstall the high-pressure line.
- Reconnect the return hose and clamp securely.
- Torque the pressure line fitting to 34 Nm (25 ft-lbs).
Step 9: Reinstall the serpentine belt
- Route the belt back over all pulleys using the correct factory path.
- Use the serpentine belt tool or long-handled breaker bar to release the tensioner and slip the belt onto the last pulley.
- Make sure the belt sits fully in every pulley groove.
Step 10: Fill and bleed the system
- Use a funnel to fill the reservoir with the correct power steering fluid.
- With the front wheels off the ground, turn the steering wheel slowly from lock to lock several times.
- Top off the fluid as the air works out.
- Do not hold the wheel against the stop for more than 2-3 seconds.
Step 11: Check for leaks and noise
- Start the engine and let it idle.
- Inspect the pump, hose fittings, and reservoir for leaks.
- Listen for whining. A little noise at first can be normal while air escapes.
✅ After Repair
- Recheck fluid level with the engine warm and idling.
- Test steering assist at low speed in a safe area.
- Reinspect all connections after your road test.
- If the steering remains noisy or foamy, bleed the system again.
💰 DIY vs Shop Cost
Shop Cost: $700-$1,300 (parts + labor)
DIY Cost: $180-$450 (parts only)
You Save: $520-$850 by doing it yourself!
Shop labor rates vary but typically run $100-$150/hour. This repair takes a shop approximately 2-4 hours.
🎯 Ready to get started?
HowToo makes it easy: same-day/2-day shipping on every part, plus all the tools and specialty tools you need! Check out the parts and tools sections below to add everything to your cart.
