









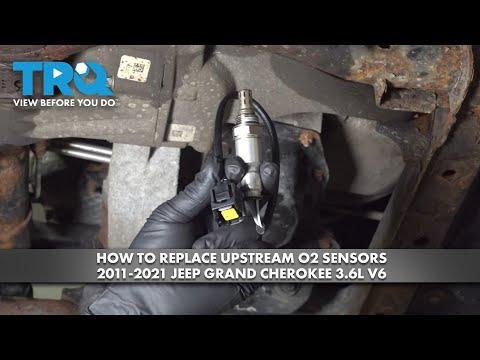





How to Replace the Oxygen Sensor on a 2017 Jeep Grand Cherokee 3.6L
Step-by-step instructions with tools, parts, torque specs, safety tips, and verification for 2016, 2017, 2018, 2019, 2020
How to Replace the Oxygen Sensor on a 2017 Jeep Grand Cherokee 3.6L
Step-by-step instructions with tools, parts, torque specs, safety tips, and verification for 2016, 2017, 2018, 2019, 2020


🔧 Oxygen Sensor - Replacement
This covers replacing one oxygen sensor on your Grand Cherokee 3.6L. The sensor threads into the exhaust and sends fuel mixture feedback to the engine computer, so a bad one can cause rough running, poor fuel economy, or check engine lights.
Difficulty Level: Intermediate | Estimated Time: 1-2 hours
⚠️ Safety & Precautions
- Let the exhaust cool fully before starting. Hot exhaust parts can cause serious burns.
- Use jack stands on a flat surface. Never work under a vehicle supported only by a jack.
- Disconnect the negative battery cable before unplugging the sensor connector if you want to avoid setting additional codes.
- Keep wiring away from the exhaust. A new sensor can fail fast if the harness touches hot pipes.
- If the sensor is seized, use penetrating oil and let it soak. Do not force it with a small wrench.
🔧 Required Tools
You'll need the following tools for this repair:
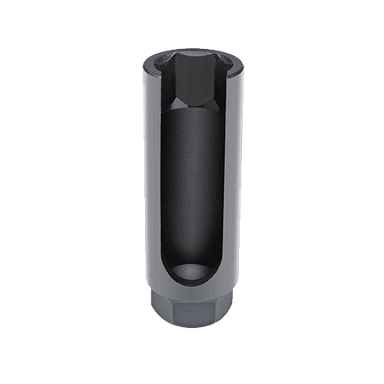
- Oxygen sensor socket 7/8 in. (22mm) or 6-point crowfoot wrench
- 3/8-inch ratchet
- 3/8-inch extension
- Breaker bar
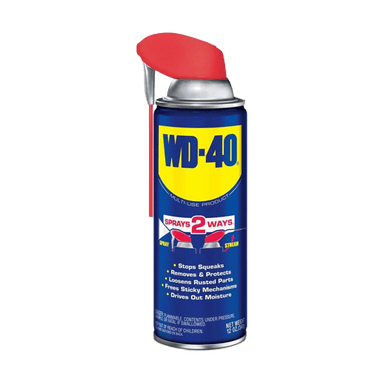
- Penetrating oil
- Torque wrench
- Jack stands
- Floor jack (rated 3-ton minimum)
- Wheel chocks
- Safety glasses
- Mechanic gloves
- Trim clip tool
🔩 Required Parts
HowToo sells all the parts you need for this repair:
- Oxygen sensor - Qty: 1
📋 Before You Begin
- Park on level ground, set the parking brake, and chock the rear wheels.
- Let the exhaust cool completely.
- If replacing an upstream sensor, plan for a check engine light to clear only after a proper drive cycle or scan tool clear.
- If your Grand Cherokee has an underbody shield in the way, remove it before reaching the sensor.
🔨 Step-by-Step Instructions
Follow these steps in order:
Step 1: Raise and secure the vehicle
- Use the floor jack to lift the front or rear of the vehicle, depending on which sensor you are replacing.
- Support it with jack stands before going underneath.
- Use wheel chocks on the opposite axle.
Step 2: Locate the oxygen sensor
- Find the sensor threaded into the exhaust pipe or catalytic converter area.
- Follow the sensor wire to its connector and note the routing before unplugging it.
- Take a quick photo first.
Step 3: Disconnect the sensor connector
- Use the trim clip tool to release any harness clips holding the wire to the body or heat shield.
- Press the lock tab and unplug the sensor connector by hand.
- Do not pull on the wire itself.
Step 4: Remove the old sensor
- Spray the sensor threads with penetrating oil and wait a few minutes if it is rusted.
- Use the oxygen sensor socket 7/8 in. (22mm) with a 3/8-inch ratchet or breaker bar to loosen it.
- Turn counterclockwise to remove the sensor from the exhaust.
- If the sensor is tight, work it slowly to avoid damaging the exhaust bung.
Step 5: Prepare the new sensor
- Compare the new sensor to the old one for connector shape and wire length.
- If the replacement sensor does not come with anti-seize, do not add any unless the sensor maker says it is allowed.
- Keep the tip clean.
Step 6: Install the new sensor
- Thread the new sensor in by hand first to avoid cross-threading.
- Use the oxygen sensor socket 7/8 in. (22mm) and torque wrench to tighten it to Torque to 40 Nm (30 ft-lbs).
- Reconnect the electrical connector until it clicks.
- Reinstall all harness clips so the wire stays away from the exhaust.
Step 7: Lower the vehicle and verify repair
- Remove the tools, lower the vehicle, and reconnect the battery if you disconnected it.
- Start the engine and check for exhaust leaks, warning lights, or loose wiring.
- If the check engine light stays on, clear codes with a scan tool and perform a short drive cycle.
✅ After Repair
- Road test the vehicle and make sure the engine runs smoothly.
- Check that the warning light does not return.
- Inspect the sensor harness again after the test drive to confirm it is not touching the exhaust.
💰 DIY vs Shop Cost
Shop Cost: $250-$450 (parts + labor)
DIY Cost: $60-$180 (parts only)
You Save: $190-$270 by doing it yourself!
Shop labor rates vary but typically run $100-$150/hour. This repair takes a shop approximately 1-2 hours.
🎯 Ready to get started?
HowToo makes it easy: same-day/2-day shipping on every part, plus all the tools and specialty tools you need! Check out the parts and tools sections below to add everything to your cart.