









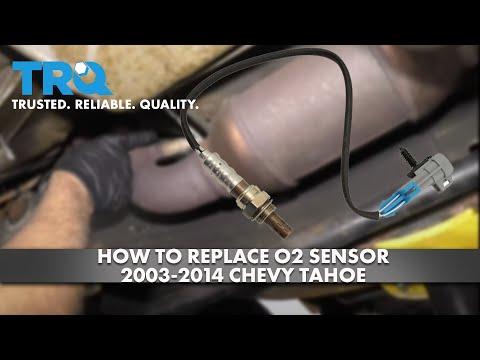






How to Replace the Oxygen Sensor on a 2012 GMC Sierra 1500
Step-by-step instructions with tools, torque specs, safety tips, and code reset guidance for 2008, 2009, 2010, 2011, 2012, 2013
How to Replace the Oxygen Sensor on a 2012 GMC Sierra 1500
Step-by-step instructions with tools, torque specs, safety tips, and code reset guidance for 2008, 2009, 2010, 2011, 2012, 2013


🔧 Oxygen Sensor - Replacement
On your Sierra, the oxygen sensor threads into the exhaust and plugs into the engine harness with a sealed connector. The job is usually straightforward, but rust and heat can make the sensor tight, so proper tools and patience matter.
Difficulty Level: Intermediate | Estimated Time: 1-2 hours
⚠️ Safety & Precautions
- The exhaust gets extremely hot. Let the truck cool fully before starting.
- Use jack stands on level ground if you need to reach the sensor from underneath.
- Disconnect the negative battery cable if the connector is close to the starter wiring or you want extra safety.
- Do not touch the sensor tip with greasy hands. Contamination can damage the new sensor.
- If you are replacing an upstream sensor, the engine may run poorly if the repair is delayed.
🔧 Required Tools
You'll need the following tools for this repair:
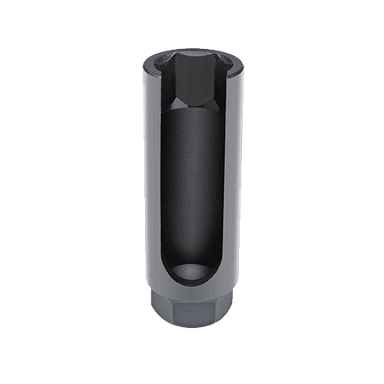
- Oxygen sensor socket 7/8-inch
- 3/8-inch drive ratchet
- 3/8-inch drive extension set
- Penetrating oil
- Floor jack (rated 3-ton minimum)
- Jack stands (rated 3-ton minimum)
- Wheel chocks
- 10mm socket
- Ratchet wrench
- Torque wrench
- Gloves
- Safety glasses
- OBD-II scan tool
🔩 Required Parts
HowToo sells all the parts you need for this repair:
- Oxygen sensor - Qty: 1
📋 Before You Begin
- Park on level ground and set the parking brake.
- Let the exhaust cool completely.
- If the sensor is under the truck, raise it safely and support it with jack stands.
- Assumption: this guide covers the single failed oxygen sensor you are replacing.
🔨 Step-by-Step Instructions
Follow these steps in order:
Step 1: Disconnect power and raise the truck
- Use a 10mm socket to disconnect the negative battery cable if you want to reduce the chance of a short.
- If the sensor is below the truck, use a floor jack and jack stands to raise and support it securely.
- Use wheel chocks at the rear wheels.
Step 2: Find the oxygen sensor connector
- Locate the sensor on the exhaust pipe or manifold.
- Follow the wire to its connector and unclip it from any retainers by hand.
- Trace the wire before loosening the sensor.
Step 3: Unplug the sensor
- Press the connector lock tab and separate the connector.
- If the lock is stubborn, use your fingers only and work it gently. Avoid prying on the wires.
Step 4: Loosen the old sensor
- Spray penetrating oil on the sensor threads if it looks rusty.
- Use the oxygen sensor socket 7/8-inch, 3/8-inch drive ratchet, and extension to break the sensor loose.
- Turn counterclockwise to remove it.
- Work it slowly to avoid rounding the flats.
Step 5: Install the new sensor
- Compare the old and new sensor to make sure the connector and wire length match.
- Thread the new sensor in by hand first to prevent cross-threading.
- Use the oxygen sensor socket 7/8-inch and torque wrench to tighten it to 41 Nm (30 ft-lbs).
- Route the wire exactly like the original and clip it into the retainers.
Step 6: Reconnect and finish up
- Reconnect the sensor connector until it clicks.
- If you disconnected the battery, reconnect the negative cable with the 10mm socket.
- Lower the truck if it was raised.
✅ After Repair
- Start the engine and check that the exhaust leak light is off.
- Use the OBD-II scan tool to clear the stored code.
- Drive the truck for a short test drive and confirm the code does not return.
- If the code comes back immediately, inspect the wiring, connector, and the opposite sensor on that bank.
💰 DIY vs Shop Cost
Shop Cost: $180-$420 (parts + labor)
DIY Cost: $60-$180 (parts only)
You Save: $120-$240 by doing it yourself!
Shop labor rates vary but typically run $100-$150/hour. This repair takes a shop approximately 0.8-1.2 hours.
🎯 Ready to get started?
HowToo makes it easy: same-day/2-day shipping on every part, plus all the tools and specialty tools you need! Check out the parts and tools sections below to add everything to your cart.