
















How to Replace the Oxygen Sensor on a 2011-2014 Chevrolet Equinox (Engine: V6 3.6L)
Step-by-step instructions with tools, torque specs, safety tips, and troubleshooting
How to Replace the Oxygen Sensor on a 2011-2014 Chevrolet Equinox (Engine: V6 3.6L)
Step-by-step instructions with tools, torque specs, safety tips, and troubleshooting for 2011, 2012, 2013, 2014


🔧 Equinox - Oxygen Sensor Replacement
Assumption: this covers the common Bank 1 Sensor 1 (upstream) or Bank 1 Sensor 2 (downstream) oxygen sensor on your Equinox. The replacement process is very similar, but the sensor location changes depending on which one you are replacing.
Difficulty Level: Intermediate | Estimated Time: 0.5-1.5 hours
⚠️ Safety & Precautions
- Let the exhaust cool fully before starting. The exhaust and sensor threads can be very hot.
- Use jack stands if you need to reach the downstream sensor under the vehicle. Never work under a vehicle supported only by a jack.
- Disconnect the negative battery cable before unplugging the sensor harness. This helps prevent shorts.
- Do not pull on the wire. Unplug the connector by the locking tab only.
- If the sensor is seized, use penetrating oil and controlled force. Do not damage the exhaust bung threads.
🔧 Required Tools
You'll need the following tools for this repair:
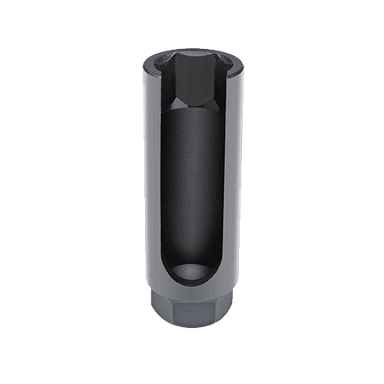
- 22mm oxygen sensor socket
- 3/8-inch ratchet
- 3-inch extension
- Penetrating oil
- Torque wrench
- Flat-blade trim tool
- Floor jack (rated 3-ton minimum)
- Jack stands (rated 3-ton minimum)
- Wheel chocks
- Safety glasses
- Mechanic gloves
🔩 Required Parts
HowToo sells all the parts you need for this repair:
- Oxygen sensor - Qty: 1
📋 Before You Begin
- Park on level ground and set the parking brake.
- If replacing the downstream sensor, raise the front of the vehicle and support it securely with jack stands.
- Let the exhaust cool completely before touching the sensor.
- Disconnect the negative battery cable before unplugging the sensor connector.
🔨 Step-by-Step Instructions
Follow these steps in order:
Step 1: Disconnect battery power
- Use a 10mm wrench to remove the negative battery cable from the battery.
- Move the cable aside so it cannot touch the terminal.
Step 2: Locate the sensor
- Upstream sensor: located on the exhaust manifold / front exhaust pipe ahead of the catalytic converter.
- Downstream sensor: located in the exhaust pipe after the catalytic converter, under the vehicle.
- Trace the sensor wire first.
Step 3: Unplug the sensor connector
- Use a flat-blade trim tool to release the connector lock if needed.
- Unplug the oxygen sensor connector from the harness.
- Free the wire from any clips so it can turn with the sensor.
Step 4: Remove the old oxygen sensor
- Spray the sensor threads with penetrating oil if they are rusty.
- Use a 22mm oxygen sensor socket with a 3/8-inch ratchet and 3-inch extension to loosen and remove the sensor.
- If it is stubborn, work it back and forth gently. Do not round off the hex.
Step 5: Install the new sensor
- Thread the new sensor in by hand first to avoid cross-threading.
- Use the 22mm oxygen sensor socket to snug it down.
- Torque to 41 Nm (30 ft-lbs).
Step 6: Reconnect the harness
- Reconnect the sensor plug until it clicks.
- Make sure the wire is clipped away from the exhaust and moving parts.
Step 7: Restore power and verify
- Reconnect the negative battery cable using a 10mm wrench.
- Start the engine and check for warning lights, exhaust leaks, or loose wiring.
✅ After Repair
- Clear any stored fault codes with a scan tool if the check engine light stays on.
- Let the engine idle for a few minutes and listen for exhaust leaks.
- Drive normally and recheck for codes after one full drive cycle.
💰 DIY vs Shop Cost
Shop Cost: $180-$450 (parts + labor)
DIY Cost: $60-$160 (parts only)
You Save: $120-$290 by doing it yourself!
Shop labor rates vary but typically run $100-$150/hour. This repair takes a shop approximately 0.5-1.0 hours.
🎯 Ready to get started?
HowToo makes it easy: same-day/2-day shipping on every part, plus all the tools and specialty tools you need! Check out the parts and tools sections below to add everything to your cart.
Guide for Oxygen Sensor replace for these Chevrolet vehicles
| Year Make Model | Sub Model | Engine | Body Style |
|---|---|---|---|
| 2014 Chevrolet Equinox | - | Inline 4 2.4L | - |
| 2013 Chevrolet Equinox | - | Inline 4 2.4L | - |
| 2012 Chevrolet Equinox | - | Inline 4 2.4L | - |
| 2011 Chevrolet Equinox | - | Inline 4 2.4L | - |