


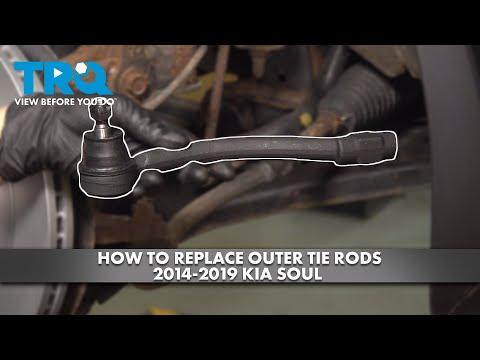


How to Replace the Outer Tie Rod End on a 2018 Kia Soul (Front Left/Right)
Step-by-step steering repair with tools, parts list, torque points, toe-marking tips, and alignment guidance
How to Replace the Outer Tie Rod End on a 2018 Kia Soul (Front Left/Right)
Step-by-step steering repair with tools, parts list, torque points, toe-marking tips, and alignment guidance


🔧 Soul - Outer Tie Rod End Replacement
Replacing the outer tie rod end restores safe steering and helps prevent tire wear and wandering. The job is straightforward mechanically, but it’s critical to preserve the toe setting closely and then get a professional alignment afterward.
Difficulty Level: Intermediate | Estimated Time: 1.0-2.0 hours
⚠️ Safety & Precautions
- ⚠️ Support your Soul on jack stands; never rely on a jack alone.
- ⚠️ Keep hands clear of pinch points while separating the joint from the knuckle.
- ⚠️ If you use a hammer, wear safety glasses and avoid hitting the threaded stud.
- ⚠️ Plan on a front-end alignment after replacement; driving without it can cause poor handling and rapid tire wear.
🔧 Required Tools
You'll need the following tools for this repair:
- Floor jack (rated 2-ton minimum)
- Jack stands (rated 2-ton minimum)
- Wheel chocks
- Safety glasses
- Mechanic gloves
- Lug nut socket (21mm)
- Breaker bar (1/2")
- Torque wrench (1/2")
- Open-end wrench set (17mm-22mm)
- Socket set (10mm-22mm)
- Pliers
- Diagonal cutters
- Tie rod end puller (specialty)
- Penetrating oil
- Paint marker
- Tape measure
🔩 Required Parts
HowToo sells all the parts you need for this repair:
- Outer tie rod end - Qty: 1
- Cotter pin - Qty: 1
📋 Before You Begin
- 🅿️ Park on level ground, set the parking brake, and chock the rear wheels.
- Loosen the front wheel lug nuts slightly using a 21mm lug nut socket and breaker bar before lifting.
- Spray penetrating oil on the tie rod end lock nut and the stud/nut at the steering knuckle.
- Use a paint marker to mark the lock nut position on the tie rod threads. This helps keep the alignment close.
🔨 Step-by-Step Instructions
Follow these steps in order:
Step 1: Confirm the side and torque-spec source
- I need 2 quick details before I give you the exact Kia torque specs (so we don’t guess):
- Which side are you replacing: front left or front right?
- Do you want me to use the Kia factory torque specs (recommended)—and if so, do you have access to a spec source you’re using (manual/app), or should I provide the steps now and flag the exact torque points for you to torque once you confirm specs?
Step 2: Lift and remove the wheel
- Lift the front corner using a floor jack at the proper front lift point.
- Place jack stands under the pinch weld/support point and lower the vehicle onto the stands.
- Remove the lug nuts using a 21mm lug nut socket and take the wheel off.
Step 3: Measure the current toe reference
- Use a tape measure to measure from a fixed point on the tie rod (or inner tie rod) to the end of the outer tie rod end, and write it down.
- This helps keep the new part close.
Step 4: Loosen the tie rod end lock nut
- Hold the inner tie rod with an open-end wrench (size varies) so it doesn’t twist.
- Break the lock nut loose using the correct-size open-end wrench.
Step 5: Remove the cotter pin and castle nut
- Straighten and remove the cotter pin using pliers or diagonal cutters.
- Remove the castle nut using the correct-size socket and ratchet.
Step 6: Separate the tie rod end from the steering knuckle
- Install a tie rod end puller (specialty) and tighten it until the stud pops free from the knuckle.
- A puller avoids damaging the boot.
Step 7: Remove the outer tie rod end
- Spin the outer tie rod end off the inner tie rod while counting the turns (example: “18 turns”).
- Write down the exact number of turns.
Step 8: Install the new outer tie rod end
- Thread the new outer tie rod end on by the same number of turns you counted.
- Align it to your paint mark and your measurement as closely as possible.
- Insert the stud into the steering knuckle by hand.
Step 9: Tighten fasteners (torque points)
- Tighten the tie rod end-to-knuckle nut using a torque wrench (1/2") to the Kia factory spec.
- Install a new cotter pin using pliers. If the cotter hole doesn’t line up, tighten the nut slightly to align—do not loosen to align.
- Tighten the lock nut using a torque wrench (1/2") (or wrench + torque adapter) to the Kia factory spec.
Step 10: Reinstall the wheel
- Reinstall the wheel and hand-thread lug nuts.
- Lower the vehicle from the jack stands using the floor jack.
- Torque the lug nuts using a torque wrench (1/2") to the Kia factory spec in a star pattern.
✅ After Repair
- Turn the steering wheel lock-to-lock with the car parked and confirm nothing binds or clunks.
- Road test at low speed and confirm the steering wheel is centered and the vehicle tracks straight.
- Get a professional front-end alignment as soon as possible.
💰 DIY vs Shop Cost
Shop Cost: $180-$400 (parts + labor + alignment)
DIY Cost: $25-$90 (parts only)
You Save: $155-$310 by doing it yourself!
Shop labor rates vary but typically run $100-$150/hour. This repair takes a shop approximately 1.0-1.5 hours.
🎯 Ready to get started?
HowToo makes it easy: same-day/2-day shipping on every part, plus all the tools and specialty tools you need! Check out the parts and tools sections below to add everything to your cart.