


How to Replace the Outer Tie Rod End on a 2018 Ford Explorer (DIY Guide)
Step-by-step instructions with required tools, parts, safety tips, and alignment notes
How to Replace the Outer Tie Rod End on a 2018 Ford Explorer (DIY Guide)
Step-by-step instructions with required tools, parts, safety tips, and alignment notes


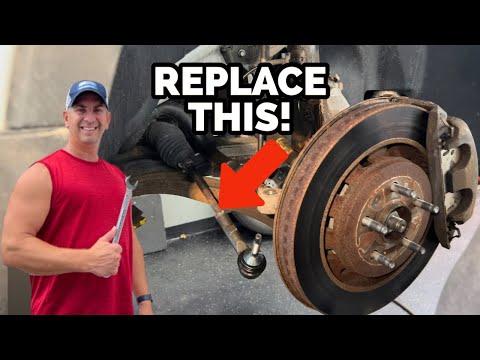
🔧 Explorer - Outer Tie Rod End Replacement
Replacing the outer tie rod end restores safe steering and helps prevent uneven tire wear. This job is very doable at home, but an alignment is required afterward because the toe setting changes.
Before I give you the exact Ford torque specs and the correct steps: which side are you replacing (driver or passenger), and is it the outer tie rod end at the wheel (not the inner tie rod at the steering rack)?
Difficulty Level: Intermediate | Estimated Time: 1.0-2.0 hours (plus alignment)
⚠️ Safety & Precautions
- 🛑 Support your Explorer with jack stands—never rely on a floor jack alone.
- 🧤 Wear gloves and safety glasses; rust and debris fall when you separate the joint.
- 🧯 Don’t strike the threaded stud directly with a hammer; you can damage threads and the knuckle.
- 🔧 After replacement, get a professional alignment ASAP to avoid tire wear and steering pull.
🔧 Required Tools
You'll need the following tools for this repair:
- Floor jack (rated 3-ton minimum)
- Jack stands (rated 3-ton minimum) - Qty: 2
- Wheel chocks - Qty: 2
- 21mm socket
- 1/2" drive ratchet
- Breaker bar (1/2" drive)
- Torque wrench (20-200 ft-lbs)
- Combination wrench set (metric)
- Pliers (for cotter pin)
- Tie rod end puller (specialty)
- Wire brush
- Penetrating oil
- Paint marker
- Tape measure
- Safety glasses
- Mechanic gloves
🔩 Required Parts
HowToo sells all the parts you need for this repair:
- Outer tie rod end - Qty: 1
- New cotter pin - Qty: 1
- Thread locker (medium strength) - Qty: 1
📋 Before You Begin
- Park on level ground, steering wheel centered, and set the parking brake.
- Chock the rear wheels with wheel chocks.
- Spray penetrating oil on the outer tie rod end jam nut and the stud nut at the knuckle; let it soak 10–15 minutes.
- Use a paint marker to mark the jam nut position against the inner tie rod threads. This helps get you close for alignment.
🔨 Step-by-Step Instructions
Follow these steps in order:
Step 1: Lift and secure the front corner
- Use a floor jack to lift the front corner you’re working on.
- Set the vehicle onto jack stands at the proper support point.
- Remove the wheel using a 21mm socket and breaker bar.
Step 2: Verify what you’re replacing (outer vs inner)
- The outer tie rod end is the joint that bolts into the steering knuckle at the wheel.
- The inner tie rod is closer to the steering rack (under the boot).
- If you confirm it’s the outer, continue. If it’s the inner, stop and tell me—steps and tools are different.
Step 3: Measure and mark for a “close” alignment
- Use a tape measure to measure from a fixed point on the inner tie rod to the center of the outer tie rod stud, and write it down.
- Use a paint marker to mark the jam nut’s exact position.
- This won’t replace an alignment—just helps you drive there.
Step 4: Loosen the jam nut
- Hold the inner tie rod area with an appropriate combination wrench (metric) if needed.
- Back off the jam nut using the correct combination wrench (metric) (size varies by part brand).
Step 5: Remove the cotter pin (if equipped)
- Use pliers to straighten and remove the cotter pin from the stud nut.
- If the cotter pin breaks, remove all pieces before continuing.
Step 6: Remove the outer tie rod stud nut
- Use the correct socket from your metric socket set and a ratchet to remove the nut from the tie rod stud at the knuckle.
- Use a wire brush first if the threads are rusty.
Step 7: Separate the tie rod end from the steering knuckle
- Install a tie rod end puller (specialty) and tighten it until the stud pops free.
- A “puller” is a tool that presses the joint apart without damaging the boot.
Step 8: Unscrew the old outer tie rod end
- Spin the outer tie rod end off the inner tie rod while counting the exact number of turns.
- Write the number down—install the new one using the same number of turns.
Step 9: Install the new outer tie rod end (set it close)
- Thread the new outer tie rod end on the inner tie rod the same number of turns you counted.
- Line up your paint marks and/or your tape-measure dimension.
- Snug the jam nut by hand for now.
Step 10: Seat the stud into the knuckle and tighten (STOP for torque confirmation)
- Insert the new tie rod stud into the steering knuckle.
- Install the stud nut by hand to avoid cross-threading.
- Stop here: the exact nut and jam-nut torque (and whether it’s a castle nut + cotter pin) can vary by side/part setup. Answer my two questions (driver/passenger, outer/inner) and I’ll give you the correct Ford torque specs and finish steps with Torque to XX Nm (YY ft-lbs).
✅ After Repair
- Reinstall the wheel and hand-tighten lug nuts, then lower the vehicle using the floor jack.
- Tighten lug nuts in a star pattern using a torque wrench to the factory wheel torque spec (I’ll provide it with your side confirmation).
- Drive slowly to an alignment shop; keep speeds low if steering feels off-center.
- After alignment, recheck that the jam nut is tight and there’s no boot twist.
💰 DIY vs Shop Cost
Shop Cost: $250-$500 (parts + labor + alignment)
DIY Cost: $40-$120 (parts only, alignment extra)
You Save: $130-$380 by doing it yourself!
Shop labor rates vary but typically run $100-$150/hour. This repair takes a shop approximately 1.0-1.5 hours.
🎯 Ready to get started?
HowToo makes it easy: same-day/2-day shipping on every part, plus all the tools and specialty tools you need! Check out the parts and tools sections below to add everything to your cart.
