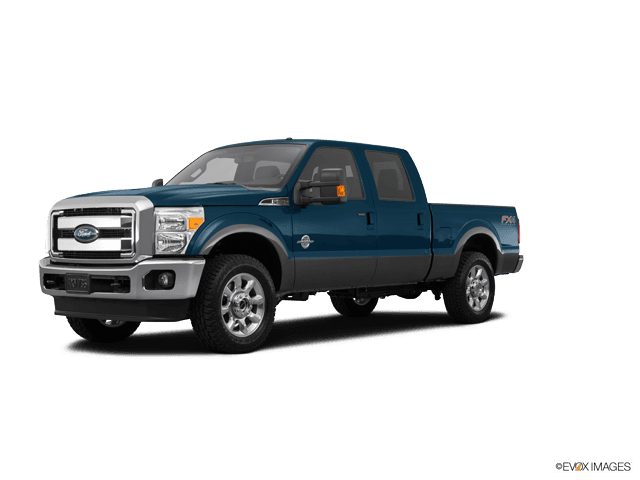
















How to Replace the Outer Tie Rod End on a 2011-2019 Ford F-250 Super Duty (Body: Crew Cab Pickup)
Step-by-step DIY steering repair with tools list, parts, torque specs, and alignment tips
How to Replace the Outer Tie Rod End on a 2011-2019 Ford F-250 Super Duty (Body: Crew Cab Pickup)
Step-by-step DIY steering repair with tools list, parts, torque specs, and alignment tips for 2011, 2012, 2013, 2014, 2015, 2016, 2017, 2018, 2019


🔧 F-250 Super Duty - Outer Tie Rod End Replacement
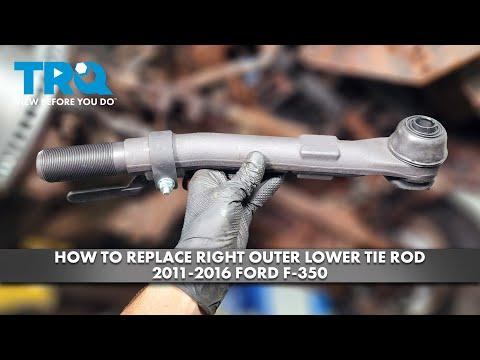
You’ll be removing the worn outer tie rod end (the joint at the steering knuckle) and installing a new one. The critical part is keeping the new tie rod end adjusted close to the old one so you can safely drive to an alignment shop afterward.
Difficulty Level: Intermediate | Estimated Time: 1.0-2.0 hours (one side)
Assumption: replacing one outer tie rod end; torque values can vary—verify with Ford service info when possible.
⚠️ Safety & Precautions
- ⚠️ Support the truck with jack stands—never rely on a floor jack.
- ⚠️ Chock the rear wheels and keep the steering wheel centered while working.
- ⚠️ If you use a pickle fork (a wedge tool that forces the joint apart), it can tear the rubber boot—use a puller if you plan to reuse anything.
- ⚠️ Wear eye protection when removing cotter pins and striking tools.
- 🔋 Battery disconnect is not required.
🔧 Required Tools
You'll need the following tools for this repair:
- Floor jack (rated 3-ton minimum)
- Jack stands (rated 3-ton minimum)
- Wheel chocks
- 1/2" drive breaker bar
- 1/2" drive torque wrench (50-250 ft-lbs range)
- Lug nut socket (commonly 21mm)
- Socket set (metric)
- Wrench set (metric)
- Needle-nose pliers
- Side cutters
- Hammer (2-3 lb)
- Tie rod end puller (specialty)
- Pickle fork separator (specialty)
- Wire brush
- Paint marker
- Tape measure
- Penetrating oil
- Grease gun
- Safety glasses
- Mechanic gloves
🔩 Required Parts
HowToo sells all the parts you need for this repair:
- Outer tie rod end - Qty: 1
- Cotter pin (tie rod end) - Qty: 1
- Chassis grease (NLGI #2) - Qty: 1
- Anti-seize compound - Qty: 1
📋 Before You Begin
- Park on level ground, set the parking brake, and place wheel chocks behind the rear tires.
- Loosen the front wheel lug nuts slightly before lifting (do not remove them yet).
- Spray penetrating oil on the tie rod end jam nut and threads.
- Plan on getting a professional alignment after this repair. Driving without an alignment can cause unsafe handling and fast tire wear.
🔨 Step-by-Step Instructions
Follow these steps in order:
Step 1: Lift and remove the wheel
- Use a lug nut socket and breaker bar to loosen lug nuts 1/2 turn.
- Lift the front corner with a floor jack and set it down on jack stands.
- Remove the lug nuts with a lug nut socket and take the wheel off.
Step 2: Mark the tie rod end position (this helps keep toe close)
- Use a wire brush to clean the exposed threads near the jam nut.
- Use a paint marker to mark the tie rod end and the jam nut alignment.
- Use a tape measure to measure from a fixed point (like the end of the inner tie rod) to the center of the tie rod end stud, and write it down.
- These marks help you drive to alignment.
Step 3: Remove the cotter pin and loosen the castle nut
- Straighten and remove the cotter pin using needle-nose pliers (or cut it with side cutters if rusted).
- Use the correct socket to loosen and remove the tie rod end castle nut.
Step 4: Separate the tie rod end from the steering knuckle
- Install a tie rod end puller (specialty) over the joint and tighten it until the stud “pops” free.
- If you don’t have a puller, use a pickle fork separator (specialty) and a hammer to drive it in until the stud releases.
- A puller is cleaner and protects the boot.
Step 5: Loosen the jam nut
- Hold the inner tie rod with the correct wrench (if needed) and loosen the jam nut using a wrench.
- Do not spin the inner tie rod—only break the jam nut loose.
Step 6: Remove the old tie rod end (count turns)
- Unscrew the tie rod end by hand.
- Count the exact number of turns it takes to remove it, and write the number down.
Step 7: Install the new tie rod end
- Apply a light coat of anti-seize compound to the threads.
- Screw the new tie rod end on the same number of turns you counted during removal.
- Line up your paint marker marks and re-check your tape measure measurement.
Step 8: Attach the stud to the steering knuckle and torque fasteners
- Insert the tie rod end stud into the steering knuckle.
- Install the castle nut by hand, then tighten using a socket and torque wrench.
- Torque to 111 Nm (82 ft-lbs), then continue tightening only as needed to align the cotter pin hole.
- Install a new cotter pin using needle-nose pliers and bend the ends over.
- Tighten the jam nut using a wrench and a torque wrench: Torque to 68 Nm (50 ft-lbs).
Step 9: Grease the new tie rod end (if it has a grease fitting)
- If the new part has a zerk fitting, attach the grease gun and add grease until the boot just starts to swell.
- Stop before grease pushes the boot open.
Step 10: Reinstall the wheel and lower the truck
- Reinstall the wheel and snug lug nuts with a lug nut socket.
- Lower the truck off the jack stands using the floor jack.
- Final-tighten lug nuts in a star pattern with a torque wrench: Torque to 224 Nm (165 ft-lbs).
✅ After Repair
- Start the truck and turn the steering wheel lock-to-lock slowly to confirm no binding or clunks.
- Road test at low speed first. If the steering wheel is off-center or it pulls, stop and re-check your tie rod end position.
- Get a front-end alignment as soon as possible.
- Re-check the cotter pin and lug nut torque after a short drive.
💰 DIY vs Shop Cost
Shop Cost: $250-$550 (parts + labor + alignment)
DIY Cost: $40-$150 (parts only, per side)
You Save: $110-$400 by doing it yourself!
Shop labor rates vary but typically run $100-$150/hour. This repair takes a shop approximately 1.0-1.5 hours.
🎯 Ready to get started?
HowToo makes it easy: same-day/2-day shipping on every part, plus all the tools and specialty tools you need! Check out the parts and tools sections below to add everything to your cart.
Guide for Steering Tie Rod End replace for these Ford vehicles
| Year Make Model | Sub Model | Engine | Body Style |
|---|---|---|---|
| 2019 Ford F-250 Super Duty | - | - | Crew Cab Pickup |
| 2019 Ford F-250 Super Duty | - | - | Extended Cab Pickup |
| 2019 Ford F-250 Super Duty | - | - | Standard Cab Pickup |
| 2018 Ford F-250 Super Duty | - | - | Crew Cab Pickup |
| 2018 Ford F-250 Super Duty | - | - | Extended Cab Pickup |
| 2018 Ford F-250 Super Duty | - | - | Standard Cab Pickup |
| 2017 Ford F-250 Super Duty | - | - | Crew Cab Pickup |
| 2017 Ford F-250 Super Duty | - | - | Extended Cab Pickup |
| 2017 Ford F-250 Super Duty | - | - | Standard Cab Pickup |
| 2016 Ford F-250 Super Duty | - | - | Crew Cab Pickup |
| 2016 Ford F-250 Super Duty | - | - | Extended Cab Pickup |
| 2016 Ford F-250 Super Duty | - | - | Standard Cab Pickup |
| 2015 Ford F-250 Super Duty | - | - | Crew Cab Pickup |
| 2015 Ford F-250 Super Duty | - | - | Extended Cab Pickup |
| 2015 Ford F-250 Super Duty | - | - | Standard Cab Pickup |
| 2014 Ford F-250 Super Duty | - | - | Crew Cab Pickup |
| 2014 Ford F-250 Super Duty | - | - | Extended Cab Pickup |
| 2014 Ford F-250 Super Duty | - | - | Standard Cab Pickup |
| 2013 Ford F-250 Super Duty | - | - | Crew Cab Pickup |
| 2013 Ford F-250 Super Duty | - | - | Extended Cab Pickup |
| 2013 Ford F-250 Super Duty | - | - | Standard Cab Pickup |
| 2012 Ford F-250 Super Duty | - | - | Crew Cab Pickup |
| 2012 Ford F-250 Super Duty | - | - | Extended Cab Pickup |
| 2012 Ford F-250 Super Duty | - | - | Standard Cab Pickup |
| 2011 Ford F-250 Super Duty | - | - | Crew Cab Pickup |
| 2011 Ford F-250 Super Duty | - | - | Extended Cab Pickup |
| 2011 Ford F-250 Super Duty | - | - | Standard Cab Pickup |