














How to Replace the Outer Tie Rod End on a 2007-2013 GMC Sierra 1500
Step-by-step instructions with tools, parts, torque specs, safety tips, and alignment notes
How to Replace the Outer Tie Rod End on a 2007-2013 GMC Sierra 1500
Step-by-step instructions with tools, parts, torque specs, safety tips, and alignment notes for 2007, 2008, 2009, 2010, 2011, 2012, 2013


🔧 Tie Rod End - Replacement
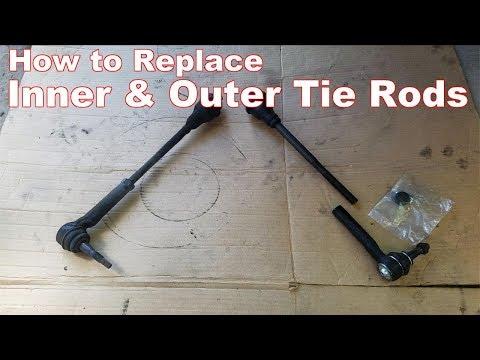
The outer tie rod end connects the steering rack to the front wheel knuckle and controls toe angle. Replacing it restores steering feel and prevents tire wear, but the front end will still need a professional alignment afterward.
Difficulty Level: Intermediate | Estimated Time: 1.5-2.5 hours
⚠️ Safety & Precautions
- Park on level ground and chock the rear wheels before lifting.
- Support the truck with jack stands. Never rely on the jack alone.
- Do not let the steering knuckle hang by the brake hose.
- Keep hands clear when separating the tie rod end from the knuckle.
- No battery disconnect is required for this repair.
🔧 Required Tools
You'll need the following tools for this repair:
- Floor jack (rated 3-ton minimum)
- Jack stands (rated for truck weight)
- Wheel chocks
- 18mm socket
- 21mm socket
- Wrench set, 18mm and 21mm
- Torque wrench
- Pickle fork (tie rod separator) (specialty)
- Ball joint separator tool (specialty)
- Pliers
- Paint marker
- Hammer
- Safety glasses
- Mechanic gloves
🔩 Required Parts
HowToo sells all the parts you need for this repair:
- Outer tie rod end - Qty: 1
- Outer tie rod end jam nut - Qty: 1
- Cotter pin - Qty: 1
📋 Before You Begin
- Park on a flat surface and center the steering wheel.
- Mark the current tie rod length before removal to help preserve toe setting.
- Loosen the front lug nuts slightly before lifting if the wheel must come off.
🔨 Step-by-Step Instructions
Follow these steps in order:
Step 1: Raise and secure the truck
- Use a floor jack to lift the front of the truck.
- Place jack stands under the frame and lower the truck onto them.
- Remove the front wheel with the 21mm socket if you need more access.
Step 2: Mark the tie rod position
- Use a paint marker to mark the jam nut and the threads of the old tie rod end.
- This helps keep the toe setting close enough to drive to the alignment shop.
Step 3: Remove the cotter pin and castle nut
- Use pliers to straighten and pull out the cotter pin from the tie rod stud.
- Use the 18mm socket or wrench to remove the castle nut.
- Leave the nut loosely threaded if the stud is stuck.
Step 4: Separate the tie rod end from the steering knuckle
- Use a pickle fork or ball joint separator tool to break the taper loose from the knuckle.
- If needed, tap the knuckle area with a hammer while applying separator pressure.
- Remove the nut fully and pull the tie rod end out of the knuckle.
Step 5: Remove the old tie rod end
- Use an 18mm wrench to loosen the jam nut on the inner tie rod.
- Count the number of turns it takes to remove the old tie rod end, or match the paint mark.
- Spin the old tie rod end off the inner tie rod.
Step 6: Install the new tie rod end
- Thread the new tie rod end onto the inner tie rod the same number of turns as the old one.
- Install the stud into the steering knuckle.
- Use the 18mm socket to tighten the new castle nut.
- Torque to 61 Nm (45 ft-lbs).
- Continue tightening only enough to align the cotter pin hole. Do not loosen the nut to align it.
Step 7: Secure with a new cotter pin
- Insert the new cotter pin through the castle nut and stud.
- Use pliers to bend the ends over so it cannot fall out.
Step 8: Tighten the jam nut
- Use an 18mm wrench to hold the tie rod end.
- Use another 18mm wrench to tighten the jam nut against the tie rod end.
- Torque to 75 Nm (55 ft-lbs).
Step 9: Reinstall the wheel and lower the truck
- Reinstall the wheel with the 21mm socket.
- Torque to 190 Nm (140 ft-lbs).
- Lower the truck from the jack stands using the floor jack.
✅ After Repair
- Start the truck and turn the steering wheel lock-to-lock to confirm smooth movement.
- Check that the tie rod end and jam nut are secure.
- Drive slowly at first and listen for clunks or looseness.
- Get a professional front-end alignment as soon as possible.
💰 DIY vs Shop Cost
Shop Cost: $180-$350 (parts + labor)
DIY Cost: $25-$70 (parts only)
You Save: $155-$280 by doing it yourself!
Shop labor rates vary but typically run $100-$150/hour. This repair takes a shop approximately 1.0-1.5 hours.
🎯 Ready to get started?
HowToo makes it easy: same-day/2-day shipping on every part, plus all the tools and specialty tools you need! Check out the parts and tools sections below to add everything to your cart.
Guide for Steering Tie Rod End replace for these GMC vehicles
| Year Make Model | Sub Model | Engine | Body Style |
|---|---|---|---|
| 2013 GMC Sierra 1500 | - | - | - |
| 2012 GMC Sierra 1500 | - | - | - |
| 2011 GMC Sierra 1500 | - | - | - |
| 2010 GMC Sierra 1500 | - | - | - |
| 2009 GMC Sierra 1500 | - | - | - |
| 2008 GMC Sierra 1500 | - | - | - |
| 2007 GMC Sierra 1500 | - | - | - |