









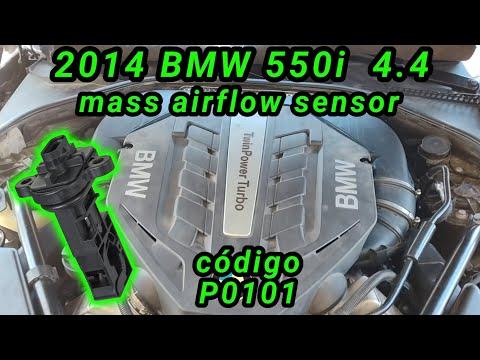







How to Replace the Mass Air Flow (MAF) Sensors on a 2014-2016 BMW 550i 4.4L Twin Turbo (Engine: V8 4.4L)
Step-by-step DIY instructions with tools, parts list, connector tips, and 4 Nm torque specs
How to Replace the Mass Air Flow (MAF) Sensors on a 2014-2016 BMW 550i 4.4L Twin Turbo (Engine: V8 4.4L)
Step-by-step DIY instructions with tools, parts list, connector tips, and 4 Nm torque specs for 2014, 2015, 2016


🔧 550i - Mass Air Flow (MAF) Sensor Replacement
Your 550i uses MAF sensors to measure incoming air so the engine computer can deliver the correct fuel. A bad MAF can cause rough idle, poor power, stalling, and check-engine lights.
Assumption: Your 550i has two MAF sensors (one per intake tube) near the air filter housings—this is the common setup on the 4.4L twin-turbo.
Difficulty Level: Beginner | Estimated Time: 0.5-1.0 hours
⚠️ Safety & Precautions
- ⚠️ Work on a cool engine; hot turbo/intake parts can burn you.
- ⚠️ Turn ignition fully OFF and keep the key away from the car while unplugging sensors.
- ⚠️ Do not touch the MAF sensing element; it’s delicate and easily damaged.
- ⚠️ Battery disconnect is not required, but avoid cycling the ignition with sensors unplugged to prevent extra fault codes.
🔧 Required Tools
You'll need the following tools for this repair:
- Safety glasses
- Nitrile gloves
- 1/4" drive ratchet
- 1/4" drive extension (3")
- Socket set (8mm, 10mm)
- Torx bit set (T20, T25)
- Flathead screwdriver (small)
- Trim clip removal tool
- Torque wrench (inch-pound or low-range Nm)
- OBD2 scan tool
- Flashlight
🔩 Required Parts
HowToo sells all the parts you need for this repair:
- Mass air flow (MAF) sensor - Replace in pairs recommended (left + right) - Qty: 2
- Intake tube clamp(s) - Optional if existing clamps are damaged - Qty: 0-2
📋 Before You Begin
- Park on level ground, set the parking brake, and open the hood.
- Make sure the ignition is OFF (do not leave it in accessory mode).
- Set your tools where they won’t fall into the engine bay.
- Tip: Take a quick photo of each connector first.
🔨 Step-by-Step Instructions
Follow these steps in order:
Step 1: Remove the engine cover (if equipped)
- Use a trim clip removal tool (or your hands) to pull straight up on the engine cover at the corners.
- Set the cover aside where it won’t get stepped on.
Step 2: Locate both MAF sensors
- Use a flashlight to find the MAF sensor on each side of the engine bay, installed in the intake tube near the air filter housing.
- Each MAF will have an electrical connector and is usually held by Torx screws.
Step 3: Unplug the MAF electrical connector(s)
- Use a small flathead screwdriver only if needed to gently release the connector lock (do not force it).
- Pull the connector straight off the MAF.
- Tip: Wiggle gently—don’t yank the wires.
Step 4: Loosen the intake tube enough to access the sensor (as needed)
- If your hands/tools don’t fit, use an 8mm socket or flathead screwdriver to loosen the hose clamp(s) on the intake tube near the MAF.
- Shift the tube slightly to create working room. (You usually don’t have to fully remove the tube.)
Step 5: Remove the old MAF sensor
- Use a Torx T20 or T25 bit with a 1/4" drive ratchet to remove the MAF mounting screws.
- Pull the MAF straight out of the housing/tube.
- Do not drop anything into the intake opening.
Step 6: Install the new MAF sensor
- Confirm the new sensor matches the old one (same shape/connector) before installing.
- Install the new MAF in the same orientation as the old one (airflow direction matters—follow the arrow if present).
- Start the screws by hand to avoid cross-threading.
- Tighten the screws with a Torx T20/T25 bit: Torque to 4 Nm (35 in-lbs).
Step 7: Re-seat the intake tube and tighten clamps
- Reposition the intake tube fully onto its mating surfaces.
- Use an 8mm socket or flathead screwdriver to tighten the clamp(s) snugly.
- Do not overtighten—stripped clamps can cause boost/air leaks.
Step 8: Plug connectors back in
- Push each connector onto the MAF until it clicks/locks.
- Gently tug-check it to confirm it’s secure.
Step 9: Reinstall the engine cover
- Align the cover with its mounting points.
- Press down firmly by hand at the corners until it snaps into place.
✅ After Repair
- Start the engine and let it idle for 1-2 minutes. Listen for hissing (an intake leak sound) near the tubes/clamps.
- Use an OBD2 scan tool to clear any stored MAF-related codes.
- Take a short test drive and verify normal power and smooth idle.
- If you get lean codes or whistling, re-check clamp tightness and that the intake tube is fully seated.
💰 DIY vs Shop Cost
Shop Cost: $350-$900 (parts + labor)
DIY Cost: $200-$700 (parts only)
You Save: $150-$200 by doing it yourself!
Shop labor rates vary but typically run $100-$150/hour. This repair takes a shop approximately 0.5-1.0 hours.
🎯 Ready to get started?
HowToo makes it easy: same-day/2-day shipping on every part, plus all the tools and specialty tools you need! Check out the parts and tools sections below to add everything to your cart.
Guide for Mass Air Flow Sensor replace for these BMW vehicles
| Year Make Model | Sub Model | Engine | Body Style |
|---|---|---|---|
| 2016 BMW 550i | - | V8 4.4L | - |
| 2015 BMW 550i | - | V8 4.4L | - |
| 2014 BMW 550i | - | V8 4.4L | - |