









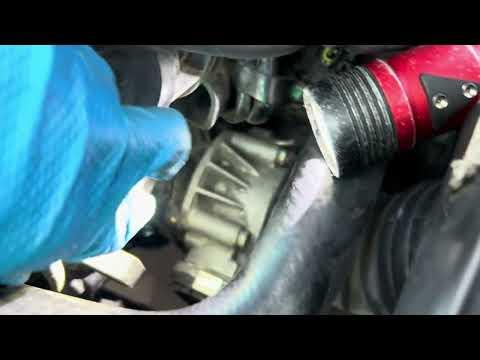







How to Replace the Mass Air Flow (MAF) Sensor on a 2021 Hyundai Tucson
Step-by-step DIY instructions with tools, parts list, safety tips, and torque specs
How to Replace the Mass Air Flow (MAF) Sensor on a 2021 Hyundai Tucson
Step-by-step DIY instructions with tools, parts list, safety tips, and torque specs


🔧 Tucson - Mass Air Flow (MAF) Sensor Replacement
The MAF sensor measures how much air enters your engine so the computer can add the right amount of fuel. If it fails or gets contaminated, your Tucson can run rough, hesitate, or turn on the check-engine light.
Difficulty Level: Beginner | Estimated Time: 0.5-1.0 hours
⚠️ Safety & Precautions
- ⚠️ Work on a cool engine; the intake area can get hot.
- ⚠️ Turn ignition fully OFF and keep the key/fob away from the vehicle while unplugging sensors.
- ⚠️ Disconnect the negative battery cable to prevent an accidental short and to help reset learned fuel trims.
- ⚠️ Do not touch the sensing element inside the MAF; it’s very delicate.
🔧 Required Tools
You'll need the following tools for this repair:
- 10mm socket
- 1/4" drive ratchet
- 3" extension (1/4")
- Phillips #2 screwdriver
- Torx T20 driver
- Small flat-blade screwdriver
- Trim clip tool
- Inch-pound torque wrench (10–100 in-lb range) (specialty)
- Nitrile gloves
- Safety glasses
🔩 Required Parts
HowToo sells all the parts you need for this repair:
- Mass air flow (MAF) sensor - Qty: 1
- MAF sensor O-ring/gasket (if equipped/separate) - Qty: 1
- Dielectric grease (optional) - Qty: 1
📋 Before You Begin
- Park on level ground, shift to Park, and set the parking brake.
- Open the hood and remove any plastic engine cover if it blocks access (it typically pulls up from rubber grommets).
- Disconnect the negative battery cable using a 10mm socket. Negative is the “-” terminal.
- Find the MAF sensor: it’s usually mounted on the air intake tube/air cleaner outlet and has an electrical connector.
- If you do not see a sensor on the intake tube, stop here—your Tucson may use a different air-measurement setup (MAP/IAT instead of a MAF). Tell me what sensor you’re looking at and where it’s mounted, and I’ll guide you correctly.
🔨 Step-by-Step Instructions
Follow these steps in order:
Step 1: Access the MAF sensor
- Locate the MAF on the intake tube near the air box. It will have a plug and usually 2 small screws.
- If anything is in the way, loosen the intake tube clamp(s) using a Phillips #2 screwdriver (or a 10mm socket if it’s a bolt-style clamp) and move the tube slightly for access.
Step 2: Unplug the MAF electrical connector
- Press the connector lock tab by hand and pull the connector straight off.
- If it’s stubborn, use a small flat-blade screwdriver to gently help lift the lock tab. Don’t pry on the wires.
Step 3: Remove the MAF sensor
- Remove the two MAF mounting screws using a Phillips #2 screwdriver or Torx T20 driver (use whichever matches your screw heads).
- Pull the sensor straight out. If it has an O-ring, it may feel snug—wiggle gently.
- Do not touch the sensing element (the tiny wire/film inside).
Step 4: Install the new MAF sensor
- Compare the new sensor to the old one to confirm the connector and shape match.
- If your sensor uses a separate seal, install the new O-ring/gasket and make sure it sits flat.
- Insert the new sensor straight into the housing, keeping it square so the seal doesn’t pinch.
- Install the screws by hand first to avoid cross-threading, then snug them with a Phillips #2 screwdriver or Torx T20 driver.
- Final-tighten with an inch-pound torque wrench: Torque to 22 in-lb (2.5 Nm).
Step 5: Reconnect the connector and reassemble
- Plug the connector back in until it clicks.
- If you loosened any intake clamps, tighten them using a Phillips #2 screwdriver or 10mm socket: Torque to 35 in-lb (4.0 Nm).
- Reinstall any engine cover you removed by pressing it back onto the grommets.
Step 6: Reconnect the battery
- Reconnect the negative battery cable using a 10mm socket.
- Torque to 35 in-lb (4.0 Nm).
✅ After Repair
- Start the engine and let it idle for 2-3 minutes. The idle may take a moment to settle after a battery disconnect.
- Listen for hissing/whistling near the intake tube (a sign of an air leak) and recheck clamp tightness if needed.
- If you had a check-engine light, it may clear after a few drive cycles; if it stays on, the code should be scanned to confirm the fix.
- Do a short test drive with gentle acceleration first, then normal driving.
💰 DIY vs Shop Cost
Shop Cost: $250-$450 (parts + labor)
DIY Cost: $80-$200 (parts only)
You Save: $170-$250 by doing it yourself!
Shop labor rates vary but typically run $100-$150/hour. This repair takes a shop approximately 0.5-1.0 hours.
🎯 Ready to get started?
HowToo makes it easy: same-day/2-day shipping on every part, plus all the tools and specialty tools you need! Check out the parts and tools sections below to add everything to your cart.
Guide for replace for these Hyundai vehicles
| Year Make Model | Sub Model | Engine | Body Style |
|---|