














How to Replace the Mass Air Flow (MAF) Sensor on a 2018 Volkswagen Golf
Step-by-step MAF replacement with tools, parts list, safety tips, and 3 Nm torque specs
How to Replace the Mass Air Flow (MAF) Sensor on a 2018 Volkswagen Golf
Step-by-step MAF replacement with tools, parts list, safety tips, and 3 Nm torque specs


🔧 Golf - Mass Air Flow (MAF) Sensor Replacement
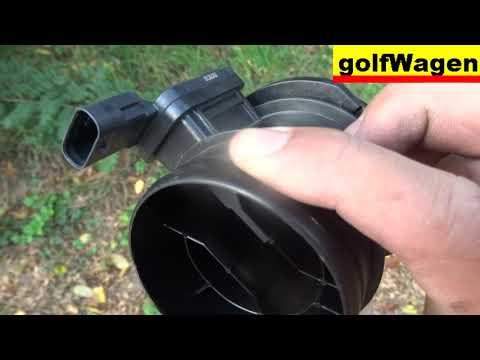
The MAF sensor measures how much air your engine is breathing so the computer can add the right amount of fuel. If it’s failing, you can get rough idle, hesitation, poor MPG, or a check engine light. Replacing it is usually quick because it’s mounted in the air intake tract near the air filter box.
Difficulty Level: Beginner | Estimated Time: 0.5-1.0 hours
⚠️ Safety & Precautions
- ⚠️ Turn ignition OFF, remove the key, and wait 2-3 minutes before unplugging sensors.
- ⚠️ Keep dirt out of the intake tube/airbox; even small debris can cause driveability issues.
- ⚠️ Do not touch the sensing element inside the MAF; it’s delicate.
- ⚠️ Battery disconnect is not required, but if you do disconnect it, use a 10mm wrench and keep the terminal from springing back.
🔧 Required Tools
You'll need the following tools for this repair:
- T20 Torx driver
- T25 Torx driver
- Flathead screwdriver (medium)
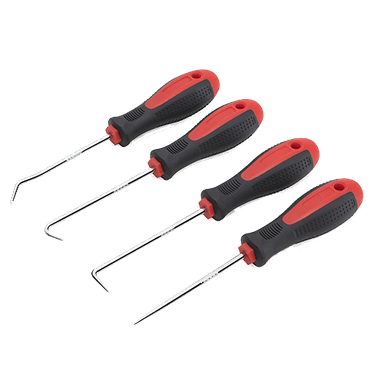
- Pick tool (small) (specialty)
- 1/4" ratchet
- 1/4" torque wrench (2-20 Nm range)
- 10mm wrench
- Nitrile gloves
- Safety glasses
- Shop towels
🔩 Required Parts
HowToo sells all the parts you need for this repair:
- Mass air flow (MAF) sensor - Qty: 1
- MAF sensor O-ring/seal - Qty: 1
📋 Before You Begin
- 🔹 Park on level ground, engine off, and open the hood.
- 🔹 Let the engine bay cool so you don’t burn your hands on hot parts.
- 🔹 Decide which MAF style you have: (A) sensor bolted into the intake tube, or (B) sensor integrated into the airbox lid. The steps below cover both.
🔨 Step-by-Step Instructions
Follow these steps in order:
Step 1: Locate the MAF sensor
- Look at the air intake tract between the air filter box and the turbo inlet tube.
- The MAF will have a 4-6 wire electrical connector and is usually held in with Torx screws.
Step 2: Unplug the MAF electrical connector
- Put on nitrile gloves and safety glasses.
- Use a pick tool (small) (specialty) to gently lift the locking tab if it’s stubborn. (A pick tool is a small hooked tool used to release clips.)
- Pull the connector straight off—do not yank on the wires.
Step 3: Remove the MAF sensor (choose your mounting style)
- Style A: MAF bolted into the intake tube
- Use a T20 Torx driver (or T25 Torx driver if equipped) to remove the two MAF screws.
- Gently twist and pull the MAF straight out of the tube.
- Style B: MAF in/at the airbox lid
- If needed for access, loosen the intake clamp using a flathead screwdriver (medium).
- Use a T20 Torx driver to remove the MAF retaining screws.
- Lift the sensor straight out.
Step 4: Inspect the seal and the housing
- Use shop towels to wipe dust from the sensor bore (the round opening) and surrounding area.
- Remove the old MAF sensor O-ring/seal if it stayed in the housing.
- Tip: Keep the intake opening pointed upward.
Step 5: Install the new MAF sensor
- Install the new MAF sensor O-ring/seal on the new sensor (or confirm it’s already installed).
- Insert the new sensor straight in—do not force it.
- Install the Torx screws by hand first to avoid cross-threading.
- Use a 1/4" torque wrench (2-20 Nm range) with the correct Torx bit to tighten screws: Torque to 3 Nm (27 in-lbs).
Step 6: Reconnect intake pieces (if loosened) and plug the connector back in
- If you loosened a clamp, tighten it using a flathead screwdriver (medium) until snug (do not over-tighten and crack plastic).
- Push the MAF connector on until it clicks/locks.
Step 7: Optional battery reset (only if you disconnected it)
- Use a 10mm wrench to tighten the battery terminal securely.
✅ After Repair
- ✅ Start the engine and let it idle for 1-2 minutes. Listen for hissing (vacuum leak) around the intake/airbox.
- ✅ Take a short test drive and confirm acceleration feels smooth.
- ✅ If the check engine light was on, you may need to clear the code with a scan tool (some lights clear after a few normal drives if the fix is correct).
💰 DIY vs Shop Cost
Shop Cost: $200-$450 (parts + labor)
DIY Cost: $80-$250 (parts only)
You Save: $120-$200 by doing it yourself!
Shop labor rates vary but typically run $100-$150/hour. This repair takes a shop approximately 0.5-1.0 hours.
🎯 Ready to get started?
HowToo makes it easy: same-day/2-day shipping on every part, plus all the tools and specialty tools you need! Check out the parts and tools sections below to add everything to your cart.