


How to Replace the Mass Air Flow (MAF) Sensor on a 2016 INFINITI QX50
Step-by-step DIY instructions with tools list, parts, safety tips, and 1.6 Nm (14 in-lbs) torque spec
How to Replace the Mass Air Flow (MAF) Sensor on a 2016 INFINITI QX50
Step-by-step DIY instructions with tools list, parts, safety tips, and 1.6 Nm (14 in-lbs) torque spec
🔧 QX50 - Mass Air Flow (MAF) Sensor Replacement
The MAF sensor measures how much air is entering your engine so the computer can add the right amount of fuel. A failed or dirty MAF can cause rough idle, hesitation, poor fuel economy, or a check-engine light.
Difficulty Level: Beginner | Estimated Time: 0.3-0.8 hours
⚠️ Safety & Precautions
- ⚠️ Work on a cool engine; the intake area can get hot.
- ⚠️ Turn ignition fully OFF and keep the key away from the vehicle while unplugging sensors.
- ⚠️ If you disconnect the battery, you may lose radio presets.
- ⚠️ Do not touch the sensing element inside the MAF; it’s delicate.
🔧 Required Tools
You'll need the following tools for this repair:
- 10mm socket
- 1/4" drive ratchet
- 3" extension (1/4" drive)
- Phillips #2 screwdriver
- Torx T20 security bit
- Trim clip tool
- Flashlight
- Nitrile gloves
- Safety glasses
🔩 Required Parts
HowToo sells all the parts you need for this repair:
- Mass air flow (MAF) sensor - Qty: 1
- MAF sensor O-ring seal - Qty: 1
- Electrical contact cleaner (sensor-safe) - Qty: 1
📋 Before You Begin
- Park on level ground, shift to Park, and set the parking brake.
- Open the hood and let the engine cool.
- If you want the safest approach: disconnect the negative battery terminal using a 10mm socket. (The negative terminal is the “-” post.)
- Tip: Take a quick photo of the connector.
🔨 Step-by-Step Instructions
Follow these steps in order:
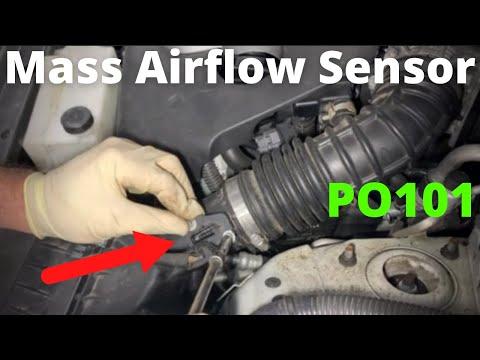
Step 1: Locate the MAF sensor
- Use a flashlight to find the air intake tube coming from the air filter box.
- The MAF is the small sensor mounted in/near the intake tube, usually right after the air filter box, with an electrical connector plugged into it.
Step 2: Unplug the MAF electrical connector
- Press the connector lock tab by hand; if it’s tight, gently help it with a trim clip tool.
- Pull the connector straight off (don’t yank the wires).
- If there’s dust or green corrosion, spray the connector lightly with electrical contact cleaner (sensor-safe) and let it air-dry.
Step 3: Remove the MAF sensor screws
- Remove the two retaining screws using a Phillips #2 screwdriver OR a Torx T20 security bit (use whichever fits your screws).
- Set the screws aside where they won’t fall into the engine bay.
Step 4: Remove the MAF sensor from the intake tube
- Wiggle the sensor straight out by hand. If it feels stuck, rotate it slightly while pulling.
- Do not touch the sensing element inside the sensor opening.
Step 5: Install the new MAF sensor and seal
- Install the new MAF sensor O-ring seal onto the new sensor (if it isn’t already installed).
- Slide the new sensor into the intake tube in the same orientation as the old one.
- Reinstall the screws using a Phillips #2 screwdriver or Torx T20 security bit.
- Torque to 1.6 Nm (14 in-lbs) (snug only—these are easy to strip).
Step 6: Reconnect everything
- Push the electrical connector on until it clicks.
- If you disconnected the battery, reconnect the negative terminal using a 10mm socket and snug it firmly.
Step 7: Quick check before starting
- Use a flashlight to verify no tools are left in the engine bay.
- Make sure the intake tube and air box are seated and not pulled loose.
✅ After Repair
- Start the engine and let it idle for 2–3 minutes. The idle may fluctuate briefly while the computer relearns.
- Check that the check-engine light stays off and that the engine responds smoothly to light throttle.
- If a check-engine light was on before, clear codes with a scan tool if available; otherwise, it may clear on its own after several drive cycles if the problem is fixed.
- If idle is still unstable, an “Idle Air Volume Learn” procedure may be needed (best done with a scan tool).
💰 DIY vs Shop Cost
Shop Cost: $200-$450 (parts + labor)
DIY Cost: $80-$250 (parts only)
You Save: $120-$200 by doing it yourself!
Shop labor rates vary but typically run $100-$150/hour. This repair takes a shop approximately 0.5-1.0 hours.
🎯 Ready to get started?
HowToo makes it easy: same-day/2-day shipping on every part, plus all the tools and specialty tools you need! Check out the parts and tools sections below to add everything to your cart.
