









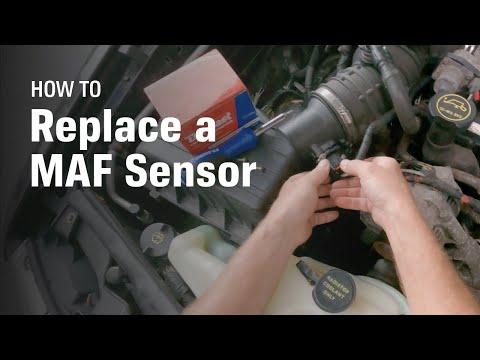







How to Replace the Mass Air Flow (MAF) Sensor on a 2016 Hyundai Tucson
Step-by-step DIY instructions with tools, parts list, safety tips, torque specs, and code-clearing steps
How to Replace the Mass Air Flow (MAF) Sensor on a 2016 Hyundai Tucson
Step-by-step DIY instructions with tools, parts list, safety tips, torque specs, and code-clearing steps


🔧 Tucson - Mass Air Flow (MAF) Sensor Replacement
The MAF sensor measures how much air enters your engine so the computer can deliver the right amount of fuel. If it fails or reads wrong, you can get rough idle, hesitation, poor mileage, or a check-engine light.
Difficulty Level: Beginner | Estimated Time: 0.5-1.0 hours
Assumption: Your Tucson’s MAF is mounted in the air intake tube near the air box and is held by 2 small screws.
⚠️ Safety & Precautions
- ⚠️ Let the engine cool before working near the turbo/intake area.
- ⚠️ Disconnect the negative battery terminal to prevent a check-engine light or accidental short.
- ⚠️ Do not touch the MAF sensing element (the tiny wire/film inside). It damages easily.
- ⚠️ Keep dirt out of the intake tube; anything that falls in can be ingested by the engine.
🔧 Required Tools
You'll need the following tools for this repair:
- 10mm socket
- 1/4" ratchet
- 3" extension (1/4" drive)
- Phillips screwdriver #2
- Torx T20 screwdriver
- Trim clip removal tool
- Small pick tool
- Inch-pound torque wrench (specialty)
- OBD2 scan tool (specialty)
- Nitrile gloves
- Safety glasses
🔩 Required Parts
HowToo sells all the parts you need for this repair:
- Mass air flow (MAF) sensor - Qty: 1
- MAF sensor O-ring seal - Qty: 1
- Dielectric grease - Qty: 1
📋 Before You Begin
- Park on level ground, shift to Park, and set the parking brake.
- Open the hood and remove any loose jewelry or dangling clothing.
- Disconnect the battery negative terminal: use a 10mm socket to loosen the clamp and remove it. Torque to 5-6 Nm (44-53 in-lbs) when reinstalling.
- If you have an OBD2 scan tool (a plug-in code reader), have it ready to clear codes after the install.
🔨 Step-by-Step Instructions
Follow these steps in order:
Step 1: Locate the MAF sensor
- Look at the air intake tube connected to the air box (the large plastic filter housing).
- The MAF sensor is the small module with an electrical connector and usually 2 screws holding it into the tube.
Step 2: Remove covers for access (if equipped)
- If there is an engine cover or intake cover in the way, remove it using a trim clip removal tool for clips and a 10mm socket for bolts.
Step 3: Unplug the MAF electrical connector
- Press the connector lock tab by hand and pull the connector straight off.
- If it’s stuck, use a small pick tool to gently lift the lock tab while pulling. Do not pull on the wires.
- Add a tiny amount of dielectric grease to the connector seal (light smear only).
Step 4: Remove the MAF sensor from the intake tube
- Remove the retaining screws using a Phillips screwdriver #2 or Torx T20 screwdriver (use the one that fits your screw head snugly).
- Carefully pull the sensor straight out. If it resists, gently wiggle it—do not pry hard.
- Remove the old O-ring seal if it stayed in the intake tube.
Step 5: Install the new MAF sensor
- Lightly seat the new O-ring seal on the new sensor (or in the bore, depending on design).
- Insert the new sensor straight into the intake tube. Make sure it sits flush and isn’t pinching the O-ring.
- Install the screws by hand first to avoid cross-threading, then tighten using a Phillips screwdriver #2 or Torx T20 screwdriver.
- Tighten with an inch-pound torque wrench if possible: Torque to 2-3 Nm (18-27 in-lbs).
- Tip: Tight is enough—these screws strip easily.
Step 6: Reconnect and reassemble
- Reconnect the MAF electrical connector until it clicks.
- Reinstall any covers removed earlier using a 10mm socket and trim clip removal tool.
- Reconnect the battery negative terminal using a 10mm socket. Torque to 5-6 Nm (44-53 in-lbs).
✅ After Repair
- Plug in your OBD2 scan tool and clear any stored MAF-related codes.
- Start the engine and let it idle for 2-3 minutes. Listen for hissing (a sign of an air leak).
- Take a short test drive with gentle acceleration. Confirm there’s no warning light and throttle feels normal.
- If a check-engine light returns, inspect the intake tube for cracks and confirm the connector is fully seated.
💰 DIY vs Shop Cost
Shop Cost: $200-$450 (parts + labor)
DIY Cost: $70-$250 (parts only)
You Save: $130-$200 by doing it yourself!
Shop labor rates vary but typically run $100-$150/hour. This repair takes a shop approximately 0.5-1.0 hours.
🎯 Ready to get started?
HowToo makes it easy: same-day/2-day shipping on every part, plus all the tools and specialty tools you need! Check out the parts and tools sections below to add everything to your cart.
Guide for Mass Air Flow Sensor Boot replace for these Hyundai vehicles
| Year Make Model | Sub Model | Engine | Body Style |
|---|