


How to Replace the Mass Air Flow (MAF) Sensor on a 2003-2018 Subaru Outback
Step-by-step DIY instructions with tools, parts list, safety tips, and torque specs (12 in-lb)
How to Replace the Mass Air Flow (MAF) Sensor on a 2003-2018 Subaru Outback
Step-by-step DIY instructions with tools, parts list, safety tips, and torque specs (12 in-lb) for 2003, 2008, 2009, 2010, 2011, 2012, 2013, 2014, 2015, 2016, 2017, 2018
🔧 Outback - Mass Air Flow (MAF) Sensor Replacement
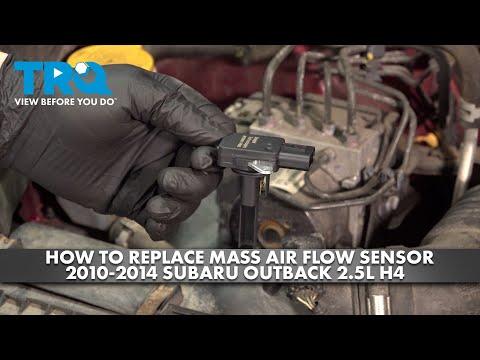
The MAF sensor measures how much air enters your engine so the computer can deliver the right amount of fuel. If it fails (or gets contaminated), you may get rough idle, hesitation, poor MPG, or a check engine light. On your Outback, it’s mounted on the air intake tube right by the air filter box.
Difficulty Level: Beginner | Estimated Time: 0.5-1.0 hours
⚠️ Safety & Precautions
- ⚠️ Work on a cool engine; the intake area sits near hot components.
- ⚠️ Disconnect the negative battery cable to prevent a check-engine light and protect the sensor circuit.
- ⚠️ Never touch the sensing element inside the MAF; it’s very delicate.
- ⚠️ Keep dirt out of the intake tube; anything that falls in can damage the engine.
🔧 Required Tools
You'll need the following tools for this repair:
- 10mm socket
- 1/4" ratchet
- 6" extension
- Phillips #2 screwdriver
- 8mm nut driver
- Trim clip removal tool
- Small torque wrench (inch-lb capable)
- Nitrile gloves
- Safety glasses
🔩 Required Parts
HowToo sells all the parts you need for this repair:
- Mass air flow (MAF) sensor - Qty: 1
- MAF sensor O-ring seal - Qty: 1
- Mass air flow sensor cleaner spray - Qty: 1
- Dielectric grease - Qty: 1
📋 Before You Begin
- Park on level ground, set the parking brake, and open the hood.
- Let the engine cool for at least 15-20 minutes if it was running.
- Disconnect the battery: use a 10mm socket to remove the negative (-) terminal and tuck it aside so it can’t spring back.
🔨 Step-by-Step Instructions
Follow these steps in order:
Step 1: Locate the MAF sensor
- Find the air filter box on the driver-side front of the engine bay.
- The MAF sensor is the small module with an electrical plug, mounted in the intake tube right after the air box.
Step 2: Unplug the MAF electrical connector
- Press the connector lock tab with your thumb and pull the plug straight off.
- If it’s stuck, use a trim clip removal tool gently to help lift the tab. Don’t pry on the wires.
- Optional: apply a tiny dab of dielectric grease (a non-conductive moisture barrier) to the rubber seal only.
Step 3: Loosen the intake tube clamp (if it blocks access)
- Use an 8mm nut driver (or Phillips #2 screwdriver) to loosen the worm-gear clamp near the MAF area.
- Gently wiggle the intake tube for better access; you usually don’t need to fully remove the tube.
Step 4: Remove the MAF sensor screws
- Use a Phillips #2 screwdriver to remove the two mounting screws holding the MAF sensor to the housing.
- Set the screws somewhere safe; they’re easy to drop.
Step 5: Remove the MAF sensor
- Pull the sensor straight out of the housing by the plastic body.
- Do not bump or touch the sensing element inside the opening.
- Remove the old MAF sensor O-ring seal if it stayed in the housing.
Step 6: Clean the housing opening (recommended)
- Spray a little MAF sensor cleaner spray on a clean lint-free cloth (not listed as a tool) and wipe the bore where the O-ring seals.
- Never use brake cleaner or carb cleaner.
Step 7: Install the new MAF sensor
- Install the new MAF sensor O-ring seal on the new sensor (or in the groove in the housing, depending on design).
- Slide the new sensor straight into place without forcing it.
- Start both screws by hand to avoid cross-threading.
- Tighten the screws with a small torque wrench (inch-lb capable): Torque to 1.3 Nm (12 in-lb).
Step 8: Re-tighten the intake tube clamp
- Use an 8mm nut driver to snug the clamp.
- Make sure the tube is fully seated and not cocked or cracked. Air leaks here can cause bad running.
Step 9: Reconnect the MAF connector and battery
- Push the connector on until it clicks.
- Reconnect the negative battery terminal using a 10mm socket and snug it.
✅ After Repair
- Start the engine and let it idle for 5 minutes with all accessories off (basic idle relearn).
- Turn the A/C on for 1 minute, then off (helps the computer re-stabilize idle load).
- Test drive 10-15 minutes and confirm there’s no hesitation or check engine light.
- If the check engine light comes back, inspect the intake tube/clamps for leaks and re-check the connector is fully latched.
💰 DIY vs Shop Cost
Shop Cost: $220-$450 (parts + labor)
DIY Cost: $90-$220 (parts only)
You Save: $130-$230 by doing it yourself!
Shop labor rates vary but typically run $100-$150/hour. This repair takes a shop approximately 0.5-1.0 hours.
🎯 Ready to get started?
HowToo makes it easy: same-day/2-day shipping on every part, plus all the tools and specialty tools you need! Check out the parts and tools sections below to add everything to your cart.
