









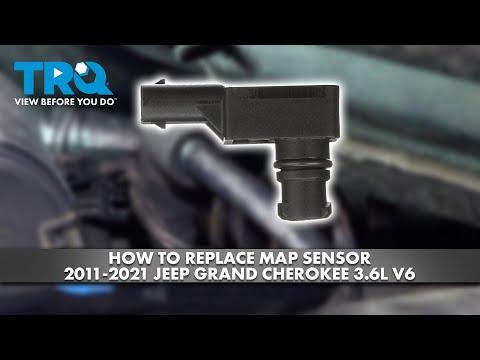






How to Replace the MAP Sensor (No MAF) on a 2011 Jeep Grand Cherokee 3.6L
Step-by-step instructions with tools, parts, IAT sensor tips, torque specs, and code-clearing guidance for 2011, 2012, 2013, 2014, 2015, 2016, 2017, 2018, 2019, 2020, 2021, 2022
How to Replace the MAP Sensor (No MAF) on a 2011 Jeep Grand Cherokee 3.6L
Step-by-step instructions with tools, parts, IAT sensor tips, torque specs, and code-clearing guidance for 2011, 2012, 2013, 2014, 2015, 2016, 2017, 2018, 2019, 2020, 2021, 2022


🔧 Grand Cherokee - Air Metering Sensor Replacement (MAF vs MAP/IAT)
Your Grand Cherokee’s 3.6L does not use a traditional Mass Air Flow (MAF) sensor. It uses a MAP sensor (Manifold Absolute Pressure) on the intake manifold (and an IAT sensor—Intake Air Temperature—depending on build), which together do the “air measuring” job.
Difficulty Level: Beginner | Estimated Time: 0.5-1.0 hours
⚠️ Safety & Precautions
- 🛑 Work on a cool engine; the intake area can be hot.
- 🧯 Keep the key off and away from the vehicle so nothing powers up.
- 🔌 It’s safest to disconnect the negative battery cable to avoid accidental shorts and to reduce the chance of setting new fault codes.
- 🧼 If you clean sensors, use only sensor-safe cleaner; do not touch the sensing element.
🔧 Required Tools
You'll need the following tools for this repair:
- 10mm socket
- 1/4" drive ratchet
- 1/4" drive extension (3"-6")
- Torx T20 bit socket
- Torx T25 bit socket
- Small flathead screwdriver
- Pick tool (small hook pick)
- Torque wrench (inch-pound)
- OBD2 scan tool
- Nitrile gloves
- Safety glasses
- Shop light
🔩 Required Parts
HowToo sells all the parts you need for this repair:
- MAP sensor - Qty: 1
- MAP sensor O-ring (seal) - Qty: 1
- IAT sensor - Qty: 1
- IAT sensor O-ring (seal) - Qty: 1
- Sensor-safe electronics cleaner - Qty: 1
📋 Before You Begin
- Park on level ground, shift to Park, and set the parking brake.
- Open the hood and let the engine cool for 20-30 minutes.
- Disconnect the negative battery terminal: use a 10mm socket, loosen the clamp, and move the cable aside so it can’t spring back.
- If you have a check-engine light, plug in an OBD2 scan tool and write down the codes before you start.
🔨 Step-by-Step Instructions
Follow these steps in order:
Step 1: Identify the correct “MAF-related” sensor
- Use a shop light and look for the MAP sensor on the top/rear area of the intake manifold (it plugs in with a small electrical connector and usually has one mounting screw).
- Also check the air intake/airbox area for an IAT sensor (a small probe-style sensor in the intake tube or airbox lid, depending on configuration).
- If unsure, replace MAP first.
Step 2: Remove the engine cover (if equipped)
- Use your hands (and a shop light) to locate the corners of the cover.
- Pull straight up firmly to release the rubber grommets, then set the cover aside.
Step 3: Unplug the MAP sensor connector
- Locate the MAP sensor connector.
- Use a small flathead screwdriver to gently help lift the lock tab if it’s stubborn (don’t break it).
- Pull the connector straight off the sensor.
Step 4: Remove the MAP sensor
- Use a Torx T20 bit socket or Torx T25 bit socket (whichever fits) with a 1/4" drive ratchet and extension to remove the MAP mounting screw.
- Twist the sensor gently and pull it straight out.
- If the O-ring sticks, use a pick tool (small hook pick) carefully to remove the old O-ring.
Step 5: Install the new MAP sensor and seal
- Lightly wipe the mounting hole with a clean rag (no dirt should fall into the intake).
- Install the new MAP sensor O-ring (seal) onto the new sensor.
- Push the sensor straight in until it seats fully.
- Install the mounting screw by hand first, then tighten with a Torx T20/T25 bit socket and 1/4" drive ratchet.
- Torque to 35 in-lbs (4 N·m) using a torque wrench (inch-pound).
Step 6: Reconnect the MAP sensor connector
- Push the connector on until it clicks/locks.
- Gently tug to confirm it’s fully seated.
Step 7 (If replacing IAT): Remove and replace the IAT sensor
- Locate the IAT sensor in the intake tube/airbox area using a shop light.
- Unplug the connector (use a small flathead screwdriver only if needed to release the lock).
- If it’s held by a screw, remove it using a Torx T20 bit socket and 1/4" drive ratchet, then pull the sensor out.
- If it’s a twist-lock style, rotate it gently by hand and pull it out.
- Install the new IAT sensor O-ring (seal) and push the sensor in until seated, then reinstall the screw if equipped.
- Torque to 35 in-lbs (4 N·m) (only if it uses a screw) using a torque wrench (inch-pound).
- Reconnect the electrical connector until it clicks.
Step 8: Reinstall the engine cover
- Align the cover over the mounting points.
- Press straight down at the corners until it snaps into the grommets.
Step 9: Reconnect the battery
- Reinstall the negative battery cable and tighten with a 10mm socket.
- Make sure the terminal is snug and doesn’t rotate by hand.
✅ After Repair
- Use an OBD2 scan tool to clear any stored codes.
- Start the engine and let it idle for 2-3 minutes; confirm the idle is steady.
- Test drive 10-15 minutes with mixed city speeds; recheck for a check-engine light.
- If codes return (like P0106/P0107/P0108), inspect the wiring connector pins and look for intake vacuum leaks.
💰 DIY vs Shop Cost
Shop Cost: $180-$400 (parts + labor)
DIY Cost: $40-$180 (parts only)
You Save: $140-$220 by doing it yourself!
Shop labor rates vary but typically run $100-$150/hour. This repair takes a shop approximately 0.5-1.0 hours.
🎯 Ready to get started?
HowToo makes it easy: same-day/2-day shipping on every part, plus all the tools and specialty tools you need! Check out the parts and tools sections below to add everything to your cart.