









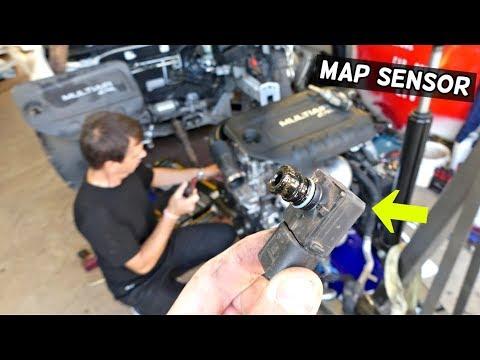






How to Replace the MAP Sensor (MAF Alternative) on a 2014-2022 Jeep Cherokee (Engine: Inline 4 2.4L)
Step-by-step troubleshooting and install guide with tools, parts list, and torque specs
How to Replace the MAP Sensor (MAF Alternative) on a 2014-2022 Jeep Cherokee (Engine: Inline 4 2.4L)
Step-by-step troubleshooting and install guide with tools, parts list, and torque specs for 2014, 2015, 2016, 2017, 2018, 2019, 2020, 2021, 2022


🔧 Cherokee - MAF Sensor Replacement
Your Cherokee with the 2.4L engine typically does not use a separate MAF (Mass Air Flow) sensor. It calculates airflow using a MAP sensor (Manifold Absolute Pressure) and an IAT sensor (Intake Air Temperature).
Assumption: You’re trying to replace the airflow-related sensor causing a code like P0106/P0107/P0108 (MAP) or an intake air temp code (IAT).
Difficulty Level: Beginner | Estimated Time: 0.3-0.7 hours
⚠️ Safety & Precautions
- 🧤 Work on a cool engine to avoid burns.
- 🔌 Turn the ignition OFF and keep the key fob away from the vehicle.
- ⚡ If you’re nervous about electronics, disconnect the negative battery cable (recommended for first-timers).
- 🧼 Keep dirt out of the intake—do not drop anything into openings.
🔧 Required Tools
You'll need the following tools for this repair:
- 1/4" ratchet
- 6" 1/4" extension
- 8mm socket
- 10mm socket
- Torx T25 bit socket
- Small flat trim tool
- Flashlight
- Nitrile gloves
- Safety glasses
🔩 Required Parts
HowToo sells all the parts you need for this repair:
- MAP sensor - Qty: 1
- MAP sensor O-ring - Qty: 1
- Dielectric grease - Qty: 1
📋 Before You Begin
- 🅿️ Park on level ground and set the parking brake.
- Wait 10–15 minutes if the engine was running.
- If disconnecting the battery: use a 10mm socket to remove the negative terminal and isolate it so it can’t spring back.
- A “sensor connector lock” is a small safety clip.
🔨 Step-by-Step Instructions
Follow these steps in order:
Step 1: Remove the engine cover (if equipped)
- Use your hands to pull straight up at the corners to pop it off the rubber mounts.
- Set it aside where it won’t get stepped on.
Step 2: Locate the MAP sensor
- Use a flashlight to look at the intake manifold (the plastic/metal intake that feeds the engine).
- The MAP sensor is a small sensor with an electrical plug, usually held in by one Torx screw.
- MAP measures manifold pressure, not airflow directly.
Step 3: Unplug the electrical connector
- Use a small flat trim tool to gently lift/slide the connector safety lock (if present).
- Press the release tab and pull the connector straight off.
- Do not pull on the wires—only the connector body.
Step 4: Remove the MAP sensor fastener
- Use a Torx T25 bit socket with a 1/4" ratchet and extension to remove the screw.
- Put the screw somewhere safe so it can’t fall into the engine bay.
Step 5: Remove the MAP sensor
- Wiggle the sensor gently while pulling it straight out.
- If it feels stuck, twist slightly—don’t pry hard (the manifold can crack).
Step 6: Install the new O-ring and sensor
- Install the new MAP sensor O-ring onto the new sensor.
- Apply a tiny smear of clean engine oil to the O-ring using a gloved finger so it slides in without tearing.
- Push the sensor straight into the manifold until fully seated.
Step 7: Reinstall the screw and tighten
- Start the screw by hand first to avoid cross-threading.
- Use a Torx T25 bit socket to snug it down.
- Torque to 4 Nm (35 in-lbs)
- Small screw: snug, not “gorilla tight.”
Step 8: Reconnect the connector and reinstall the cover
- Add a small dab of dielectric grease to the connector seal (optional but helpful).
- Push the connector on until it clicks, then re-engage the lock (if equipped).
- Reinstall the engine cover by lining it up and pressing down firmly.
Step 9: Reconnect battery (if disconnected)
- Use a 10mm socket to tighten the negative terminal.
- Torque to 6 Nm (53 in-lbs)
✅ After Repair
- Start the engine and let it idle for 1–2 minutes.
- Listen for vacuum leaks (hissing) around the sensor area.
- If you had a check-engine light, clear codes with a scan tool; otherwise it may clear after a few drives if the problem is fixed.
- Test drive: light throttle first, then normal driving. Confirm no warning lights return.
💰 DIY vs Shop Cost
Shop Cost: $180-$350 (parts + labor)
DIY Cost: $35-$120 (parts only)
You Save: $145-$230 by doing it yourself!
Shop labor rates vary but typically run $100-$150/hour. This repair takes a shop approximately 0.5-1.0 hours.
🎯 Ready to get started?
HowToo makes it easy: same-day/2-day shipping on every part, plus all the tools and specialty tools you need! Check out the parts and tools sections below to add everything to your cart.
Guide for Manifold Absolute Pressure Sensor replace for these Jeep vehicles
| Year Make Model | Sub Model | Engine | Body Style |
|---|---|---|---|
| 2022 Jeep Cherokee | - | Inline 4 2.4L | - |
| 2021 Jeep Cherokee | - | Inline 4 2.4L | - |
| 2020 Jeep Cherokee | - | Inline 4 2.4L | - |
| 2019 Jeep Cherokee | - | Inline 4 2.4L | - |
| 2018 Jeep Cherokee | - | Inline 4 2.4L | - |
| 2017 Jeep Cherokee | - | Inline 4 2.4L | - |
| 2016 Jeep Cherokee | - | Inline 4 2.4L | - |
| 2015 Jeep Cherokee | - | Inline 4 2.4L | - |
| 2014 Jeep Cherokee | - | Inline 4 2.4L | - |