









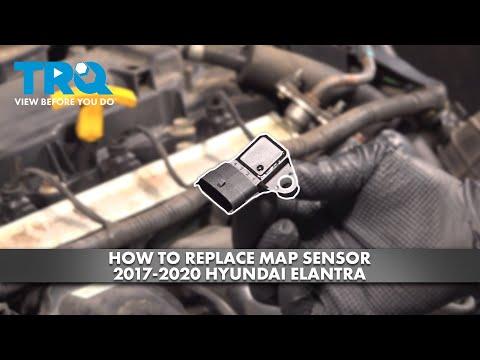







How to Replace the MAP or IAT “MAF” Sensor on a 2020-2024 Hyundai Palisade (Engine: V6 3.8L)
Step-by-step intake sensor replacement with tools, parts, O-ring tips, and torque specs
How to Replace the MAP or IAT “MAF” Sensor on a 2020-2024 Hyundai Palisade (Engine: V6 3.8L)
Step-by-step intake sensor replacement with tools, parts, O-ring tips, and torque specs for 2020, 2021, 2022, 2023, 2024


🔧 Palisade - Airflow Sensor Replacement (MAF / MAP / IAT)
On your Palisade, a traditional “MAF sensor” in the intake tube is usually not used. Hyundai typically measures airflow using a MAP sensor (Manifold Absolute Pressure) on the intake manifold, plus an IAT sensor (Intake Air Temperature) in the air duct/air box.
If you tell me where your sensor is located (or upload a photo), I can confirm which one you’re replacing. Below are both factory-style procedures.
Difficulty Level: Beginner | Estimated Time: 0.5–1.0 hours
⚠️ Safety & Precautions
- ⚠️ Let the engine cool before working near the intake manifold.
- ⚠️ Turn ignition fully OFF and keep the key/fob away from the vehicle.
- ⚠️ Do not touch sensor tips with fingers or spray them with harsh cleaners.
- ⚠️ Battery disconnect is not required, but it helps prevent a check-engine light when unplugging sensors.
🔧 Required Tools
You'll need the following tools for this repair:
- 10mm socket
- 1/4" ratchet
- 3" extension (1/4")
- Flat-head screwdriver
- Phillips #2 screwdriver
- Trim clip tool
- Torque wrench (inch-pound)
- Torque wrench (ft-lb)
- Nitrile gloves
- Safety glasses
- OBD2 scan tool
🔩 Required Parts
HowToo sells all the parts you need for this repair:
- MAP sensor (intake manifold pressure sensor) - Qty: 1
- IAT sensor (intake air temperature sensor) - Qty: 1
- Sensor O-ring/seal (if not included) - Qty: 1
📋 Before You Begin
- Park on level ground and set the parking brake.
- Open the hood and identify the sensor location before removing anything.
- If you choose to disconnect the battery: use a 10mm socket to remove the negative terminal and isolate it so it can’t spring back.
- Have your OBD2 scan tool ready if you want to clear codes after the repair.
🔨 Step-by-Step Instructions
Follow these steps in order:
Step 1: Identify which “MAF” you’re actually replacing
- Look at the air intake tubing between the air box and the engine.
- If the sensor is mounted in the air duct/air box area with small screws, that’s typically the IAT sensor.
- If the sensor is mounted on the intake manifold (closer to the engine, usually held by a small bolt), that’s the MAP sensor.
- If you upload a photo, I’ll confirm fast.
Step 2: Remove the engine cover (if equipped)
- Grip the cover at the corners and pull straight upward to release the rubber grommets.
- If any plastic clips are in your way, use a trim clip tool to lift them without breaking.
Step 3A: IAT sensor replacement (sensor in the intake duct/air box)
- Loosen intake duct clamps (if needed for access) using a flat-head screwdriver.
- Press the connector lock tab and unplug the sensor.
- Remove the sensor screws using a Phillips #2 screwdriver.
- Pull the sensor straight out; remove and replace the O-ring/seal if applicable.
- Install the new sensor and tighten screws evenly with a torque wrench (inch-pound): Torque to 2.5 Nm (22 in-lbs).
- Reconnect the electrical connector until it clicks.
Step 3B: MAP sensor replacement (sensor on the intake manifold)
- Press the connector lock tab and unplug the sensor.
- Remove the sensor retaining bolt using a 10mm socket, 1/4" ratchet, and 3" extension.
- Wiggle and pull the sensor straight out (it’s sealed with an O-ring).
- Lightly seat the new O-ring (dry-fit; don’t oil it unless the new part instructions say to).
- Install the sensor fully, then install the bolt and tighten with a torque wrench (ft-lb): Torque to 9.8 Nm (7 ft-lbs).
- Reconnect the electrical connector until it clicks.
Step 4: Reassemble the intake and engine cover
- If you loosened intake duct clamps, tighten them using a flat-head screwdriver (snug, no stripping).
- Reinstall the engine cover by aligning the pegs and pushing straight down.
- If you disconnected the battery, reconnect the negative terminal using a 10mm socket (snug and secure).
✅ After Repair
- Start the engine and let it idle for 2–3 minutes. Confirm idle is smooth.
- Check that no intake duct is loose (a leak can cause rough idle and codes).
- If the check-engine light is on, use an OBD2 scan tool to clear codes and recheck for returns after a short drive.
- Test drive 10–15 minutes with gentle acceleration to confirm normal power.
💰 DIY vs Shop Cost
Shop Cost: $150-$350 (parts + labor)
DIY Cost: $40-$150 (parts only)
You Save: $110-$200 by doing it yourself!
Shop labor rates vary but typically run $100-$150/hour. This repair takes a shop approximately 0.5-1.0 hours.
🎯 Ready to get started?
HowToo makes it easy: same-day/2-day shipping on every part, plus all the tools and specialty tools you need! Check out the parts and tools sections below to add everything to your cart.
Guide for Manifold Absolute Pressure Sensor replace for these Hyundai vehicles
| Year Make Model | Sub Model | Engine | Body Style |
|---|---|---|---|
| 2024 Hyundai Palisade | - | V6 3.8L | - |
| 2023 Hyundai Palisade | - | V6 3.8L | - |
| 2022 Hyundai Palisade | - | V6 3.8L | - |
| 2021 Hyundai Palisade | - | V6 3.8L | - |
| 2020 Hyundai Palisade | - | V6 3.8L | - |