


How to Replace the MAF Sensor on a 2022 Ford Explorer 3.3L
Step-by-step DIY Ford Explorer MAF sensor replacement with tools, parts list, torque specs, safety tips, and cost savings
How to Replace the MAF Sensor on a 2022 Ford Explorer 3.3L
Step-by-step DIY Ford Explorer MAF sensor replacement with tools, parts list, torque specs, safety tips, and cost savings


🔧 Explorer - Mass Air Flow (MAF) Sensor Replacement
The MAF sensor measures how much air goes into your engine so the computer can adjust fuel correctly. If it fails, you can get rough idle, poor fuel economy, or a check-engine light. You’ll remove it from the intake duct, swap in a new one, and reconnect everything carefully.
Difficulty Level: Beginner | Estimated Time: 0.5–1 hour
⚠️ Safety & Precautions
- ⚠️ Always work with the engine off, key removed, and let the engine bay cool completely.
- ⚠️ Disconnecting the battery may erase radio/clock settings; note them before starting.
- ⚠️ Do not touch the tiny sensing wires or film inside the MAF; they are very delicate.
- ⚠️ Only use electronic / MAF-safe cleaner on connectors if needed, never on a new MAF unless specified by the manufacturer.
- ⚠️ Keep tools and loose items away from the cooling fan; it can start unexpectedly with the key on.
- ⚠️ Battery negative cable removal is recommended to avoid accidental shorts while working near wiring.
🔧 Required Tools
You'll need the following tools for this repair:
- 🛠️ 10mm socket
- 🛠️ 1/4" drive ratchet
- 🛠️ 3" extension (1/4" drive)
- 🛠️ Torx T20 screwdriver
- 🛠️ Small flathead screwdriver (4–5mm tip)
- 🛠️ Needle-nose pliers
- 🛠️ Torque screwdriver or small inch‑pound torque wrench (specialty)
- 🛠️ Shop rags
- 🛠️ Nitrile gloves
- 🛠️ Safety glasses
- 🛠️ Electronic contact cleaner (MAF-safe)
🔩 Required Parts
HowToo sells all the parts you need for this repair:
- 🔩 Mass air flow (MAF) sensor – 3.3L - Qty: 1
- 🔩 MAF sensor O-ring or sealing gasket - Qty: 1
- 🔩 Air intake duct clamp (optional, if damaged) - Qty: 1
- 🔩 Dielectric grease (for electrical connectors, optional) - Qty: 1
- 🔩 Plastic push clips for intake cover (optional, if any break) - Qty: 2–4
📋 Before You Begin
- 🧾 Park your Explorer on level ground, shift to Park, and set the parking brake.
- 🧾 Turn the ignition fully off and remove the key or key fob from the vehicle.
- 🧾 Open the hood and secure it with the prop rod.
- 🧾 Take a quick photo of the MAF area and wiring so you can match hose and connector routing during reassembly.
- 🧾 Disconnect the negative battery cable:
- Use a 10mm socket and ratchet to loosen the negative terminal clamp.
- Lift the cable off and tuck it aside so it cannot spring back.
🔨 Step-by-Step Instructions
Follow these steps in order:
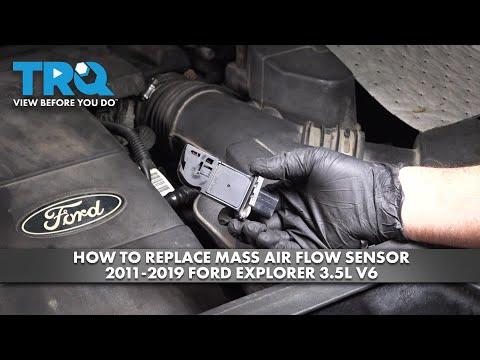
Step 1: Locate the MAF sensor
- Open the hood and stand at the front of your Explorer.
- Find the air filter box on the driver side front of the engine bay.
- Follow the large black plastic intake tube running from the air box toward the engine throttle body.
- The MAF sensor is mounted in this tube near the air box and has a small rectangular electrical connector plugged into it.
Step 2: Access the MAF sensor area
- If there is a plastic engine cover in your way, gently pull up at the corners to release the cover clips by hand. No tools are usually required.
- Move any small hoses or wiring looms gently aside by hand to make more room, noting where they go.
- Take a photo of the MAF connector and orientation.
Step 3: Disconnect the MAF electrical connector
- Put on your safety glasses and nitrile gloves.
- Locate the locking tab on the MAF connector plug.
- Use a small flathead screwdriver to gently lift or push the locking tab (depending on style) while pulling the connector straight back by hand.
- Do not pull on the wires; hold the plastic body of the connector.
- If the connector is stuck, wiggle it gently while holding the release tab; do not force it.
Step 4: Clean and inspect the connector (optional but recommended)
- Inspect the connector terminals for green or white corrosion, dirt, or moisture.
- If dirty, spray a small amount of electronic contact cleaner into the connector and let it air dry for a few minutes.
- If you use dielectric grease, apply a tiny smear to the outer rubber seal area, not directly on the metal pins.
Step 5: Remove the MAF sensor retaining screws
- Identify the two small screws holding the MAF to the intake tube.
- Use a Torx T20 screwdriver to loosen and remove both screws.
- Keep steady pressure so you don’t strip the heads. Place the screws in a small tray so they don’t get lost.
- Do not drop screws into the intake tube.
Step 6: Remove the old MAF sensor
- Once the screws are removed, gently pull the MAF sensor straight out of the intake tube by hand.
- If it feels stuck, gently twist it a few millimeters left and right while pulling straight out; do not pry with tools on the sensor body.
- Inspect the O-ring or gasket on the sensor; note how it is seated.
Step 7: Prepare the new MAF sensor
- Compare the new MAF to the old one to ensure the connector, screw holes, and sensing element location match.
- Install the new O-ring or sealing gasket onto the new MAF sensor if it is not pre-installed.
- Lightly wipe the mating surface on the intake tube with a shop rag to remove dust.
- Do not touch the sensing wires or film.
Step 8: Install the new MAF sensor
- Align the new MAF sensor with the opening in the intake tube in the same orientation as the old one (airflow arrow, if present, should point toward the engine).
- Slide the sensor straight into the tube until the mounting flange sits flush.
- Install the two retaining screws by hand first to avoid cross-threading.
- Use the Torx T20 screwdriver to tighten the screws evenly until snug.
- Then tighten to Torque to 2.5 Nm (22 in-lbs) with a torque screwdriver or small inch‑pound torque wrench if available. Do not overtighten; the housing is plastic.
Step 9: Reconnect the MAF electrical connector
- Align the connector with the MAF sensor socket.
- Push the connector straight in by hand until it clicks into place.
- Gently tug on the connector to confirm it is locked.
- Make sure the wiring harness is routed as before and not pulled tight or rubbing against sharp edges.
Step 10: Reinstall any removed covers and reconnect battery
- If you removed the engine cover, line up the cover with its mounting posts and press down by hand at each corner until it clicks into place.
- Reconnect the negative battery cable:
- Place the cable clamp back on the negative battery post.
- Use the 10mm socket and ratchet to tighten the clamp bolt until snug.
- Torque to about 6 Nm (53 in-lbs); do not overtighten.
Step 11: Initial restart and idle learn
- Sit in the driver seat and turn the ignition to ON (engine off) for about 10 seconds to let the computer see the new sensor.
- Then start the engine and let it idle in Park for 5–10 minutes with all accessories off (AC, lights, rear defrost).
- The idle may change slightly as the computer relearns.
✅ After Repair
- 🧪 Check that the engine idles smoothly and does not hesitate when you gently press the accelerator.
- 🧪 Look under the hood to confirm there are no air leaks (listen for loud hissing) around the air box, intake tube, and MAF sensor area.
- 🧪 If the check-engine light was on, it may clear on its own after a few drive cycles, or you can clear it with a scan tool or code reader.
- 🧪 Take a short, gentle test drive: normal acceleration, no heavy throttle at first. Confirm there are no warning lights and throttle response feels normal.
- 🧪 After the drive, recheck that the connector is still fully seated and that nothing has come loose around the air intake.
💰 DIY vs Shop Cost
Shop Cost: $250–$450 (parts + labor)
DIY Cost: $80–$180 (parts only)
You Save: $170–$270 by doing it yourself!
Shop labor rates vary but typically run $100–$150/hour. This repair takes a shop approximately 0.5–1.0 hour.
🎯 Ready to get started?
HowToo makes it easy: same-day/2-day shipping on every part, plus all the tools and specialty tools you need! Check out the parts and tools sections above to add everything to your cart.
