









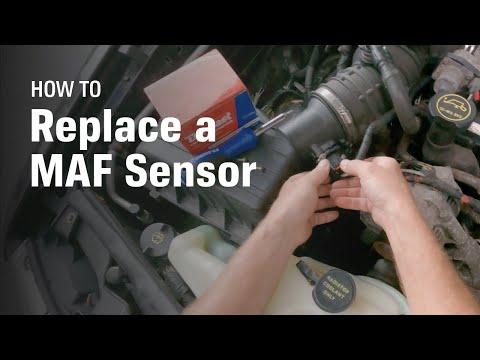






How to Replace the MAF Sensor on a 2017 Hyundai Tucson 1.6L
Step-by-step DIY guide with tools, parts, torque specs, code clearing, and safety tips
How to Replace the MAF Sensor on a 2017 Hyundai Tucson 1.6L
Step-by-step DIY guide with tools, parts, torque specs, code clearing, and safety tips


🔧 Tucson - Mass Air Flow Sensor Replacement
The mass air flow sensor measures the amount of air entering your Tucson’s turbocharged 1.6L engine so the engine computer can calculate fuel delivery. Replacing it is usually a simple under-hood repair, but handle the sensor carefully because the sensing element is delicate.
Difficulty Level: Beginner | Estimated Time: 15-30 minutes
⚠️ Safety & Precautions
- ⚠️ Let the engine cool before working near the air intake and turbo inlet area.
- ⚠️ Turn the ignition fully OFF and keep the key away from the vehicle while the sensor is unplugged.
- ⚠️ Do not touch the small sensing wire/film inside the MAF sensor.
- ⚠️ Battery disconnect is recommended to prevent accidental sensor circuit faults while unplugging the connector.
- ⚠️ Never spray brake cleaner, carb cleaner, or compressed air directly onto the new MAF sensor.
🔧 Required Tools
You'll need the following tools for this repair:
- 10mm socket
- 1/4-inch ratchet
- Phillips #2 screwdriver
- Trim clip removal tool
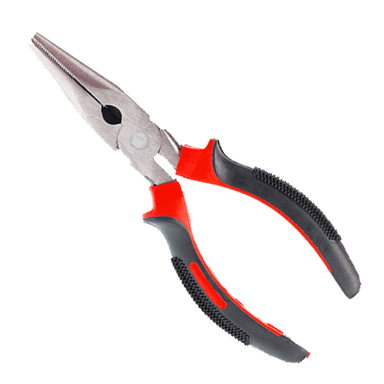
- Needle-nose pliers
- OBD-II scan tool
- Nitrile gloves
- Safety glasses
🔩 Required Parts
HowToo sells all the parts you need for this repair:
- Mass air flow sensor - Qty: 1
- MAF sensor O-ring seal - Qty: 1
📋 Before You Begin
- Park your Tucson on level ground and shift to Park.
- Set the parking brake and open the hood.
- Let the engine cool for at least 15 minutes if it was recently running.
- Use a 10mm socket and 1/4-inch ratchet to disconnect the negative battery cable. Move the cable aside so it cannot spring back onto the battery post.
- An OBD-II scan tool is a small plug-in device that reads and clears engine fault codes from the diagnostic port under the dashboard.
🔨 Step-by-Step Instructions
Follow these steps in order:
Step 1: Locate the MAF Sensor
- Put on safety glasses and nitrile gloves.
- Open the hood and look at the air intake tube between the air filter box and the turbo inlet hose.
- The MAF sensor is mounted in the intake tube/air cleaner outlet area and has an electrical connector plugged into it.
- Take a phone photo first.
Step 2: Unplug the Electrical Connector
- Use your fingers to press the locking tab on the MAF sensor connector.
- If the connector is tight, use needle-nose pliers gently on the connector body only.
- Pull the connector straight back. Do not pull on the wires.
- If a plastic connector retainer is clipped to the intake tube, use the trim clip removal tool to release it.
Step 3: Remove the Old MAF Sensor
- Use a Phillips #2 screwdriver to remove the MAF sensor retaining screws.
- Set the screws aside in a safe place.
- Pull the MAF sensor straight out of the intake tube.
- If it feels stuck, gently wiggle it by the plastic housing. Do not pry against the sensing element.
Step 4: Inspect the Sensor Opening
- Use a clean gloved finger to check that the old O-ring seal did not stay stuck in the intake tube.
- Use the trim clip removal tool only if needed to lift out an old seal, being careful not to gouge the plastic intake tube.
- Make sure no dirt or debris falls into the intake opening.
Step 5: Install the New MAF Sensor
- Confirm the new MAF sensor has a clean O-ring seal installed.
- Insert the new sensor straight into the intake tube in the same orientation as the old one.
- Use the Phillips #2 screwdriver to install the retaining screws by hand first so they do not cross-thread.
- Tighten the screws snugly with the Phillips #2 screwdriver. If using a torque screwdriver, Torque to 2-3 Nm (18-27 in-lbs).
- Snug is enough for plastic.
Step 6: Reconnect the Electrical Connector
- Push the electrical connector straight onto the new MAF sensor until it clicks.
- Use the trim clip removal tool or your fingers to secure any wiring retainer back to the intake tube.
- Gently tug the connector body to confirm it is locked in place.
Step 7: Reconnect the Battery
- Place the negative battery cable back onto the battery post.
- Use the 10mm socket and 1/4-inch ratchet to tighten the negative terminal nut.
- Torque to 4-6 Nm (35-53 in-lbs).
- Do not overtighten the battery terminal because it can crack the clamp.
Step 8: Clear Codes and Start the Engine
- Plug the OBD-II scan tool into the diagnostic port under the driver-side dash.
- Turn the ignition ON without starting the engine.
- Use the OBD-II scan tool to clear stored engine codes.
- Start the engine and let it idle for 2-3 minutes without pressing the accelerator.
- Listen for air leaks near the intake tube. A leak may sound like a hiss.
✅ After Repair
- ✅ Confirm the check engine light stays off after clearing codes.
- ✅ Let the engine idle until it feels smooth and stable.
- ✅ Take a gentle 10-15 minute test drive with light acceleration first.
- ✅ Recheck that the MAF connector is fully seated if the engine idles rough or the check engine light returns.
- ✅ If codes like P0101, P0102, or P0103 return, inspect the air filter box, intake tube clamps, and wiring before replacing more parts.
💰 DIY vs Shop Cost
Shop Cost: $180-$350 (parts + labor)
DIY Cost: $70-$180 (parts only)
You Save: $100-$170 by doing it yourself!
Shop labor rates vary but typically run $100-$150/hour. This repair takes a shop approximately 0.3-0.6 hours.
🎯 Ready to get started?
HowToo makes it easy: same-day/2-day shipping on every part, plus all the tools and specialty tools you need! Check out the parts and tools sections below to add everything to your cart.
Guide for Mass Air Flow Sensor Hose replace for these Hyundai vehicles
| Year Make Model | Sub Model | Engine | Body Style |
|---|