









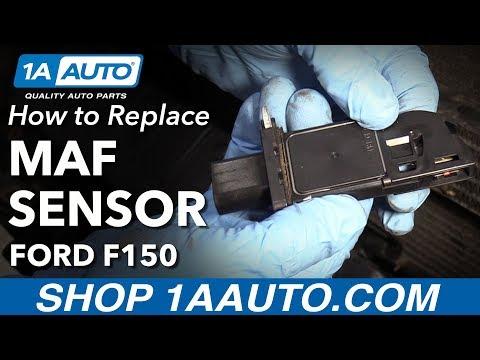








How to Replace the MAF Sensor on a 2016 Ford F-150 5.0L V8
Step-by-step instructions with tools, torque specs, cleaning tips, KAM reset, and post-repair checks for 2010, 2011, 2012, 2013, 2014
How to Replace the MAF Sensor on a 2016 Ford F-150 5.0L V8
Step-by-step instructions with tools, torque specs, cleaning tips, KAM reset, and post-repair checks for 2010, 2011, 2012, 2013, 2014


F-150 - Mass Air Flow (MAF) Sensor Replacement 🚚
I’ll walk you through this in simple steps. Two quick questions before we start:
- 🧰 Is your air filter box still stock (black plastic box on the passenger side), or do you have an aftermarket intake?
- 🧼 Do you plan to clean the existing sensor first, or replace it with a new one?
Tools & Parts You’ll Need 🛠️
- 🪛 T20 Torx driver (star-shaped screwdriver bit)
- 🔧 7 mm socket or nut driver (for intake clamp if loosening the tube helps access)
- 🧤 Nitrile gloves (keep oil off the sensor)
- 🧽 Optional: MAF sensor cleaner (non-residue spray made for sensors)
- 📦 Replacement MAF sensor for your 5.0L (2016) — use an OEM or premium brand only
MAF sensor = a small sensor that measures the air entering your engine so fuel stays balanced.
Safety First ⚠️
- 🔋 Turn the ignition OFF. Remove key. Do not spray or work with ignition on.
- 🔥 Work on a cool engine to avoid burns.
- 🧯 Do not touch or drop the sensing element; it’s fragile.
Location 📍
On your 5.0L, the MAF sensor is integrated in the air intake tube just after the air filter box (passenger side). It’s a small module held by two T20 Torx screws with a 5‑pin electrical connector.
Step-by-Step Replacement ✅
- 🔌 Disconnect the MAF connector: Press the tab and pull straight back. Don’t wiggle by the wires.
- 🪛 Remove the two T20 Torx screws that hold the MAF to the air duct or housing. Set them aside safely.
- ⬆️ Slide the MAF sensor straight out of the housing. A slight twist helps break the seal.
- 🧽 Optional cleaning: If reusing, spray MAF cleaner on the sensing wire/film for 3–4 short bursts. Do not touch the element. Let it air-dry 10 minutes.
- ⬇️ Install the new (or cleaned) MAF sensor in the same orientation. The arrow on the body must point toward the engine (airflow direction).
- 🪛 Reinstall the two T20 screws: snug by hand. Torque: 18 in‑lb (2.0 N·m). Do not overtighten—the housing is plastic.
- 🔌 Reconnect the electrical connector until it clicks.
- 🔄 If you loosened the intake clamp for access, retighten the 7 mm clamp: Torque: 35 in‑lb (4.0 N·m).
Clear Adaptives (Recommended) 🧠
- 🧰 Best method: Use a scan tool and perform Powertrain > Keep Alive Memory (KAM) Reset to clear fuel trims.
- 🔋 No scan tool: Disconnect the negative battery cable for 10 minutes, then reconnect. You’ll lose radio presets and the PCM will relearn. Idle may fluctuate for a short drive.
Post-Repair Checks 🚦
- 🟢 Start the engine; let it idle 2–3 minutes. Listen for smooth idle.
- 🌬️ Verify all intake tubes and clamps are sealed—no hissing.
- 🚗 Drive 10–15 minutes mixed speeds to let the PCM relearn.
- 🔎 If a check engine light remains, read codes (e.g., P0101–P0104). Reinspect connector orientation and for intake air leaks between airbox and throttle body.
Tips & Common Gotchas 💡
- 🧰 Use dielectric grease sparingly on the connector seal only, not on pins.
- 🪵 Never use carb or brake cleaner on a MAF—only dedicated MAF cleaner.
- 🧩 If you have an oiled performance air filter, excess oil can foul the MAF. Let the filter fully dry after re-oiling.
- 🧊 Cold-start stalls after replacement often resolve after a few drive cycles post-KAM reset.
Suggested Parts & Tools 🧳
- 🧰 Motorcraft MAF sensor (OE fit for your 5.0L)
- 🧽 CRC MAF Sensor Cleaner
- 🪛 T20 Torx driver and 7 mm nut driver
HowToo makes it easy: same-day/2-day shipping on every part, plus all the tools and specialty tools you need! You can add items to your cart from the tools and parts section below or via the Parts button.