


How to Replace the MAF or MAP Sensor on a 2022 Jeep Grand Cherokee WK
Step-by-step DIY sensor replacement with tools, parts list, torque specs, safety tips, and post-repair checks for 2022
How to Replace the MAF or MAP Sensor on a 2022 Jeep Grand Cherokee WK
Step-by-step DIY sensor replacement with tools, parts list, torque specs, safety tips, and post-repair checks for 2022
🔧 Grand Cherokee WK - Mass Air Flow (MAF) Sensor Replacement
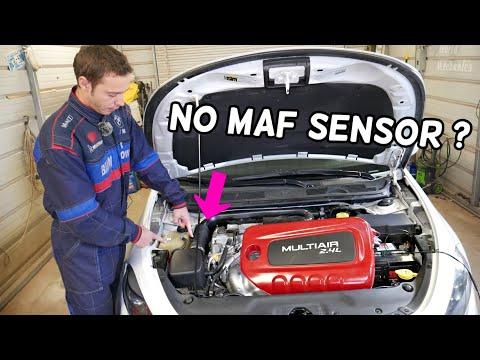
On your Grand Cherokee WK with the 3.6L engine, the factory setup normally uses a MAP sensor (manifold absolute pressure) and an IAT sensor (intake air temperature), not a traditional MAF sensor in the intake tube. I want to be sure we replace the correct part and give you accurate steps.
Difficulty Level: Beginner | Estimated Time: 0.5–1 hour
⚠️ Safety & Precautions
- 🛑 Only work on the engine when it is cool to avoid burns.
- 🛑 Turn the ignition off and remove the key before unplugging any sensors.
- 🛑 Disconnect the negative battery terminal if you will be leaning heavily over the engine or are worried about short circuits.
🔧 Required Tools
You'll need the following tools for this repair:
- 🧰 10mm socket
- 🧰 1/4" drive ratchet
- 🧰 1/4" drive extension 3"
- 🧰 T20 Torx screwdriver
- 🧰 T25 Torx screwdriver
- 🧰 Small flathead screwdriver 4mm
- 🧰 Needle nose pliers
- 🧰 Digital multimeter (specialty)
- 🧰 OBD-II scan tool (specialty)
- 🧰 Mechanic’s gloves
- 🧰 Safety glasses
- 🧰 Shop towels
🔩 Required Parts
HowToo sells all the parts you need for this repair:
- 🔩 Mass air flow (MAF) sensor or MAP sensor (correct for your engine) - Qty: 1
- 🔩 Sensor mounting screws (if not reused) - Qty: 2
- 🔩 Dielectric grease for electrical connectors - Qty: small tube
📋 Before You Begin
- 🚗 Park the Grand Cherokee on level ground, shift to Park, and set the parking brake.
- 🔑 Turn the ignition fully off and remove the key/fob from the vehicle.
- 🔋 If you prefer maximum safety, use a 10mm socket to disconnect the negative battery terminal and move the cable aside.
- 📱 If you have an OBD-II scan tool, keep it handy to clear codes after replacement.
🔨 Step-by-Step Instructions
Follow these steps in order:
Step 1: Confirm which sensor we are replacing
- 🧰 Look at the air intake: follow the plastic tube from the air filter box toward the engine.
- 🧰 A true MAF sensor is usually mounted in this tube with an electrical connector and held by small screws.
- 🧰 A MAP sensor is usually mounted on the intake manifold (metal or plastic piece on top of the engine) with one screw and a connector.
- 🧰 If you can, reply and tell me: is your sensor mounted in the air intake tube or on the intake manifold? This changes the exact location and screw type.
Step 2: Access the sensor area
- 🧰 Open the hood and support it with the hood prop rod.
- 🧰 If needed for access, use a 10mm socket and ratchet to loosen the clamp on the air intake tube and gently move the tube a bit. Do not force the plastic.
- 🧰 Wipe dirt away from around the sensor with shop towels so dust does not fall into the intake when the sensor is removed.
Step 3: Disconnect the electrical connector
- 🧰 Locate the small electrical plug on the sensor body.
- 🧰 Use a small flathead screwdriver 4mm to gently lift the locking tab while pulling the connector straight off. Do not pry hard.
- 🧰 Inspect the connector for bent pins or corrosion. If dirty, blow gently or wipe lightly with a dry towel.
Step 4: Remove the old sensor
- 🧰 Use a T20 Torx screwdriver or T25 Torx screwdriver (whichever matches) to remove the screws holding the sensor.
- 🧰 Keep the screws safe; place them in a small tray or cup.
- 🧰 Gently wiggle and pull the sensor straight out. Do not twist hard; the plastic can crack.
Step 5: Compare old and new parts
- 🧰 Place the old and new sensors side by side on a clean surface.
- 🧰 Check that the mounting holes, electrical connector shape, and sensor tip length all match.
- 🧰 If they do not match, do not install; you may have the wrong part.
Step 6: Install the new sensor
- 🧰 If desired, apply a tiny smear of dielectric grease around the connector seal only (not on the metal pins).
- 🧰 Carefully insert the new sensor into the housing or manifold. Make sure the sensor sits flat and fully seated.
- 🧰 Install the screws by hand first, then tighten with the T20 Torx screwdriver or T25 Torx screwdriver until snug.
- 🧰 For small sensor screws, tighten to about 2–3 Nm (18–27 in-lbs)—just past finger tight. Do not overtighten.
Step 7: Reconnect the electrical connector
- 🧰 Push the connector straight onto the sensor until you hear or feel a click.
- 🧰 Gently tug to confirm it is locked in place.
- 🧰 If you removed or loosened the intake tube earlier, use the 10mm socket to snug the clamp back. Torque to 3–4 Nm (27–35 in-lbs) if you have a small torque wrench.
Step 8: Reconnect battery and clear codes
- 🧰 If you disconnected the battery, use the 10mm socket to reinstall and snug the negative terminal. Torque to 5–7 Nm (44–62 in-lbs).
- 🧰 Plug in your OBD-II scan tool (specialty) to the port under the dash.
- 🧰 Turn the ignition to ON (engine off) and use the scan tool to clear any stored codes related to the sensor.
Step 9: Test the repair
- 🧰 Start the engine and let it idle for a few minutes.
- 🧰 Listen for smooth idle and watch for any warning lights on the dash.
- 🧰 Take a short, gentle drive. Check for normal power and throttle response. Stop if any new lights appear.
✅ After Repair
- 🚗 Verify that any previous check engine light for the MAF/MAP or intake system stays off.
- 📟 Re-scan with your OBD-II tool after the test drive and confirm no new codes are stored.
- 🔁 Over the next few trips, pay attention to fuel economy and engine smoothness; both should be normal or improved.
💰 DIY vs Shop Cost
Shop Cost: $220–$380 (parts + labor)
DIY Cost: $70–$150 (parts only)
You Save: $150–$230 by doing it yourself!
Shop labor rates vary but typically run $100–$150/hour. This repair takes a shop approximately 0.5–1.0 hours.
🎯 Ready to get started?
HowToo makes it easy: same-day/2-day shipping on every part, plus all the tools and specialty tools you need! Check out the parts and tools sections below to add everything to your cart.
