









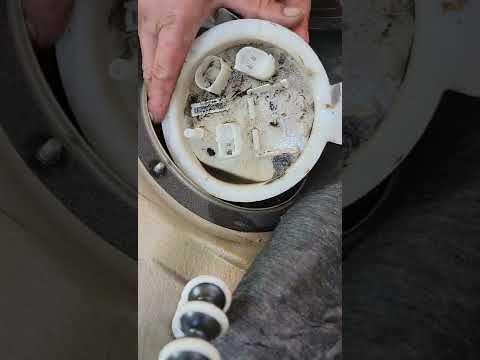







How to Replace the In-Tank Fuel Pump on a 2011-2016 BMW 550i (Low-Pressure Pump) (Engine: V8 4.4L)
Step-by-step DIY instructions with required tools, parts list, safety tips, and key torque specs
How to Replace the In-Tank Fuel Pump on a 2011-2016 BMW 550i (Low-Pressure Pump) (Engine: V8 4.4L)
Step-by-step DIY instructions with required tools, parts list, safety tips, and key torque specs for 2011, 2013, 2014, 2015, 2016


🔧 550i - In-Tank Fuel Pump Replacement
On your 550i, the “fuel pump” most DIYers mean is the low-pressure pump inside the fuel tank (under the rear seat). Replacing it restores proper fuel supply to the engine and can fix long-crank, stalling, or low-fuel-pressure faults.
Difficulty Level: Intermediate | Estimated Time: 2-4 hours
Assumption: You’re replacing the in-tank (low-pressure) pump/module, not the engine-mounted high-pressure pumps.
⚠️ Safety & Precautions
- ⚠️ Work outdoors or in a well-ventilated area; fuel vapors ignite easily.
- ⚠️ No smoking, no hot lights, no grinding/sparks near the car.
- ⚠️ Disconnect the negative battery cable in the trunk before opening fuel lines.
- ⚠️ Keep a Class B fire extinguisher nearby.
- ⚠️ Clean the area before opening the tank to prevent dirt from entering.
🔧 Required Tools
You'll need the following tools for this repair:
- Safety glasses
- Nitrile gloves
- Trim removal tool set
- Ratchet
- 8mm socket
- 10mm socket
- Small flat-blade screwdriver
- Pick tool
- Fuel line disconnect pick set
- Brass punch (specialty)
- Small hammer
- Torque wrench (Nm) 5–120 Nm range
- Shop towels
- Catch pan
- Hand vacuum or compressed air blow gun
- Permanent marker or paint pen
- Flashlight
🔩 Required Parts
HowToo sells all the parts you need for this repair:
- In-tank fuel pump module - Qty: 1
- Fuel pump module seal / O-ring - Qty: 1
- Fuel pump lock ring - Qty: 1
- Fuel line retaining clips - Qty: 1 set
📋 Before You Begin
- Park on level ground, set the parking brake, and open the fuel door to relieve tank vapor pressure.
- Relieve fuel pressure: remove the fuel pump fuse and crank/start until it stalls; then crank 5 seconds more.
- Disconnect the battery negative cable in the trunk using a 10mm socket.
- Have towels and a catch pan ready; a small amount of fuel will spill when lines are disconnected.
🔨 Step-by-Step Instructions
Follow these steps in order:
Step 1: Remove the rear seat bottom
- Pull up firmly on the front edge of the rear seat bottom cushion to release the clips.
- Lift the cushion out and set it aside.
- Pull straight up; don’t pry the leather.
Step 2: Expose the fuel pump access cover
- Peel back the insulation/sound deadening over the access area.
- Use a trim removal tool set to avoid tearing insulation or breaking clips.
Step 3: Remove the access cover
- Use an 8mm socket and ratchet to remove the access cover fasteners (if equipped).
- Lift the cover off and set it aside.
Step 4: Clean the area (important)
- Use a hand vacuum or compressed air blow gun to remove dirt around the pump module and lock ring.
- Wipe with shop towels so no debris falls into the tank.
Step 5: Disconnect the electrical connector
- Press the lock tab and unplug the pump electrical connector by hand.
- If it’s stubborn, use a small flat-blade screwdriver gently to release the tab.
Step 6: Disconnect the fuel line(s)
- Place a catch pan and shop towels under the connection.
- Release the quick-connect by using a fuel line disconnect pick set (a small pick that lifts the connector’s locking clip).
- Pull the line straight off; do not twist hard.
Step 7: Mark the pump module position
- Use a permanent marker or paint pen to mark the lock ring and tank so you can align the new module the same way.
Step 8: Remove the lock ring
- Use a brass punch (specialty) and small hammer to tap the lock ring counterclockwise until it releases.
- Brass is used to reduce spark risk compared to steel.
Step 9: Remove the pump module
- Lift the module slowly out of the tank while guiding the float arm (fuel level sensor) so it doesn’t bend.
- Let fuel drain from the module into the tank; keep shop towels ready.
- Remove the old seal / O-ring from the tank opening.
Step 10: Install the new seal and pump module
- Install the new seal / O-ring into the tank groove by hand (make sure it sits flat).
- Lower the new pump module in, aligning it with your marks.
- A pinched seal will cause fuel smell/leaks.
Step 11: Install and tighten the lock ring
- Thread the new lock ring on by hand first to avoid cross-threading.
- Tighten using a brass punch (specialty) and small hammer until fully seated.
- Torque to 110 Nm (81 ft-lbs) if using a proper lock-ring tool and torque wrench (Nm) 5–120 Nm range.
Step 12: Reconnect fuel line(s) and electrical connector
- Push the fuel line on until it clicks; lightly tug to confirm it’s locked.
- Reconnect the electrical connector until it clicks.
- Replace any damaged retaining clips with the new ones.
Step 13: Reinstall the access cover and rear seat
- Reinstall the access cover using an 8mm socket and ratchet.
- Torque to 5 Nm (44 in-lbs).
- Reinstall insulation, then press the rear seat bottom cushion down until both front clips snap in.
✅ After Repair
- Reconnect the battery negative cable using a 10mm socket and torque wrench: Torque to 5 Nm (44 in-lbs).
- Prime the system: turn ignition ON (do not start) for 10 seconds, OFF for 10 seconds; repeat 3 times.
- Start the engine and let it idle for 1–2 minutes while you check for leaks and fuel smell.
- If you have a scan tool, clear any stored fuel pressure/fuel pump faults and recheck.
💰 DIY vs Shop Cost
Shop Cost: $900-$1,600 (parts + labor)
DIY Cost: $250-$650 (parts only)
You Save: $650-$950 by doing it yourself!
Shop labor rates vary but typically run $100-$150/hour. This repair takes a shop approximately 2-4 hours.
🎯 Ready to get started?
HowToo makes it easy: same-day/2-day shipping on every part, plus all the tools and specialty tools you need! Check out the parts and tools sections below to add everything to your cart.
Guide for Fuel Pump Module Assembly replace for these BMW vehicles
| Year Make Model | Sub Model | Engine | Body Style |
|---|---|---|---|
| 2016 BMW 550i | - | V8 4.4L | - |
| 2015 BMW 550i | - | V8 4.4L | - |
| 2014 BMW 550i | - | V8 4.4L | - |
| 2013 BMW 550i | - | V8 4.4L | - |
| 2011 BMW 550i | - | V8 4.4L | - |