









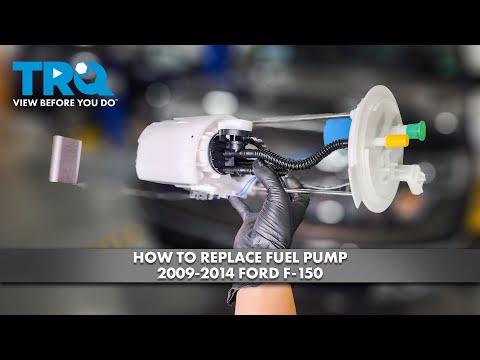







How to Replace the In-Tank Fuel Pump on a 2009 Ford F-150 (Fuel Pump Module)
Step-by-step drop-the-tank or lift-the-bed methods, required tools/parts, torque specs, and safety tips for 2009, 2010
How to Replace the In-Tank Fuel Pump on a 2009 Ford F-150 (Fuel Pump Module)
Step-by-step drop-the-tank or lift-the-bed methods, required tools/parts, torque specs, and safety tips for 2009, 2010


🔧 F-150 - Fuel Pump Replacement
On your F-150, the fuel pump is part of an in-tank fuel pump module. Replacing it means relieving fuel pressure, disconnecting the fuel lines/electrical connector, then removing the module from the tank and installing a new seal and pump module.
Difficulty Level: Advanced | Estimated Time: 3-6 hours
⚠️ Safety & Precautions
- 🧯 Work outdoors or in a very well-ventilated area; fuel vapors are extremely flammable.
- 🚭 No smoking, no sparks, no hot lights; keep a Class B fire extinguisher nearby.
- 🔋 Disconnect the negative battery cable before opening the fuel system.
- 🛑 Relieve fuel pressure before disconnecting any fuel line to prevent spray.
- ⬆️ If lifting the truck, support it with jack stands on the frame—never rely on a jack.
- 🧤 Wear safety glasses and fuel-resistant gloves; gasoline is a skin/eye irritant.
🔧 Required Tools
You'll need the following tools for this repair:
- Safety glasses
- Fuel-resistant gloves
- Class B fire extinguisher
- Floor jack (rated 3-ton minimum)
- Jack stands (rated 3-ton minimum)
- Wheel chocks
- Ratchet
- Socket set (8mm, 10mm, 13mm, 15mm, 18mm, 21mm)
- Wrench set (10mm, 13mm, 15mm)
- Torque wrench (20-200 ft-lbs range)
- Flat-blade screwdriver
- Pick tool
- Fuel line quick-disconnect tool set (3/8" and 1/2")
- Drain pan
- Shop rags
- Brass punch and hammer
- Fuel pump lock ring tool (specialty)
- Penetrating oil
🔩 Required Parts
HowToo sells all the parts you need for this repair:
- Fuel pump module assembly (in-tank) - Qty: 1
- Fuel pump module tank seal/O-ring - Qty: 1
- Fuel pump lock ring - Qty: 1
- Fuel filter (frame rail mounted) - Qty: 1
📋 Before You Begin
- Park on level ground, set the parking brake, and chock the rear wheels.
- Try to run the fuel level down to 1/4 tank or less; a full tank is heavy and harder to control.
- Open the fuel door and loosen the gas cap to help vent tank pressure.
- Plan your access method: Drop the tank (most common DIY) or lift/remove the bed (often faster if bed bolts aren’t seized).
🔨 Step-by-Step Instructions
Follow these steps in order:
Step 1: Relieve fuel pressure
- Open the under-hood fuse box and remove the fuel pump relay using a pick tool (or your fingers if it’s loose).
- Start the engine and let it run until it stalls.
- Crank again for 3-5 seconds to bleed off any remaining pressure.
- Less pressure = less fuel spray.
Step 2: Disconnect the battery
- Use a 10mm wrench to remove the negative battery cable and isolate it so it can’t spring back.
Step 3: Raise and support the truck (if dropping the tank)
- Use a floor jack (rated 3-ton minimum) to lift the truck at approved lift points.
- Set it securely on jack stands (rated 3-ton minimum).
Step 4: Choose your access method
- Method A (Drop the tank): Best if bed bolts are rusty or you’re working alone.
- Method B (Lift the bed): Best if you have help; gives top access with less work under the truck.
Step 5A: Drop-the-tank method - disconnect filler neck and vent
- Support the fuel tank with a floor jack (use a flat board on the jack pad if possible).
- Use a flat-blade screwdriver to loosen the hose clamps at the filler neck connection.
- Twist and pull the filler hose(s) off the tank neck.
- Place a drain pan underneath and keep shop rags ready for drips.
Step 6A: Drop-the-tank method - unplug electrical and disconnect fuel lines
- Lower the tank slightly with the floor jack so you can reach the top.
- Unplug the pump module electrical connector by releasing the tab with a pick tool.
- Disconnect the fuel line quick-connect fittings using a fuel line quick-disconnect tool set (3/8" and 1/2").
- Push line in, then release it.
Step 7A: Drop-the-tank method - remove tank straps
- Soak strap fasteners with penetrating oil.
- Use a 13mm or 15mm socket (varies by hardware) to remove the fuel tank strap bolts.
- Carefully lower the tank with the floor jack and slide it out.
- On reassembly, Torque strap bolts to 41 Nm (30 ft-lbs).
Step 5B: Lift-the-bed method - remove/raise the bed
- Unplug the rear taillamp/bed harness connector (near the rear frame area) using a pick tool to release locks.
- Remove the bed bolts using an 18mm socket and ratchet.
- With at least one helper, lift the bed and slide it rearward enough to expose the top of the fuel tank (or remove it fully).
- On reassembly, Torque bed-to-frame bolts to 80 Nm (59 ft-lbs).
Step 6: Clean the top of the tank and remove the lock ring
- Use shop rags to wipe dirt away from the pump module area so debris doesn’t fall into the tank.
- Remove the lock ring using a fuel pump lock ring tool (specialty).
- If needed, use a brass punch and hammer to tap the ring loose (brass helps reduce spark risk).
Step 7: Remove the fuel pump module
- Carefully lift the module out of the tank by hand.
- Angle it as needed to avoid damaging the float arm (it reads fuel level).
- Remove the old seal/O-ring with a pick tool.
Step 8: Install the new seal and fuel pump module
- Install the new tank seal/O-ring by hand, making sure it sits flat in its groove.
- Lower the new module into place, aligning the tabs/index marks.
- Install the new lock ring and tighten it using the fuel pump lock ring tool (specialty) until it’s fully seated/locked.
Step 9: Reconnect lines and wiring
- Reconnect the electrical connector until it clicks.
- Reconnect the fuel lines until you feel/hear a click, then gently tug-test by hand.
- Reconnect the filler neck hose(s) and tighten clamps using a flat-blade screwdriver.
Step 10: Replace the frame-rail fuel filter
- Position a drain pan under the fuel filter.
- Disconnect the quick-connect fittings using the fuel line quick-disconnect tool set (3/8" and 1/2").
- Install the new filter in the correct flow direction and reconnect lines until they click.
Step 11: Reassemble and torque
- If you dropped the tank: raise it into position with the floor jack and reinstall straps using a socket set, then Torque strap bolts to 41 Nm (30 ft-lbs).
- If you lifted the bed: reinstall bed bolts using an 18mm socket, then Torque bed-to-frame bolts to 80 Nm (59 ft-lbs).
Step 12: Prime the system and check for leaks
- Reconnect the negative battery cable using a 10mm wrench.
- Reinstall the fuel pump relay by hand.
- Turn the key to ON (engine off) for 5 seconds, then OFF for 5 seconds. Do this 3 times to prime.
- Start the engine and inspect for leaks at the tank top connections and fuel filter.
✅ After Repair
- Let the engine idle for 2-3 minutes and re-check for fuel seepage.
- Test drive for 10-15 minutes, then inspect again for leaks.
- If the fuel gauge reads wrong, re-check that the module float arm wasn’t bent during install.
- If you get a check-engine light, scan for codes—loose connectors/lines can trigger EVAP or fuel pressure codes.
💰 DIY vs Shop Cost
Shop Cost: $900-$1,700 (parts + labor)
DIY Cost: $250-$650 (parts only)
You Save: $650-$1,050 by doing it yourself!
Shop labor rates vary but typically run $100-$150/hour. This repair takes a shop approximately 3-6 hours.
🎯 Ready to get started?
HowToo makes it easy: same-day/2-day shipping on every part, plus all the tools and specialty tools you need! Check out the parts and tools sections below to add everything to your cart.