


How to Replace the In-Tank Fuel Pump Module on a 2020 Chevrolet Blazer
Step-by-step instructions to drop the fuel tank, swap the pump, and prime the system (tools, parts, and safety tips)
How to Replace the In-Tank Fuel Pump Module on a 2020 Chevrolet Blazer
Step-by-step instructions to drop the fuel tank, swap the pump, and prime the system (tools, parts, and safety tips)


🔧 Blazer - Fuel Pump Replacement
On your Blazer, the fuel pump is part of an in-tank fuel pump module. Replacing it usually requires lowering the fuel tank so you can remove the lock ring and lift the module out without damaging the fuel lines or the tank seal.
Difficulty Level: Advanced | Estimated Time: 3-6 hours
⚠️ Safety & Precautions
- ⚠️ Work outside or in a very well-ventilated area; fuel vapors are highly flammable.
- ⚠️ No smoking, no heaters, no shop lights with hot bulbs, and keep a fire extinguisher nearby.
- ⚠️ Relieve fuel pressure before disconnecting any fuel lines to prevent fuel spray.
- ⚠️ Disconnect the negative battery cable to reduce fire risk.
- ⚠️ Support the tank with a transmission jack; a falling tank can injure you and break lines.
🔧 Required Tools
You'll need the following tools for this repair:
- Floor jack (rated 3-ton minimum)
- Jack stands (rated 3-ton minimum)
- Wheel chocks
- Safety glasses
- Nitrile gloves
- Fire extinguisher (Class B)
- Transmission jack (specialty)
- Socket set (8mm-18mm)
- Ratchet (3/8")
- Breaker bar (3/8" or 1/2")
- Torque wrench (10-200 Nm range)
- Flat trim tool
- Fuel line quick-disconnect tool set (specialty)
- Brass punch (specialty)
- Small hammer
- Drain pan
- Shop towels
- Paint marker
🔩 Required Parts
HowToo sells all the parts you need for this repair:
- Fuel pump module (in-tank) - Qty: 1
- Fuel pump module tank seal (O-ring/gasket) - Qty: 1
- Fuel pump lock ring (if damaged/corroded) - Qty: 1
- Fuel line retaining clips (if equipped/needed) - Qty: 1 set
📋 Before You Begin
- Park on level ground, set the parking brake, and chock the rear wheels.
- Run the fuel level as low as possible; a lighter tank is much safer to handle.
- Open the fuel door and loosen the gas cap to vent tank pressure.
- Disconnect the negative battery cable using a 10mm socket (common size).
- Plan for two variants below: FWD is simpler; AWD may require extra underbody removal around the driveshaft/exhaust shields.
🔨 Step-by-Step Instructions
Follow these steps in order:
Step 1: Relieve fuel pressure
- Open the under-hood fuse/relay box and use the diagram on the cover to locate the Fuel Pump relay/fuse.
- Remove it using a fuse puller (often in the fuse box) or flat trim tool.
- Start the engine and let it run until it stalls; crank 2-3 more seconds to bleed off remaining pressure.
- Turn ignition OFF.
Step 2: Raise and support your Blazer
- Lift the vehicle with a floor jack (rated 3-ton minimum) at the proper lift points.
- Support it securely on jack stands (rated 3-ton minimum).
Step 3: Prepare to lower the fuel tank
- Position a transmission jack (specialty) under the center of the fuel tank.
- Use shop towels and a drain pan under the fuel line area to catch any drips.
Step 4: Disconnect the filler neck and vent lines
- At the tank-side connections, loosen clamps using the appropriate socket set (8mm-18mm) or screwdriver-style head (varies by clamp).
- Carefully twist and pull the hoses free by hand; use a flat trim tool gently if stuck. Don’t tear the hose ends.
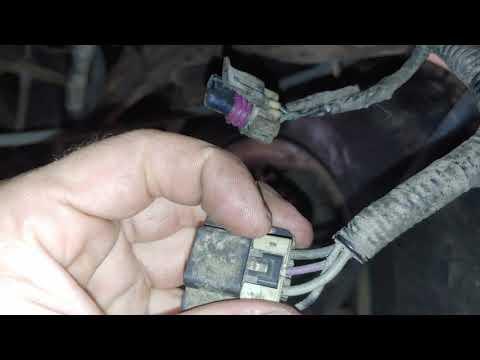
Step 5: Disconnect electrical connectors at the tank
- Locate the fuel pump module connector(s) above the tank.
- Release the lock tab using a flat trim tool, then unplug by hand.
Step 6: Disconnect fuel supply/EVAP lines at the tank
- Use a fuel line quick-disconnect tool set (specialty) to separate the quick-connect fittings.
- Pull straight apart; do not pry hard with metal tools. Quick-connects crack easily.
- Cap/cover open lines with shop towels.
Step 7: Remove tank shields/underbody items as needed
- Remove any plastic shields or brackets blocking the tank straps using a socket set (8mm-18mm) and ratchet (3/8").
- AWD note: If a shield/bracket interferes due to driveline routing, remove only what’s necessary using the same socket set and ratchet.
Step 8: Remove the fuel tank straps and lower the tank
- Support the tank firmly on the transmission jack (specialty).
- Remove strap bolts using a socket set (8mm-18mm) and breaker bar if tight.
- Slowly lower the tank a few inches, then stop and check for any remaining hoses/wires.
- Once fully free, lower it enough to access the fuel pump module on top.
- Reinstall strap bolts later and torque to factory specification using a torque wrench (10-200 Nm range).
Step 9: Clean the top of the tank and mark the module position
- Wipe dirt away using shop towels so contamination doesn’t fall into the tank.
- Use a paint marker to mark the module and tank alignment for correct reinstallation.
Step 10: Remove the fuel pump lock ring and lift out the module
- Use a brass punch (specialty) and small hammer to tap the lock ring counterclockwise until it releases. (A brass punch helps avoid sparks.)
- Lift the module straight up carefully; angle it as needed to clear the float arm.
- Remove the old tank seal (O-ring) by hand; do not reuse it.
Step 11: Install the new seal and new fuel pump module
- Install the new fuel pump module tank seal (O-ring/gasket) into the tank groove by hand.
- Lower the new module into the tank, aligning it to your paint marks.
- Reinstall the lock ring and use the brass punch (specialty) and small hammer to seat it fully.
Step 12: Raise the tank and reconnect everything
- Raise the tank with the transmission jack (specialty).
- Reconnect fuel/EVAP quick-connects by pushing until they click; lightly tug by hand to confirm locked.
- Reconnect electrical connectors by hand until the lock clicks.
- Reconnect filler/vent hoses and tighten clamps using the appropriate socket set (8mm-18mm).
- Reinstall shields/brackets using the socket set (8mm-18mm) and ratchet (3/8").
- Install and tighten tank strap bolts, then torque to factory specification using a torque wrench (10-200 Nm range).
Step 13: Restore power and prime the fuel system
- Reinstall the Fuel Pump relay/fuse by hand.
- Reconnect the negative battery cable using a 10mm socket.
- Turn ignition ON (engine OFF) for 5 seconds, then OFF for 5 seconds; repeat 3 times to prime the system.
- Start the engine and let it idle while you check underneath for leaks.
✅ After Repair
- Check carefully for fuel seepage at every quick-connect and hose clamp while idling.
- If the check engine light turns on, scan for codes (a loose EVAP line is a common cause).
- Test drive close to home first, then re-check for leaks again.
💰 DIY vs Shop Cost
Shop Cost: $900-$1,600 (parts + labor)
DIY Cost: $250-$750 (parts only)
You Save: $650-$850 by doing it yourself!
Shop labor rates vary but typically run $100-$150/hour. This repair takes a shop approximately 3-6 hours.
🎯 Ready to get started?
HowToo makes it easy: same-day/2-day shipping on every part, plus all the tools and specialty tools you need! Check out the parts and tools sections below to add everything to your cart.