









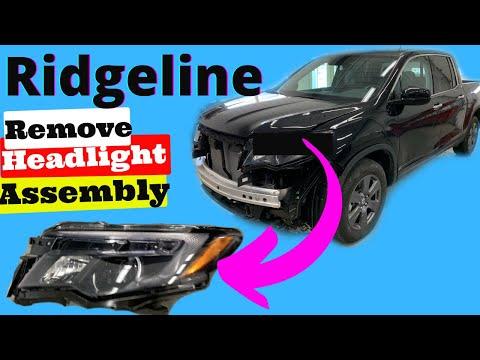







How to Replace the Headlight Assembly (LED) on a 2021 Honda Passport
Step-by-step bumper removal, tools/parts list, connector tips, and headlight mounting bolt torque specs for 2019, 2020, 2021
How to Replace the Headlight Assembly (LED) on a 2021 Honda Passport
Step-by-step bumper removal, tools/parts list, connector tips, and headlight mounting bolt torque specs for 2019, 2020, 2021


🔧 Passport - Headlight Bulb Replacement
On your Passport Touring, the main low/high beam headlights are LED units built into the headlamp assembly, so there typically isn’t a serviceable “bulb” to swap. If the low/high beam has failed, the normal repair is replacing the entire headlight assembly on the affected side (or both sides if you want them to match).
Quick check: Are you trying to replace the main low/high beam headlights, or a smaller front bulb like the turn signal/parking/side marker?
Difficulty Level: Intermediate | Estimated Time: 2-4 hours
⚠️ Safety & Precautions
- ⚠️ Let the headlights cool before touching anything around them.
- ⚠️ Disconnect the 12V battery negative terminal to prevent shorting a connector.
- ⚠️ Support the bumper cover so it doesn’t scratch paint or tear wiring.
- ⚠️ Use jack stands if you lift the front—never rely on a jack alone.
🔧 Required Tools
You'll need the following tools for this repair:
- 10mm socket
- 3/8" ratchet
- 3" socket extension
- Trim clip removal tool
- Phillips screwdriver #2
- Flat-blade screwdriver (small)
- Torque wrench (5–30 ft-lbs range)
- Floor jack (rated 3-ton minimum)
- Jack stands (rated 3-ton minimum)
- Wheel chocks
- Nitrile gloves
- Safety glasses
- Fender cover
🔩 Required Parts
HowToo sells all the parts you need for this repair:
- Front headlight assembly (left) - Qty: 1
- Front headlight assembly (right) - Qty: 1
- Front bumper cover retainer clips - Qty: 1 set
📋 Before You Begin
- 🅿️ Park on level ground, set the parking brake, and chock the rear wheels.
- 🔌 Open the hood and disconnect the battery negative cable using a 10mm socket.
- 🧰 Set a fender cover over the bumper edge to protect paint.
- 🧩 If you’ve never used one: a trim clip removal tool is a small pry tool that pops plastic clips out without breaking them.
🔨 Step-by-Step Instructions
Follow these steps in order:
Step 1: Remove the upper bumper cover fasteners
- Open the hood and locate the plastic clips/fasteners along the top of the bumper cover near the radiator support.
- Remove the clips using a trim clip removal tool and a flat-blade screwdriver (small) as needed.
- Place clips aside in a tray so they don’t get lost. Photos help during reassembly.
Step 2: Remove the wheel-well fasteners (both sides)
- Turn the steering wheel fully left to access the right wheel-well liner fasteners.
- Remove liner screws/clips using a Phillips screwdriver #2 and trim clip removal tool.
- Turn the steering wheel fully right and repeat for the left side.
Step 3: Release the lower bumper cover fasteners
- If needed for access, raise the front with a floor jack (rated 3-ton minimum) and support with jack stands (rated 3-ton minimum).
- Remove the lower clips/bolts along the underside using a 10mm socket and trim clip removal tool.
Step 4: Pull the bumper cover forward (enough to access the headlight)
- Starting at one corner, carefully pull the bumper cover outward to release the side retainers.
- Support the bumper cover so it doesn’t hang by any wiring.
- If you meet resistance, stop and look for a missed clip or screw before pulling harder.
Step 5: Disconnect any bumper electrical connectors (if equipped)
- Disconnect any accessible connectors (fog lights/parking sensors) by pressing the lock tab and pulling straight out by hand.
- Do not pull on wires—only pull on the connector body.
Step 6: Remove the headlight assembly mounting bolts
- Locate the headlight mounting bolts (typically along the top and side of the headlight).
- Remove the bolts using a 10mm socket, 3/8" ratchet, and 3" socket extension.
- Keep bolts organized by location. Some lengths may differ.
Step 7: Disconnect the headlight electrical connector
- Press the connector lock tab and unplug the headlight harness by hand.
- If the lock tab is stubborn, gently assist with a flat-blade screwdriver (small) (do not break the tab).
Step 8: Remove and replace the headlight assembly
- Slide the headlight assembly straight out, watching alignment pins.
- Install the new headlight assembly in the same position, ensuring it seats fully.
- Reconnect the electrical connector until it clicks.
Step 9: Reinstall headlight mounting bolts
- Start all bolts by hand to avoid cross-threading.
- Tighten using a 10mm socket and 3/8" ratchet.
- Torque to 9.8 Nm (7.2 ft-lbs) using a torque wrench (5–30 ft-lbs range).
Step 10: Reinstall the bumper cover and all fasteners
- Reconnect any bumper electrical connectors by hand.
- Align the bumper cover to the fenders and press the sides back into the retainers.
- Reinstall the lower bolts/clips using a 10mm socket and trim clip removal tool.
- Reinstall wheel-well fasteners using a Phillips screwdriver #2 and trim clip removal tool.
- Reinstall the upper clips by hand and seat them using a trim clip removal tool if needed.
Step 11: Reconnect the battery
- Reconnect the negative cable using a 10mm socket.
✅ After Repair
- 🔦 Turn the ignition on and verify low beams, high beams, DRLs, and turn signals work on both sides.
- 🧭 Check headlight aim against a wall at night; if the beam looks off, the headlight may need aiming/inspection.
- 🔎 Confirm the bumper cover gaps are even and clips are fully seated.
💰 DIY vs Shop Cost
Shop Cost: $900-$2,200 (parts + labor)
DIY Cost: $500-$1,800 (parts only)
You Save: $400-$800 by doing it yourself!
Shop labor rates vary but typically run $100-$150/hour. This repair takes a shop approximately 2-4 hours.
🎯 Ready to get started?
HowToo makes it easy: same-day/2-day shipping on every part, plus all the tools and specialty tools you need! Check out the parts and tools sections below to add everything to your cart.