









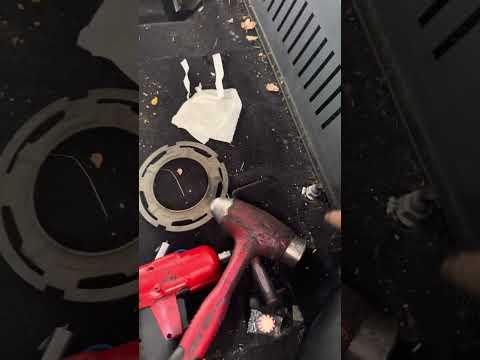






How to Replace the Fuel Pump on a 2017 Jeep Grand Cherokee
Step-by-step instructions, tools, parts, safety tips, and leak-check guidance for 2011, 2012, 2013, 2014, 2015, 2016, 2017, 2018, 2019, 2020, 2021, 2022
How to Replace the Fuel Pump on a 2017 Jeep Grand Cherokee
Step-by-step instructions, tools, parts, safety tips, and leak-check guidance for 2011, 2012, 2013, 2014, 2015, 2016, 2017, 2018, 2019, 2020, 2021, 2022


🔧 Fuel Pump - Replacement
On your Grand Cherokee, the fuel pump is part of the in-tank fuel pump module. The job usually means relieving fuel pressure, accessing the module, and replacing the seal and module assembly so the fuel system stays leak-free.
Difficulty Level: Advanced | Estimated Time: 4-6 hours
⚠️ Safety & Precautions
- Fuel vapors are flammable. Work outside or in a very well-ventilated area.
- Disconnect the negative battery cable before opening the fuel system.
- Do not smoke, spark, or use heat near the vehicle.
- Keep a fire extinguisher nearby.
- If the fuel tank must be lowered, support it securely with a transmission jack or floor jack.
- Relieve fuel pressure before disconnecting any fuel lines.
🔧 Required Tools
You'll need the following tools for this repair:
- 10mm socket
- 13mm socket
- Ratchet
- 1/4-inch drive extension
- Flat blade trim tool
- Fuel line disconnect tool set
- Fuel pump lock ring tool (specialty)
- Torque wrench
- Transmission jack or floor jack rated 3-ton minimum
- Jack stands rated for vehicle weight
- Drain pan
- Shop towels
- Safety glasses
- Nitrile gloves
🔩 Required Parts
HowToo sells all the parts you need for this repair:
- Fuel pump module assembly - Qty: 1
- Fuel pump module seal/O-ring - Qty: 1
- Fuel tank lock ring - Qty: 1
- Fuel tank retaining strap bolts - Qty: 2
📋 Before You Begin
- Run the fuel level as low as safely possible before starting. A nearly empty tank is much easier to handle.
- Park on level ground and set the parking brake.
- Disconnect the negative battery cable.
- Have a drain pan and shop towels ready for fuel drips.
- Label every connector before unplugging it.
🔨 Step-by-Step Instructions
Follow these steps in order:
Step 1: Relieve fuel pressure
- Remove the fuel pump relay or fuse from the underhood fuse box.
- Start the engine and let it run until it stalls.
- Crank for a few seconds more, then turn the key off.
Step 2: Disconnect the battery
- Use a 10mm socket to remove the negative battery cable.
- Isolate the cable so it cannot touch the terminal again.
Step 3: Access the fuel pump module
- If your Grand Cherokee has an access panel: remove the rear seat lower cushion if needed, then use a flat blade trim tool to lift the access cover.
- If there is no access panel: the fuel tank must be lowered.
Step 4: Remove the fuel tank if required
- Support the tank with a transmission jack or floor jack rated 3-ton minimum.
- Use a 13mm socket to remove the tank strap bolts.
- Lower the tank slightly and disconnect the electrical connector and vapor/fuel lines with the fuel line disconnect tool set.
- Lower the tank fully and move it out from under the vehicle.
Step 5: Disconnect the module connections
- Clean around the fuel pump opening with shop towels to keep dirt out.
- Disconnect the electrical connector from the module.
- Release any fuel line quick-connects with the fuel line disconnect tool set.
Step 6: Remove the lock ring
- Use a fuel pump lock ring tool (specialty) to turn the ring counterclockwise.
- Lift the lock ring off carefully.
- Remove the fuel pump module straight up and out of the tank.
Step 7: Install the new module
- Transfer any required parts from the old module only if the new part instructions require it.
- Install the new fuel pump module seal/O-ring in the tank opening.
- Lower the new module straight into the tank.
- Install the lock ring and tighten it with the fuel pump lock ring tool (specialty) until fully seated. Torque to factory specification.
Step 8: Reinstall the tank
- Raise the tank with the transmission jack or floor jack rated 3-ton minimum.
- Reconnect the fuel lines and electrical connector.
- Install the tank straps with a 13mm socket. Torque to factory specification.
Step 9: Reconnect battery and prime the system
- Reconnect the negative battery cable with a 10mm socket.
- Cycle the ignition to ON for 5 seconds, then OFF, 3-4 times to prime the fuel system.
- Check carefully for fuel leaks at the module and line connections.
✅ After Repair
- Start the engine and let it idle.
- Inspect under the vehicle and around the tank for any fuel seepage.
- Clear any stored fuel pressure or low-pressure codes with a scan tool if needed.
- Road test and verify normal acceleration and no warning lights.
💰 DIY vs Shop Cost
Shop Cost: $900-$1,600 (parts + labor)
DIY Cost: $250-$650 (parts only)
You Save: $650-$950 by doing it yourself!
Shop labor rates vary but typically run $100-$150/hour. This repair takes a shop approximately 4-6 hours.
🎯 Ready to get started?
HowToo makes it easy: same-day/2-day shipping on every part, plus all the tools and specialty tools you need! Check out the parts and tools sections below to add everything to your cart.