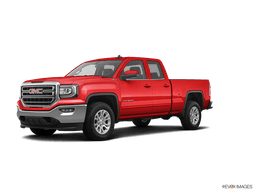














How to Replace the Fuel Pump on a 2019 GMC Sierra 1500
Step-by-step instructions with tools, parts, safety tips, and torque specs
How to Replace the Fuel Pump on a 2019 GMC Sierra 1500
Step-by-step instructions with tools, parts, safety tips, and torque specs


🔧 Fuel Pump - Replacement
Your fuel pump is inside the fuel tank on your Sierra. This job usually means relieving fuel pressure, lowering the fuel tank, and swapping the pump module. Work carefully because gasoline vapors are flammable and fuel system parts can crack if forced.
Difficulty Level: Advanced | Estimated Time: 3-5 hours
⚠️ Safety & Precautions
- Work outside or in a very well-ventilated area. Keep all sparks, flames, and heaters away.
- Relieve fuel pressure before opening any fuel lines.
- Disconnect the negative battery cable before lowering the tank.
- Fuel vapors can ignite easily. Use only non-sparking tools where possible.
- A full fuel tank is heavy. Keep the tank as empty as possible before starting.
- Support the tank securely with a transmission jack or floor jack and a wide board.
🔧 Required Tools
You'll need the following tools for this repair:
- Metric socket set
- Metric wrench set
- Fuel line disconnect tool set
- Floor jack (rated 3-ton minimum)
- Jack stands (rated for truck weight)
- Wood block for jack support
- Flat-blade screwdriver
- Torque wrench
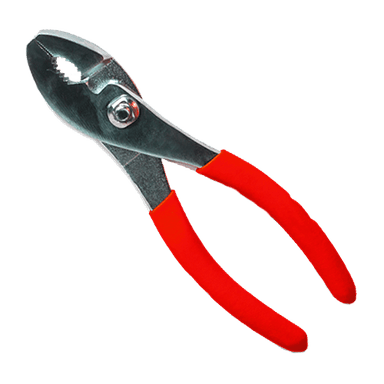
- Pliers
- Drip pan
- Shop rags
- Safety glasses
- Fuel-resistant gloves
- Fuel pump lock ring tool (specialty)
- Trim clip removal tool
🔩 Required Parts
HowToo sells all the parts you need for this repair:
- Fuel pump module - Qty: 1
- Fuel pump module seal - Qty: 1
- Fuel filter sock - Qty: 1
- Fuel tank strap hardware - Qty: 1 set
- Fuel line O-rings - Qty: 1 set
- Fuel pump fuse - Qty: 1
📋 Before You Begin
- Park on level ground and set the parking brake.
- Run the fuel level down as low as safely possible.
- Open the fuel cap to release tank pressure, then reinstall it loosely.
- Disconnect the negative battery cable before touching fuel lines.
- Raise the truck and support it securely on jack stands if needed for tank access.
🔨 Step-by-Step Instructions
Follow these steps in order:
Step 1: Relieve fuel system pressure
- Use the fuel pump fuse removal method or a scan tool fuel pressure release function if available.
- Start the engine and let it stall, or crank briefly until it will not start.
- Turn the ignition off and disconnect the negative battery cable with a metric wrench.
Step 2: Raise and support the truck
- Use a floor jack and jack stands to lift and support the rear or the whole truck as needed.
- Make sure you have clear access to the fuel tank area.
- Keep the tank as light as possible.
Step 3: Disconnect tank connections
- Use a fuel line disconnect tool set to disconnect the fuel supply and EVAP lines.
- Use a trim clip removal tool and metric socket set to remove any shields, brackets, or splash guards blocking the tank.
- Unplug the electrical connector from the fuel pump module.
Step 4: Support and lower the fuel tank
- Place a floor jack with a wood block under the tank.
- Use a metric socket set to remove the fuel tank strap bolts.
- Lower the tank slowly and check for any hose or wire still attached.
- Tighten tank strap bolts to 40 Nm (30 ft-lbs) during reassembly.
Step 5: Remove the fuel pump module
- Clean the top of the tank with shop rags so dirt does not fall inside.
- Use the fuel pump lock ring tool (specialty) to remove the lock ring.
- Lift out the old fuel pump module carefully.
- Remove the old seal and inspect the tank opening for damage.
Step 6: Install the new fuel pump module
- Install the new fuel pump module seal in the tank opening.
- Lower the new module straight into place so the float arm is not bent.
- Use the fuel pump lock ring tool (specialty) to secure the lock ring fully.
- Do not pinch the seal.
Step 7: Reinstall the tank and reconnect everything
- Raise the tank with the floor jack and wood block.
- Reconnect the fuel lines using the fuel line disconnect tool set if needed for alignment.
- Reconnect the electrical connector and EVAP line.
- Install the tank straps and torque the strap bolts to 40 Nm (30 ft-lbs).
Step 8: Reconnect battery and prime the system
- Reconnect the negative battery cable with a metric wrench.
- Turn the ignition to ON for 5 seconds, then OFF. Repeat 3 times to prime the fuel system.
- Check around the tank and lines for leaks before starting.
✅ After Repair
- Start the engine and let it idle.
- Check again for fuel leaks at the tank, lines, and module seal.
- Verify fuel gauge operation and normal engine running.
- Clear any stored fuel system codes with a scan tool if needed.
- Test drive and recheck for leaks after the drive.
💰 DIY vs Shop Cost
Shop Cost: $900-$1,600 (parts + labor)
DIY Cost: $250-$650 (parts only)
You Save: $650-$950 by doing it yourself!
Shop labor rates vary but typically run $100-$150/hour. This repair takes a shop approximately 3-5 hours.
🎯 Ready to get started?
HowToo makes it easy: same-day/2-day shipping on every part, plus all the tools and specialty tools you need! Check out the parts and tools sections below to add everything to your cart.
🔧 Radiator Hose - Replacement
Assumption: This covers the main radiator coolant hose on your Sierra. The steps are the same for the upper hose, with minor clamp-location differences if you’re doing the lower hose.
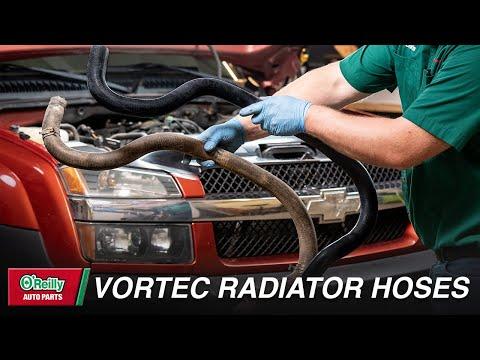
Your radiator hose carries hot coolant between the engine and radiator. Replacing a cracked, swollen, or leaking hose prevents coolant loss and overheating. Work only on a cold engine so you do not get sprayed with hot coolant.
Difficulty Level: Beginner | Estimated Time: 1-2 hours
⚠️ Safety & Precautions
- Never open the cooling system when the engine is hot.
- Coolant can cause burns and is toxic. Keep it away from skin, pets, and children.
- Use a drain pan and clean spills right away.
- Disconnect the negative battery cable only if you must move near the starter or fan area.
- If your truck has an electric fan, keep hands clear even with the key off if the system is powered.
🔧 Required Tools
You'll need the following tools for this repair:
- Metric socket set
- Flat-blade screwdriver
- Pliers
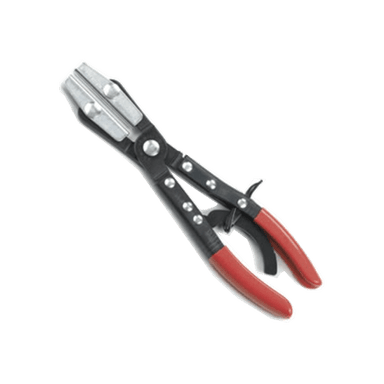
- Hose clamp pliers (specialty)
- Drain pan
- Funnel
- Shop rags
- Torque wrench
- Safety glasses
- Coolant test strip kit
- Gloves
🔩 Required Parts
HowToo sells all the parts you need for this repair:
- Radiator hose - Qty: 1
- Radiator hose clamps - Qty: 2
- Engine coolant - Qty: 1-2 gallons
- Distilled water - Qty: 1-2 gallons
📋 Before You Begin
- Park on level ground and let the engine cool completely.
- Set the parking brake.
- Open the hood and locate the radiator hose you are replacing.
- Place a drain pan under the radiator drain area.
- If the cooling system is pressurized, slowly loosen the reservoir cap only after the engine is cold.
🔨 Step-by-Step Instructions
Follow these steps in order:
Step 1: Drain enough coolant
- Use a drain pan under the radiator.
- Open the radiator drain or remove the lower hose enough to drain coolant below the hose level.
- Close the drain once the coolant level is low enough.
- Drain only what you need.
Step 2: Remove the old hose clamps
- Use hose clamp pliers (specialty) or a flat-blade screwdriver to release the spring clamps or worm clamps.
- Slide the clamps back on the hose before removing the hose ends.
- If the hose is stuck, twist it gently with pliers to break the seal.
Step 3: Remove the old radiator hose
- Pull the hose off the radiator neck and engine fitting.
- Use a shop rag to catch any remaining coolant.
- Inspect both fittings for cracks, rust, or rough edges.
Step 4: Install the new hose
- Compare the new hose to the old one to confirm length and bend shape.
- Push the new hose fully onto both fittings.
- Position the new clamps behind the bead on each neck.
- Use hose clamp pliers (specialty) or a flat-blade screwdriver to secure the clamps.
- Make sure the hose sits straight.
Step 5: Refill the cooling system
- Use a funnel to refill with the correct coolant mixture.
- On this truck, fill with the OEM-spec coolant type for your cooling system.
- Top off the surge tank to the proper mark.
Step 6: Bleed air from the system
- Start the engine and let it idle with the cap on loosely or as directed by the service cap design.
- Turn the heater to full hot.
- Watch the coolant level and add more if it drops.
- Once bubbles stop and the level stabilizes, install the cap fully.
Step 7: Check for leaks
- Inspect both hose ends while the engine is running.
- Use a shop rag to dry any wet spots and verify the leak source.
- If the hose seeps, reposition the clamp and recheck.
✅ After Repair
- Drive the truck until it reaches operating temperature.
- Check the coolant level again after it cools down.
- Reinspect the hose, clamps, and fittings for leaks.
- Watch the temperature gauge on the next few drives.
- If the coolant level keeps dropping, the system may still have trapped air or another leak.
💰 DIY vs Shop Cost
Shop Cost: $180-$450 (parts + labor)
DIY Cost: $35-$120 (parts only)
You Save: $145-$330 by doing it yourself!
Shop labor rates vary but typically run $100-$150/hour. This repair takes a shop approximately 1-2 hours.
🎯 Ready to get started?
HowToo makes it easy: same-day/2-day shipping on every part, plus all the tools and specialty tools you need! Check out the parts and tools sections below to add everything to your cart.
Guide for Radiator Coolant Hose replace for these GMC vehicles
| Year Make Model | Sub Model | Engine | Body Style |
|---|