













How to Replace the Fuel Pump on a 2016 Ford F-150
Step-by-step instructions with tools, parts, safety tips, and torque specs for 2004, 2005, 2006, 2007, 2008, 2009, 2010
How to Replace the Fuel Pump on a 2016 Ford F-150
Step-by-step instructions with tools, parts, safety tips, and torque specs for 2004, 2005, 2006, 2007, 2008, 2009, 2010


🔧 Fuel Pump - Replacement
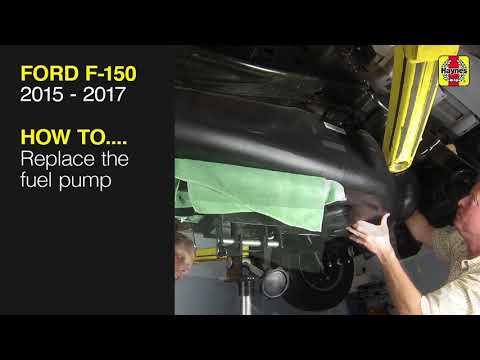
The fuel pump on your F-150 is inside the fuel tank, so the tank has to be lowered to replace the pump module. This is a bigger job, but it is straightforward if you work safely and keep everything clean.
Difficulty Level: Advanced | Estimated Time: 4-6 hours
⚠️ Safety & Precautions
- Fuel is flammable. Work outside or in a very well-ventilated area away from sparks, heaters, and cigarettes.
- Relieve fuel pressure before disconnecting any lines.
- Disconnect the negative battery cable before starting.
- The fuel tank is heavy when full. Run the tank low on fuel before beginning.
- Support the tank securely with a floor jack and a wide wood block.
- Use eye protection and fuel-resistant gloves.
🔧 Required Tools
You'll need the following tools for this repair:
- 10mm socket
- 13mm socket
- 15mm socket
- Ratchet
- Long extension
- Torque wrench
- Fuel line disconnect tool (specialty)
- Flat-blade screwdriver
- Floor jack (rated 3-ton minimum)
- Jack stands
- Wood block
- Fuel-safe drain pan
- Shop towels
- Safety glasses
- Nitrile gloves
🔩 Required Parts
HowToo sells all the parts you need for this repair:
- Fuel pump module - Qty: 1
- Fuel tank seal / lock ring seal - Qty: 1
- Fuel filter sock - Qty: 1
- Fuel line O-rings - Qty: 1 set
- Fuel filler neck seal - Qty: 1
📋 Before You Begin
- Run the fuel level as low as possible before starting.
- Park on level ground and set the parking brake.
- Disconnect the negative battery cable.
- Relieve fuel pressure at the fuel rail before opening the system.
- Raise the truck safely and support it on jack stands.
🔨 Step-by-Step Instructions
Follow these steps in order:
Step 1: Relieve fuel pressure and disconnect the battery
- Use a scan tool or follow the fuel pump fuse method to depressurize the system.
- Disconnect the negative battery cable with a 10mm socket.
Step 2: Raise and support the truck
- Use a floor jack (rated 3-ton minimum) and jack stands to safely lift the rear of the truck.
- Keep the fuel tank area fully supported and stable.
Step 3: Remove the spare tire if it blocks access
- Use the appropriate 15mm socket and ratchet to lower the spare tire if needed for tank access.
Step 4: Disconnect the fuel filler and vent hoses
- Use a flat-blade screwdriver to loosen hose clamps if equipped.
- Remove the hoses carefully and label them if needed.
Step 5: Disconnect the electrical connector and fuel lines
- Use a fuel line disconnect tool (specialty) to release the fuel lines.
- Disconnect the fuel pump electrical connector by hand.
- Catch any spilled fuel with a fuel-safe drain pan and shop towels.
Step 6: Support and lower the fuel tank
- Place a floor jack (rated 3-ton minimum) with a wood block under the tank.
- Use a 15mm socket to remove the tank strap bolts.
- Lower the tank slowly and check that nothing is still attached.
Step 7: Remove the fuel pump module
- Clean the top of the tank before opening it.
- Use a fuel pump lock ring tool (specialty) if available, or carefully remove the lock ring as designed.
- Lift the fuel pump module straight out to avoid damaging the float arm.
- Keep dirt out of the tank.
Step 8: Install the new fuel pump module
- Install the new fuel tank seal / lock ring seal.
- Lower the new pump module into place.
- Install and tighten the lock ring fully.
Step 9: Reinstall the fuel tank
- Raise the tank with the floor jack and wood block.
- Reconnect the fuel lines and electrical connector.
- Reinstall the tank strap bolts with a 15mm socket.
- Torque tank strap bolts to 41 Nm (30 ft-lbs).
Step 10: Reconnect hoses, battery, and prime the system
- Reconnect the filler and vent hoses.
- Reconnect the negative battery cable with a 10mm socket.
- Turn the key to ON for 5 seconds, then OFF. Repeat 3 times to prime the fuel system.
✅ After Repair
- Check carefully for fuel leaks at the tank, lines, and filler neck.
- Start the engine and let it idle while checking for leaks again.
- Verify the fuel gauge reads correctly.
- Take a short test drive and confirm normal engine power and no warning lights.
💰 DIY vs Shop Cost
Shop Cost: $1,000-$1,800 (parts + labor)
DIY Cost: $250-$650 (parts only)
You Save: $750-$1,150 by doing it yourself!
Shop labor rates vary but typically run $100-$150/hour. This repair takes a shop approximately 4-6 hours.
🎯 Ready to get started?
HowToo makes it easy: same-day/2-day shipping on every part, plus all the tools and specialty tools you need! Check out the parts and tools sections below to add everything to your cart.