









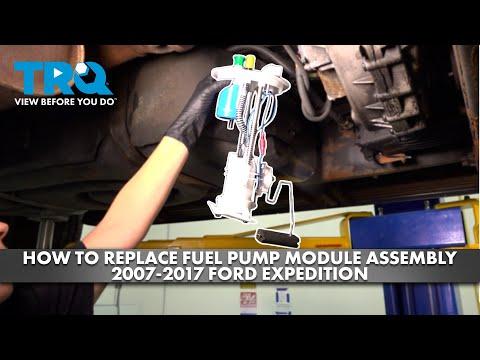







How to Replace the Fuel Pump on a 2014-2017 Ford Expedition (In-Tank Module) (Engine: V6 3.5L)
Step-by-step tank drop instructions with required tools/parts, safety tips, and torque specs
How to Replace the Fuel Pump on a 2014-2017 Ford Expedition (In-Tank Module) (Engine: V6 3.5L)
Step-by-step tank drop instructions with required tools/parts, safety tips, and torque specs for 2014


🔧 Expedition - Fuel Pump Replacement
The fuel pump on your Expedition is part of an in-tank fuel pump module. Replacing it usually requires lowering the fuel tank, swapping the module and seal, then reinstalling everything without damaging fuel lines or wiring.
Difficulty Level: Advanced | Estimated Time: 3-6 hours
Assumption: In-tank pump module access is from under the vehicle (tank must be lowered).
⚠️ Safety & Precautions
- ⚠️ Work outside or in a very well-ventilated area—fuel vapors ignite easily.
- ⚠️ No smoking, sparks, hot lights, or power tools near open fuel.
- ⚠️ Relieve fuel pressure before disconnecting any fuel line to prevent spray.
- ⚠️ Disconnect the battery negative terminal to reduce spark risk.
- ⚠️ Support the fuel tank with a transmission jack (a jack made to balance heavy items).
- ⚠️ If the tank is over 1/2 full, siphon/drain fuel first—full tanks are very heavy.
🔧 Required Tools
You'll need the following tools for this repair:
- Safety glasses
- Nitrile gloves
- Fire extinguisher Class B
- Floor jack (rated 3-ton minimum)
- Jack stands (rated 3-ton minimum)
- Wheel chocks
- Transmission jack (specialty)
- Socket set 8mm–15mm
- Ratchet 3/8" drive
- Torque wrench 10–100 ft-lbs
- Flat trim tool
- Fuel line disconnect tool set (specialty)
- Brass punch (specialty)
- Small hammer
- Drain pan
- Shop towels
- Plastic caps/plugs for fuel lines
🔩 Required Parts
HowToo sells all the parts you need for this repair:
- Fuel pump module assembly - Qty: 1
- Fuel pump module tank seal O-ring - Qty: 1
- Fuel pump lock ring - Qty: 1
- Dielectric grease - Qty: 1
📋 Before You Begin
- Park on level ground, set the parking brake, and chock the rear wheels with wheel chocks.
- If possible, drive until the tank is near empty to make it lighter.
- Relieve fuel pressure before disconnecting lines.
- Disconnect the battery negative cable using a 10mm socket.
🔨 Step-by-Step Instructions
Follow these steps in order:
Step 1: Relieve fuel pressure
- Open the hood and remove the fuel pump fuse/relay from the fuse box using a flat trim tool.
- Start the engine and let it run until it stalls, then crank for 3–5 seconds more.
- Turn the key OFF and reinstall the fuse/relay later during reassembly.
Step 2: Disconnect the battery
- Use a 10mm socket to remove the negative battery terminal and move it aside so it can’t spring back.
Step 3: Raise and support the vehicle
- Lift the rear of the vehicle with a floor jack (rated 3-ton minimum).
- Set it securely on jack stands (rated 3-ton minimum) at the frame.
Step 4: Support the fuel tank
- Position a transmission jack (specialty) under the fuel tank.
- Use a piece of wood (on the jack saddle) if needed to spread the load.
Step 5: Disconnect the filler neck and vent connections
- Loosen the filler hose clamps using an 8mm socket.
- Carefully twist and pull the filler hose and vent hose off the tank neck.
- Plug the hoses with plastic caps/plugs for fuel lines to reduce fumes.
Step 6: Disconnect electrical connectors at the tank
- Unplug the fuel pump module connector(s) by releasing the tab with a flat trim tool.
- Apply a small amount of dielectric grease during reassembly to help prevent corrosion.
Step 7: Disconnect fuel lines
- Place a drain pan under the fuel line connections.
- Use the fuel line disconnect tool set (specialty) to release the quick-connect fittings.
- Cap the lines with plastic caps/plugs for fuel lines.
- Quick-connects pop off—don’t pry hard.
Step 8: Remove the tank straps
- Remove any shield/bracket blocking strap bolts using a socket set 8mm–15mm and ratchet 3/8" drive.
- While the tank is supported by the transmission jack (specialty), remove the fuel tank strap bolts using a 13mm socket.
- Lower the tank slowly a few inches and check for any remaining hoses/wires before lowering further.
- On reassembly: Torque tank strap bolts to 41 Nm (30 ft-lbs).
Step 9: Clean the area around the fuel pump module
- Use shop towels to wipe dirt off the top of the tank around the pump module.
- Keeping dirt out is critical—grit can damage the new pump and clog the strainer.
Step 10: Remove the lock ring
- Use a brass punch (specialty) and small hammer to tap the lock ring counterclockwise until it releases.
- A brass punch is a softer metal that helps reduce spark risk compared to steel.
Step 11: Remove the fuel pump module
- Lift the module out carefully; angle it as needed to clear the float arm (fuel level sender).
- Let fuel drain from the module into the drain pan.
- Remove the old seal O-ring from the tank opening using a flat trim tool.
Step 12: Install the new seal and module
- Install the new fuel pump module tank seal O-ring in the tank groove.
- Lower the new fuel pump module assembly into the tank, keeping the seal in place.
- Align the module tabs/index marks, then install the new fuel pump lock ring.
- Use the brass punch (specialty) and small hammer to tap the lock ring clockwise until fully seated/locked.
Step 13: Reinstall the fuel tank
- Raise the tank with the transmission jack (specialty) into position.
- Reconnect fuel lines until you hear/feel a click.
- Reconnect electrical connectors.
- Reconnect vent and filler hoses, then tighten clamps using an 8mm socket.
- Install the tank straps and bolts using a 13mm socket.
- Torque tank strap bolts to 41 Nm (30 ft-lbs).
Step 14: Restore power and prime the fuel system
- Reinstall the fuel pump fuse/relay using a flat trim tool.
- Reconnect the battery negative terminal using a 10mm socket.
- Turn the key to ON (engine off) for 5 seconds, then OFF for 5 seconds—repeat 3 times to prime the system.
✅ After Repair
- Start the engine and let it idle for 1–2 minutes.
- Check underneath for leaks at the fuel line connections and around the tank.
- Test drive gently, then recheck for leaks and fuel smell.
- If you have a check-engine light after the repair, check connectors and fuel line seating first.
💰 DIY vs Shop Cost
Shop Cost: $900-$1,800 (parts + labor)
DIY Cost: $250-$650 (parts only)
You Save: $650-$1,150 by doing it yourself!
Shop labor rates vary but typically run $100-$150/hour. This repair takes a shop approximately 3-6 hours.
🎯 Ready to get started?
HowToo makes it easy: same-day/2-day shipping on every part, plus all the tools and specialty tools you need! Check out the parts and tools sections below to add everything to your cart.
Guide for Fuel Pump and Sender Assembly replace for these Ford vehicles
| Year Make Model | Sub Model | Engine | Body Style |
|---|---|---|---|
| 2017 Ford Expedition | - | V6 3.5L | - |
| 2016 Ford Expedition | - | V6 3.5L | - |
| 2015 Ford Expedition | - | V6 3.5L | - |
| 2014 Ford Expedition | - | V8 5.4L | - |